#simplycreate Pouring Art
Helpful Tips for Acrylic Pouring Painting
There are 3 different acrylic pouring painting techniques to try with this tutorial which has been created by Daler-Rowney artist Jenny Muncaster. Jenny's acrylic pouring for beginners guides are easy to follow and you will be amazed by the results!
Getting started: Before you start any pouring painting projects, make sure you protect your work surface as this technique can get messy! A plastic sheet or a tablecloth or a bin bag is useful and can be used again. A jar lid under your artboard helps to elevate it and keep it up and out of the tilted-off paint. Use a washable tray or plate to catch any drips, (an aluminium foil or baking tray also works well). For further acrylic pour projects, a baking tray and rack are handy to have in your toolkit!
The materials in your kit
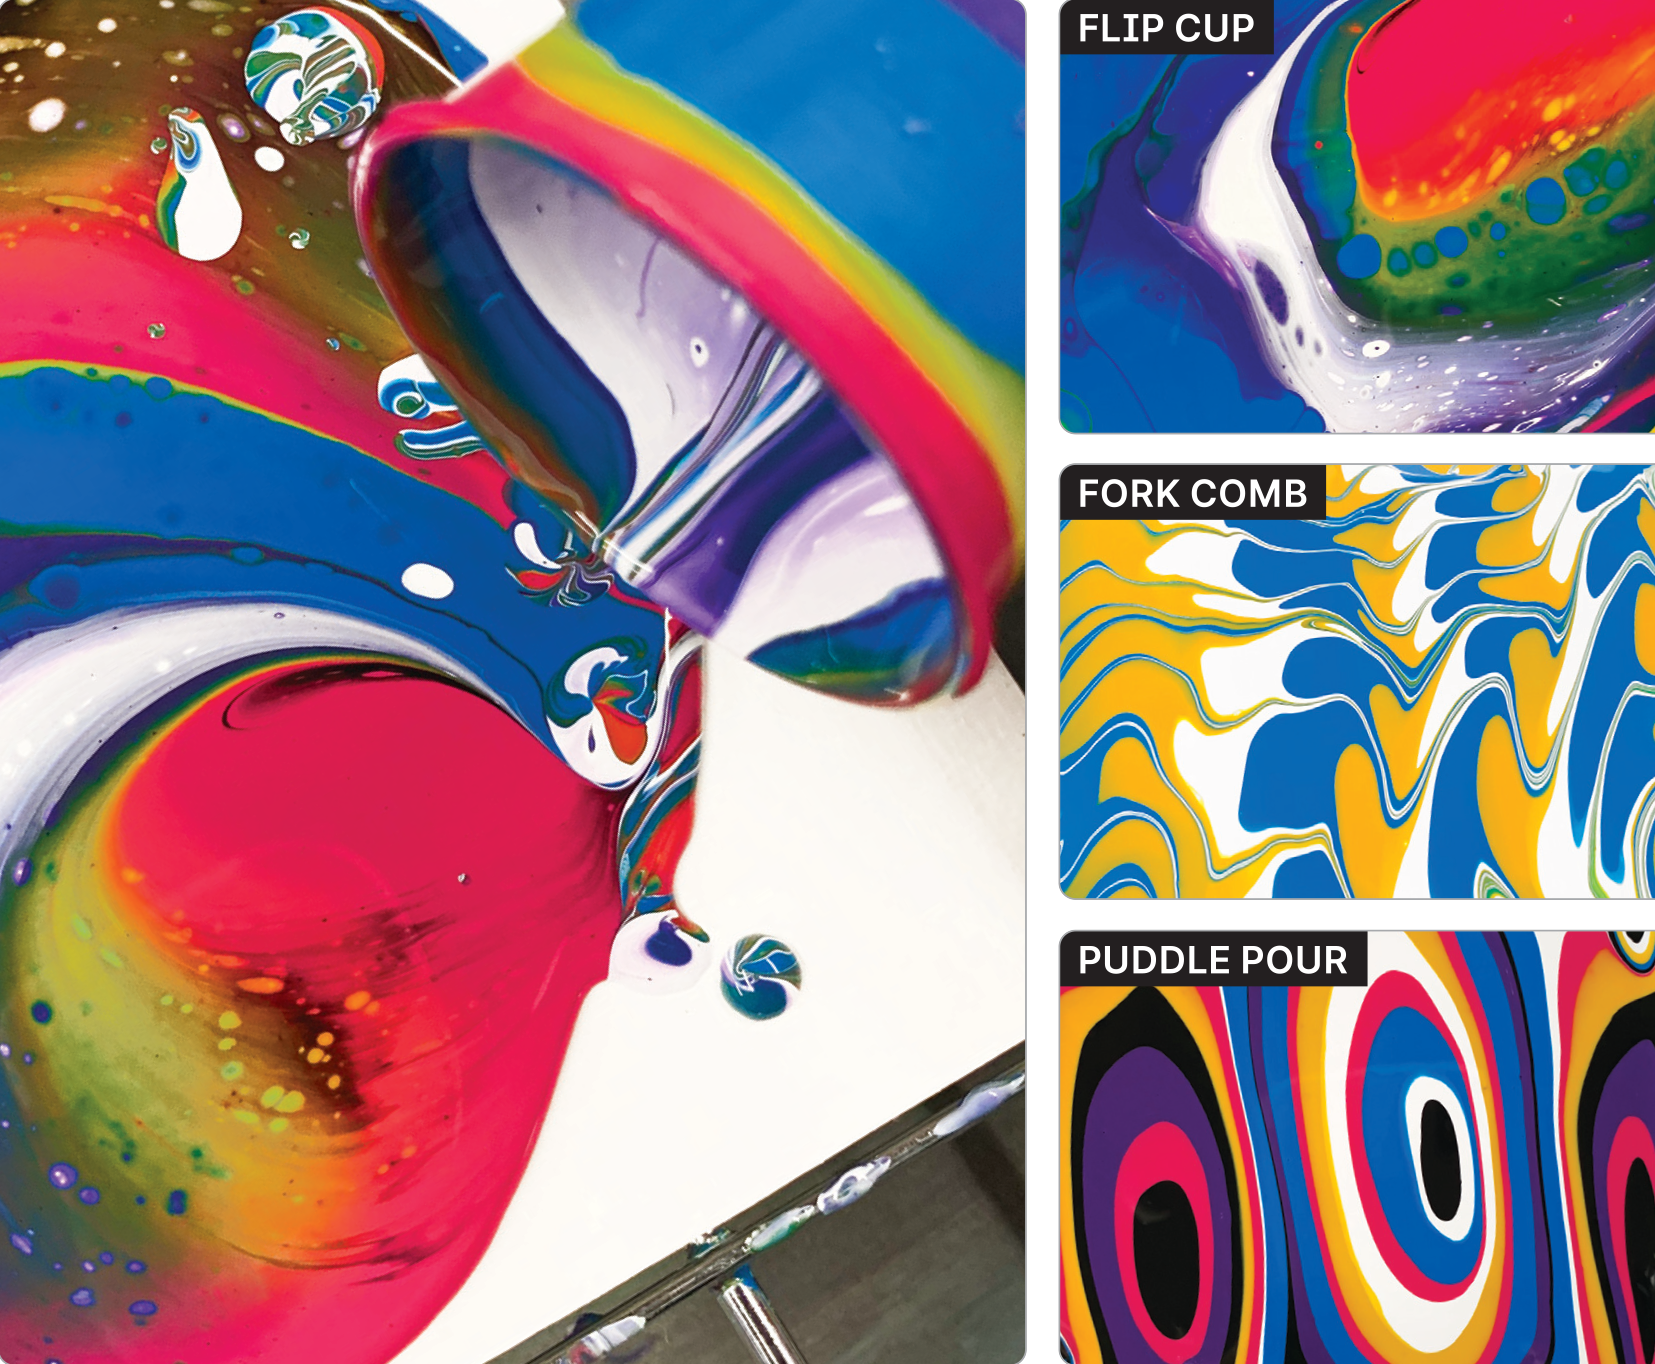
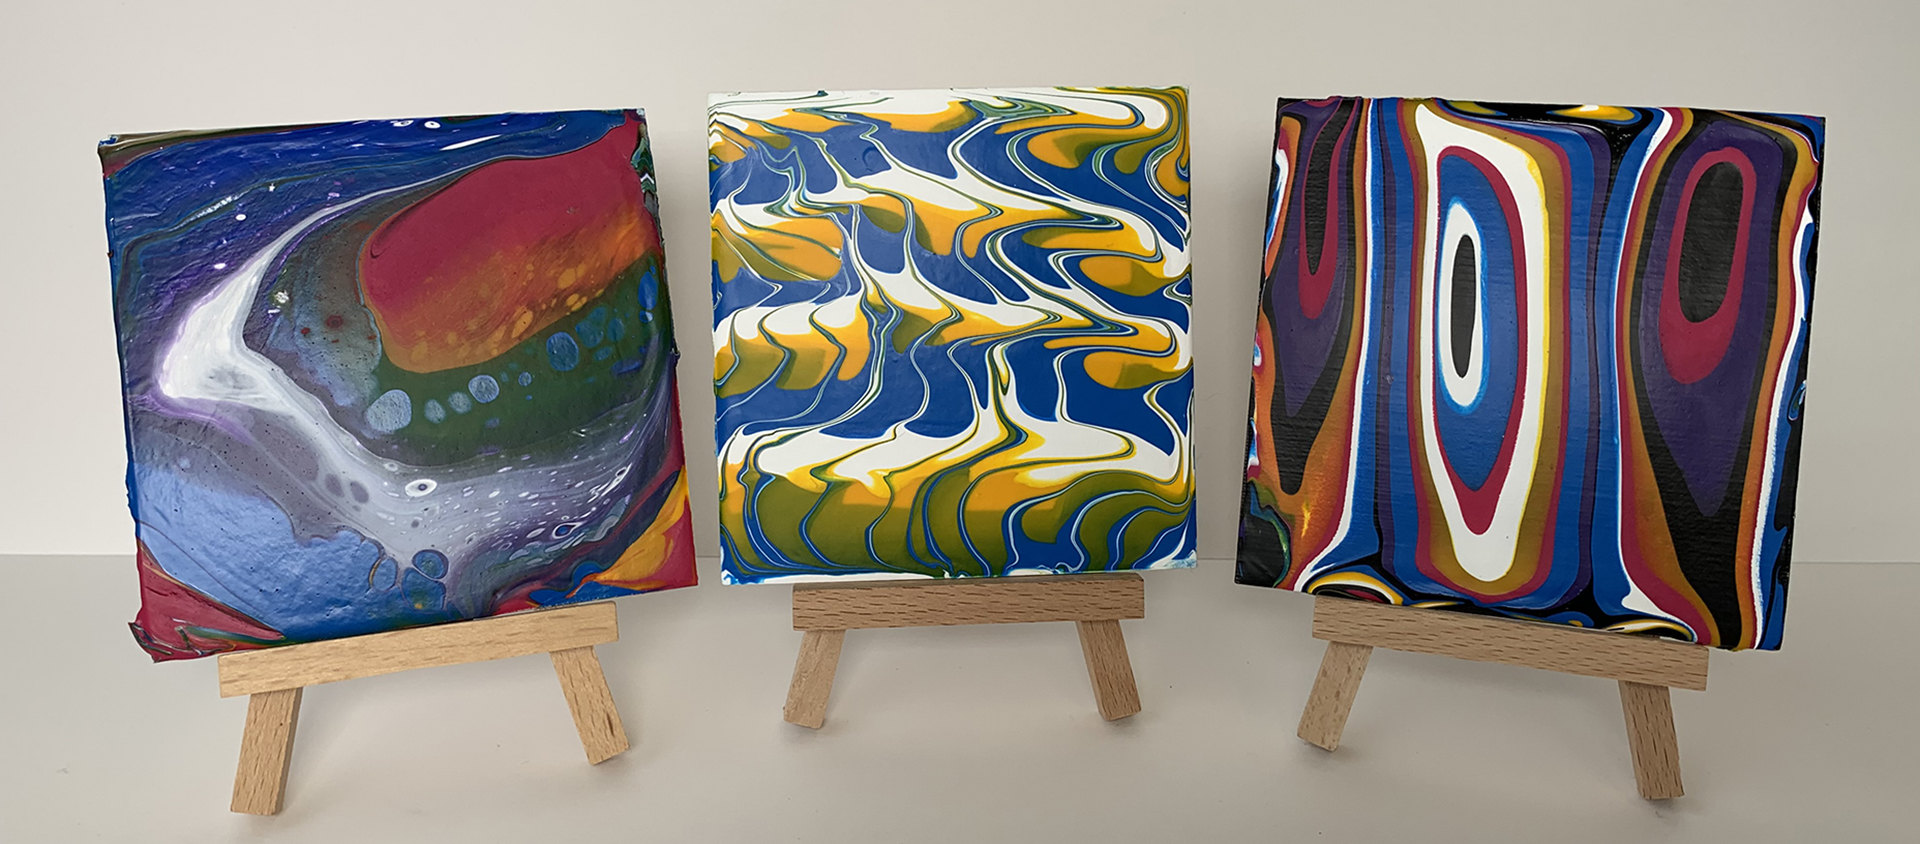
Pour Painting - Pouring Puddle
A puddle pour involves dropping paint colours one on top of the other to create solid colour patterns.
Your step by step guide
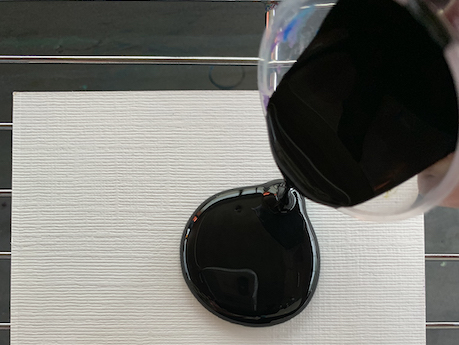
Pour an amount of Black paint on your board to act as a solid base colour, enough to cover it evenly. This wet base layer will help to improve the flow of the subsequent colourful puddles.
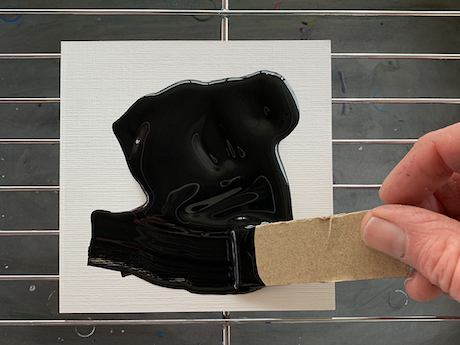
Spread the base layer paint out evenly over the entire board. A strip of cardboard makes a good spreader tool.
While your base colour is still wet, choose a contrasting colour and drop small puddles of paint, leaving some spaces in between.
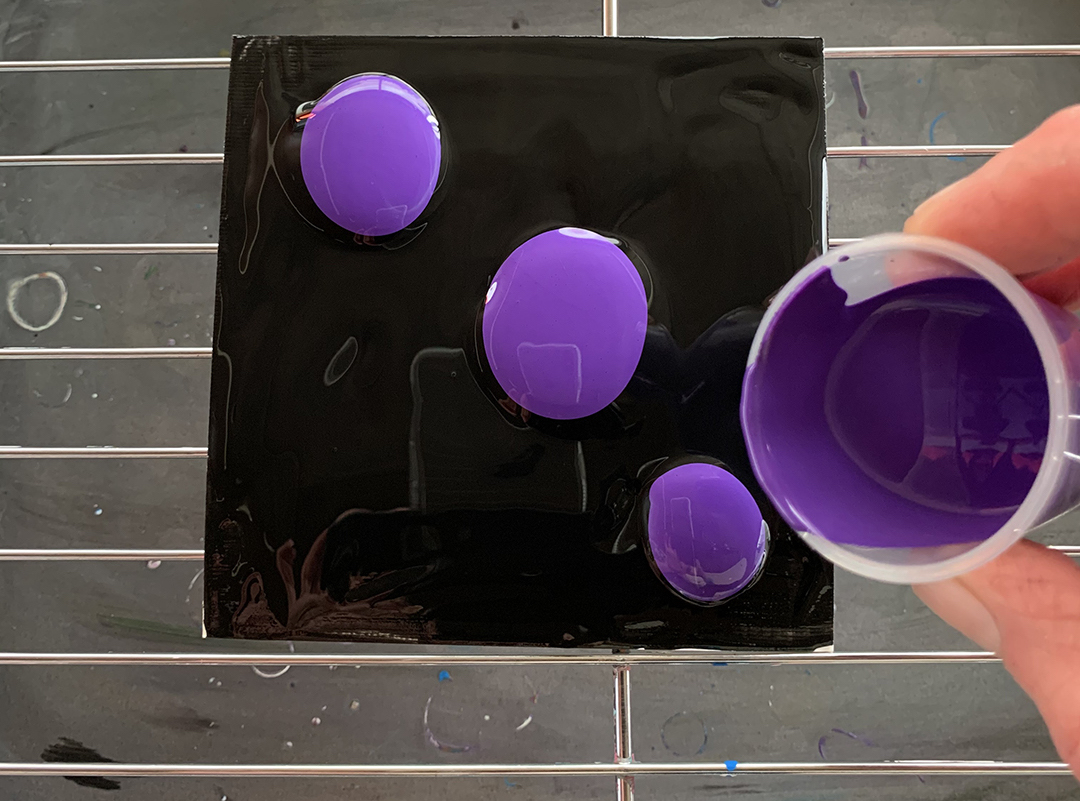
Create more puddles using contrasting colours to fill the spaces. Expand these puddles by pouring additional colours into the centre of each puddle.

Repeat this process until you are happy with the pouring painting design.

Try tilting your board while the paint is wet to stretch the pattern until a desirable composition is achieved. Place artwork on a flat surface and allow it to dry. Recommended 48 hours for total dry.
Your step by step guide
Pour an amount of Black paint on your board to act as a solid base colour, enough to cover it evenly. This wet base layer will help to improve the flow of the subsequent colourful puddles.
Spread the base layer paint out evenly over the entire board. A strip of cardboard makes a good spreader tool.
While your base colour is still wet, choose a contrasting colour and drop small puddles of paint, leaving some spaces in between.
Create more puddles using contrasting colours to fill the spaces. Expand these puddles by pouring additional colours into the centre of each puddle.
Repeat this process until you are happy with the pouring painting design.
Try tilting your board while the paint is wet to stretch the pattern until a desirable composition is achieved. Place artwork on a flat surface and allow it to dry. Recommended 48 hours for total dry.
What you'll need
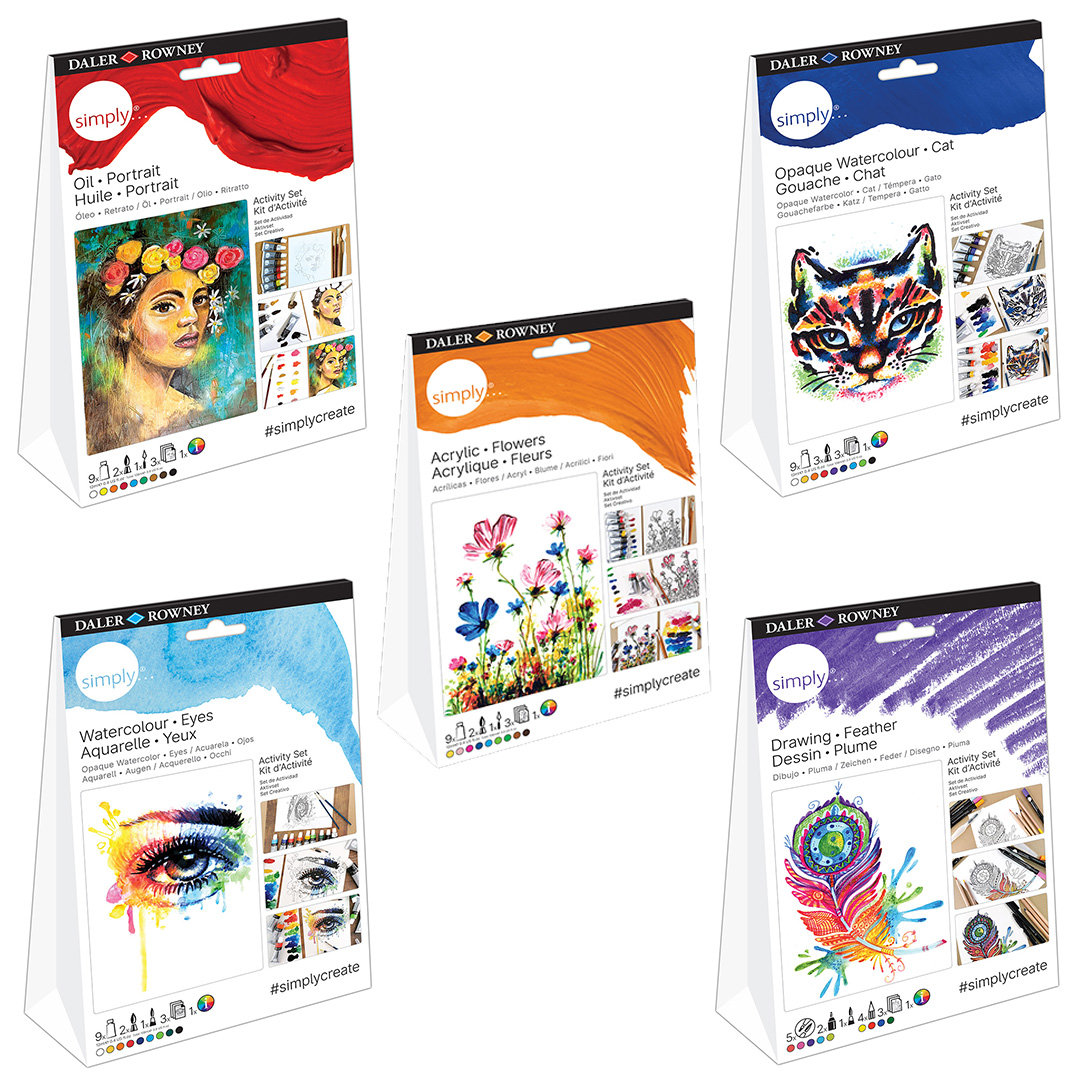
Simply Activity Sets
Daler-Rowney Simply Activity Sets provide a perfect activity for beginner artists and hobbyists to start working with different paint types.
VIEW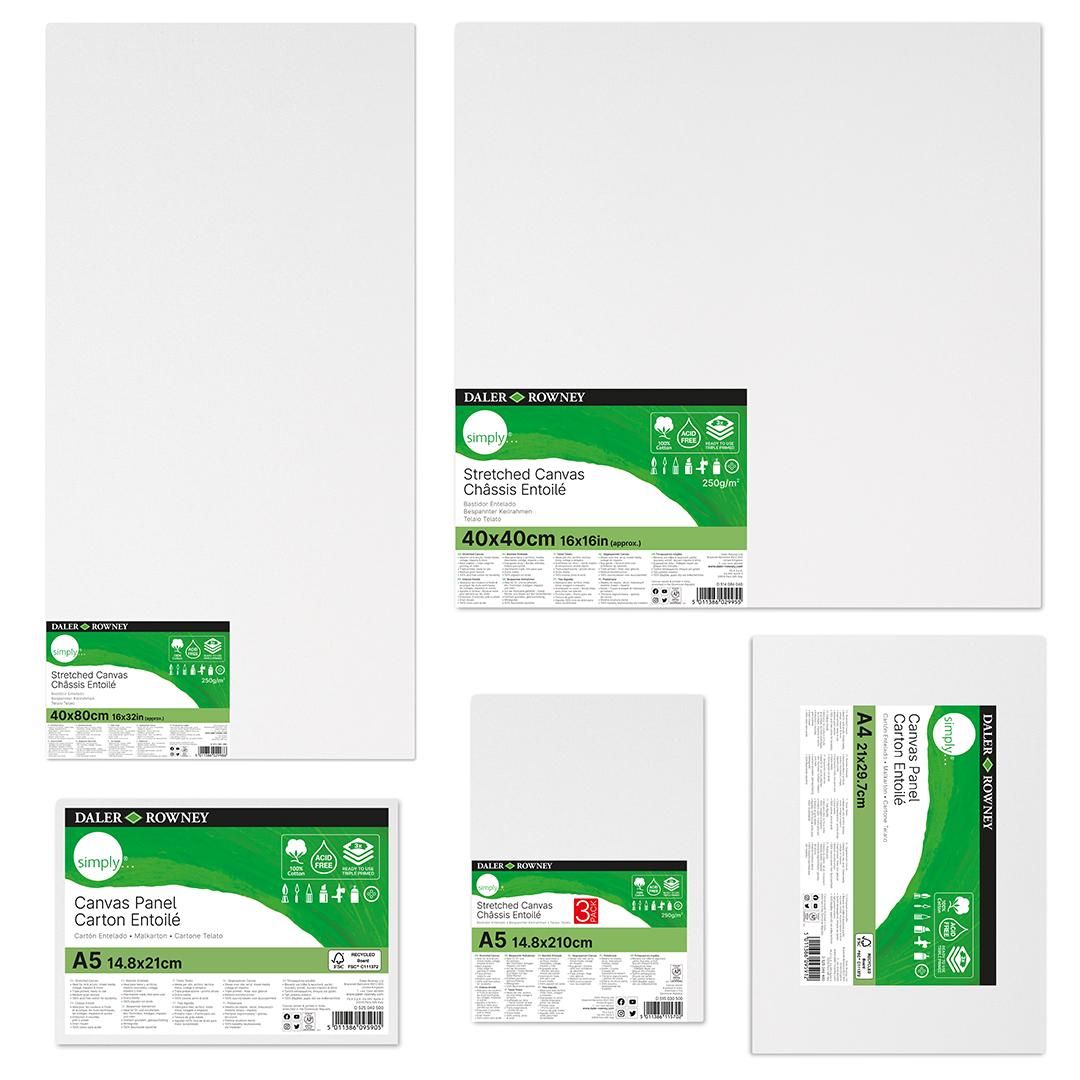
Simply Canvas & Panels
Daler-Rowney Simply Stretched Canvases & Canvas Panels feature a 250gsm, 100% cotton, triple primed, acid-free canvas. The medium grain textured surface is ready for use and the range is available in a comprehensive assortment of shapes and sizes.
VIEWPouring Painting with a Fork
A simple and effective fluid art technique that is fun to do creating patterns on your painting with a fork!
Your step by step guide
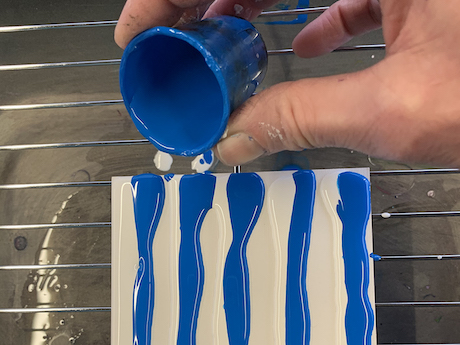
Start by drizzling lines of White paint across the width of your board. About 5 or 6 stripes are evenly spaced.
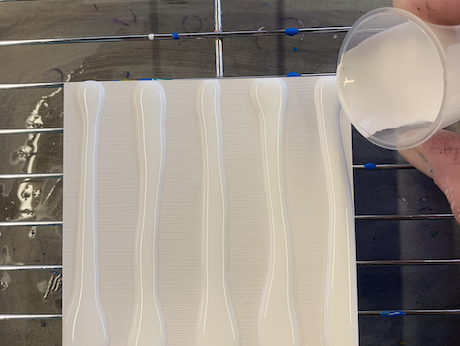
Drizzle even stripes of Blue next to the white paint allowing some space for a third colour.
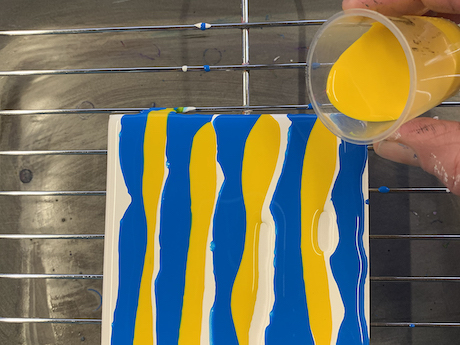
Repeat the design with yellow stripes filling in the gaps.
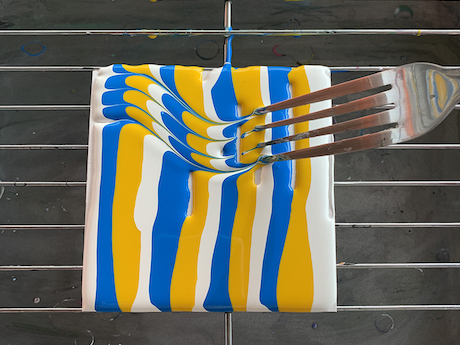
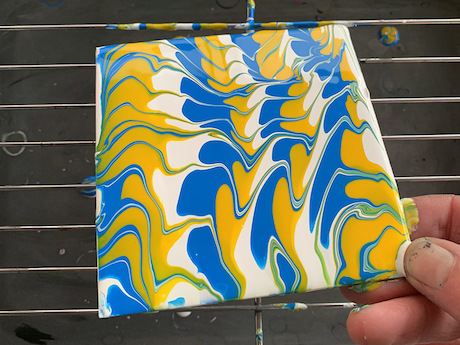
Take a kitchen fork and starting at one edge gently drag the fork prongs through the paint towards the other end to create a pattern. Experiment with ‘worming’ the fork across for an interesting pattern effect. You may need to hold on to the board with your other hand to stop it from shifting while you drag the fork across the paint.
Take a kitchen fork and starting at one edge gently drag the fork prongs through the paint towards the other end to create a pattern. Experiment with ‘worming’ the fork across for an interesting pattern effect. You may need to hold on to the board with your other hand to stop it from shifting while you drag the fork across the paint.
Repeat this fork technique across the board.
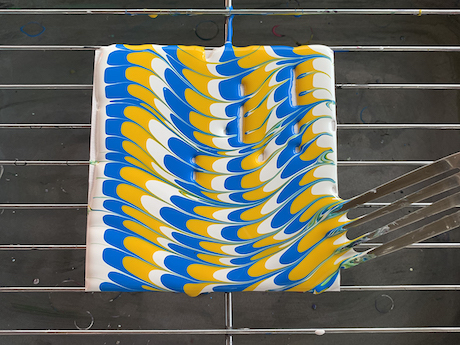
Try tilting the canvas while the paint is wet to create further movement and effect. Place artwork on a flat surface and allow it to dry. Recommended 48 hours for total dry.
Your step by step guide
Start by drizzling lines of White paint across the width of your board. About 5 or 6 stripes are evenly spaced.
Drizzle even stripes of Blue next to the white paint allowing some space for a third colour.
Repeat the design with yellow stripes filling in the gaps.
Take a kitchen fork and starting at one edge gently drag the fork prongs through the paint towards the other end to create a pattern. Experiment with ‘worming’ the fork across for an interesting pattern effect. You may need to hold on to the board with your other hand to stop it from shifting while you drag the fork across the paint.
Take a kitchen fork and starting at one edge gently drag the fork prongs through the paint towards the other end to create a pattern. Experiment with ‘worming’ the fork across for an interesting pattern effect. You may need to hold on to the board with your other hand to stop it from shifting while you drag the fork across the paint.
Repeat this fork technique across the board.
Try tilting the canvas while the paint is wet to create further movement and effect. Place artwork on a flat surface and allow it to dry. Recommended 48 hours for total dry.
What you'll need
Simply Activity Sets
Daler-Rowney Simply Activity Sets provide a perfect activity for beginner artists and hobbyists to start working with different paint types.
VIEW Simply Canvas & Panels
Daler-Rowney Simply Stretched Canvases & Canvas Panels feature a 250gsm, 100% cotton, triple primed, acid-free canvas. The medium grain textured surface is ready for use and the range is available in a comprehensive assortment of shapes and sizes.
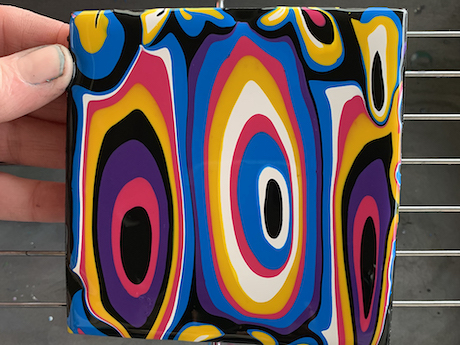
VIEWPouring Art - Flip Cup Painting
Your step by step guide
Start with a small amount of white paint on the bottom of the cup. White is often used to begin the layers as it is denser and more likely to create ‘cells’ as you flip the colours.
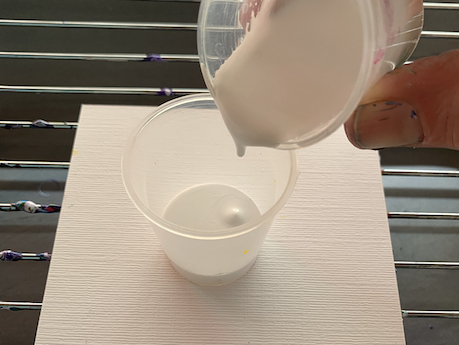
Pour the other colours one by one on top of each other in the cup to create a layered effect. The order here is White, Violet, Blue, Yellow, Pink and Black.
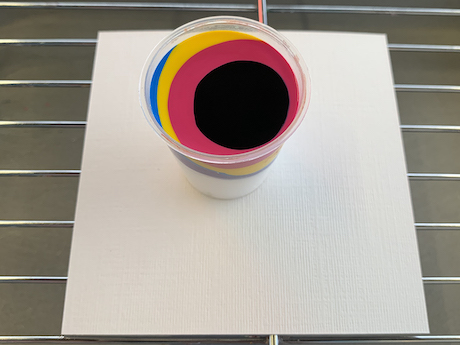
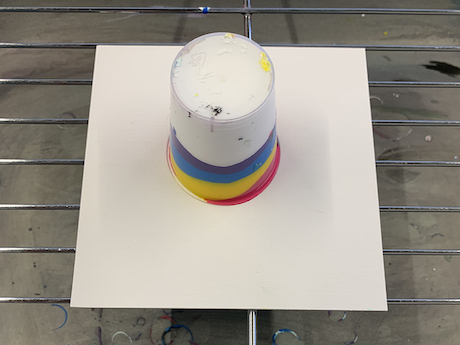
Holding the cup of colour in one hand, place the board upside down over the cup, the board will act as a lid so the paint does not spill out. Hold the board and cup together as you flip them over.
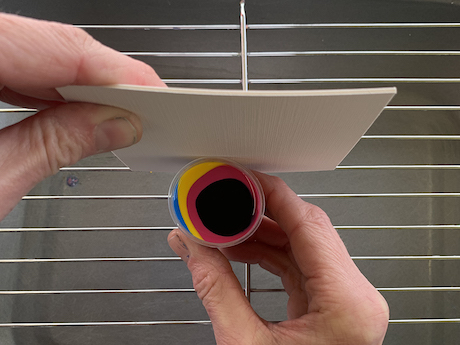
The cup is now upside down on the board with the paint still in the cup. Wait a few moments for the paint to settle.
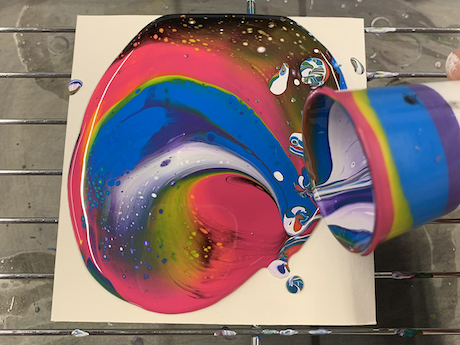
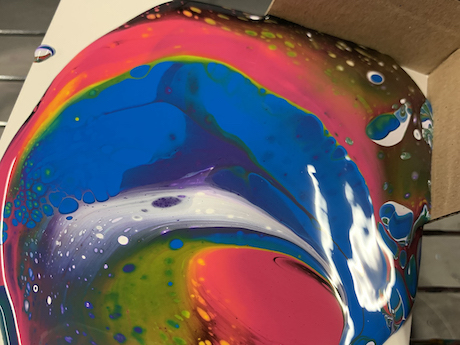
Gradually lift the cup and release the paint, give it a gentle swirl as you do so to encourage distribution. If there are a few drips in the cup why not drop them over the artwork to create further effects? Let the paint flow toward the edges of the board, some excess may fall off the edges but this is ok.
Gradually lift the cup and release the paint, give it a gentle swirl as you do so to encourage distribution. If there are a few drips in the cup why not drop them over the artwork to create further effects? Let the paint flow toward the edges of the board, some excess may fall off the edges but this is ok.
A strip of folded cardboard is useful for cradling the corners of the board to catch excess paint flow as you tip the board. Repeat this technique for each corner if necessary. Place artwork on a flat surface and allow it to dry. Recommended 48 hours for total dry.
Your step by step guide
Start with a small amount of white paint on the bottom of the cup. White is often used to begin the layers as it is denser and more likely to create ‘cells’ as you flip the colours.
Pour the other colours one by one on top of each other in the cup to create a layered effect. The order here is White, Violet, Blue, Yellow, Pink and Black.
Holding the cup of colour in one hand, place the board upside down over the cup, the board will act as a lid so the paint does not spill out. Hold the board and cup together as you flip them over.
The cup is now upside down on the board with the paint still in the cup. Wait a few moments for the paint to settle.
Gradually lift the cup and release the paint, give it a gentle swirl as you do so to encourage distribution. If there are a few drips in the cup why not drop them over the artwork to create further effects? Let the paint flow toward the edges of the board, some excess may fall off the edges but this is ok.
Gradually lift the cup and release the paint, give it a gentle swirl as you do so to encourage distribution. If there are a few drips in the cup why not drop them over the artwork to create further effects? Let the paint flow toward the edges of the board, some excess may fall off the edges but this is ok.
A strip of folded cardboard is useful for cradling the corners of the board to catch excess paint flow as you tip the board. Repeat this technique for each corner if necessary. Place artwork on a flat surface and allow it to dry. Recommended 48 hours for total dry.
What you'll need
Simply Activity Sets
Daler-Rowney Simply Activity Sets provide a perfect activity for beginner artists and hobbyists to start working with different paint types.
VIEW Simply Canvas & Panels
Daler-Rowney Simply Stretched Canvases & Canvas Panels feature a 250gsm, 100% cotton, triple primed, acid-free canvas. The medium grain textured surface is ready for use and the range is available in a comprehensive assortment of shapes and sizes.
VIEWAbout the artist
The artist Jenny Muncaster is a graduate of the Winchester School of Art and has a studio in Winchester, The Colour Factory Studios and Gallery, which she set up in 1994.