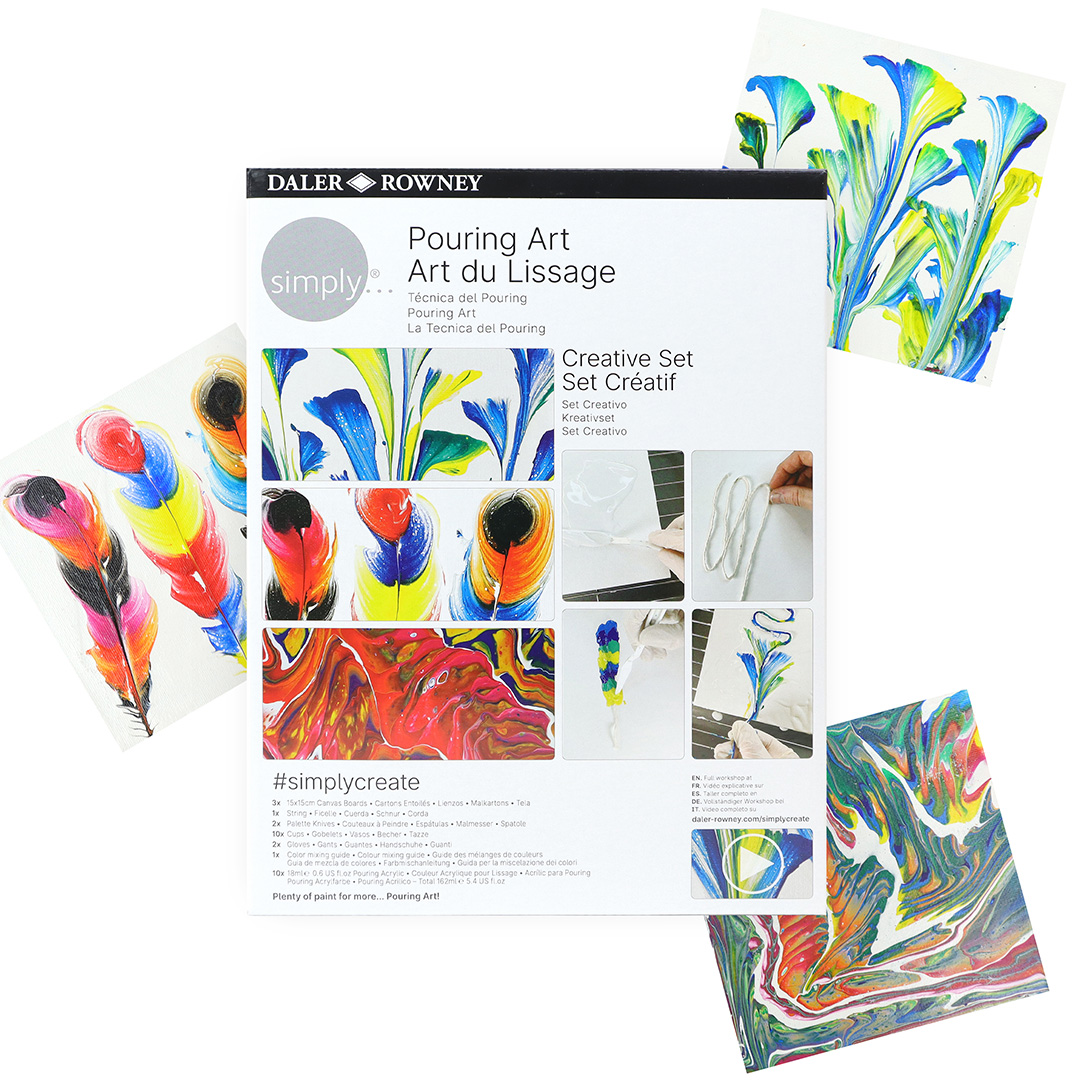
#simplycreate Creative Pouring Art Set
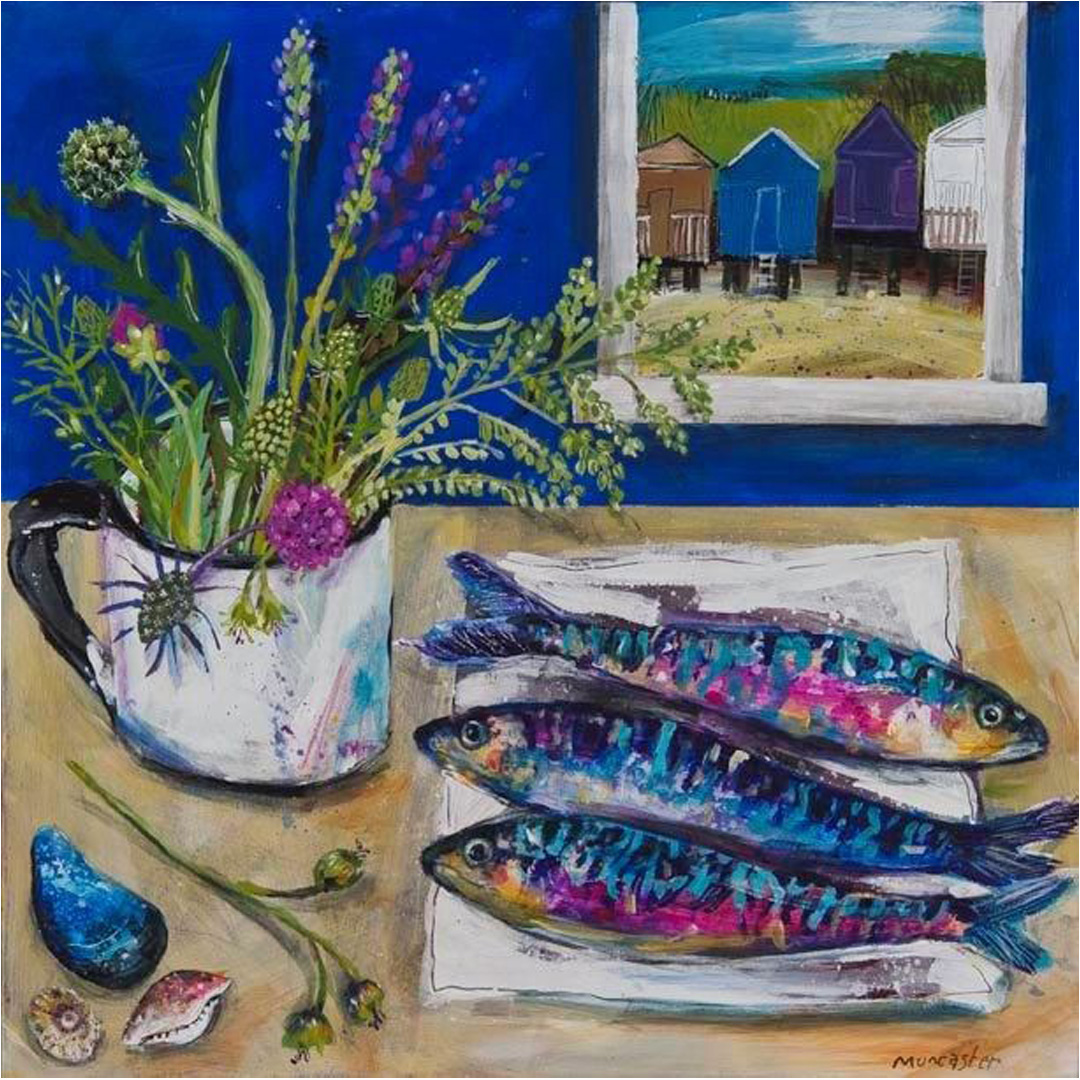
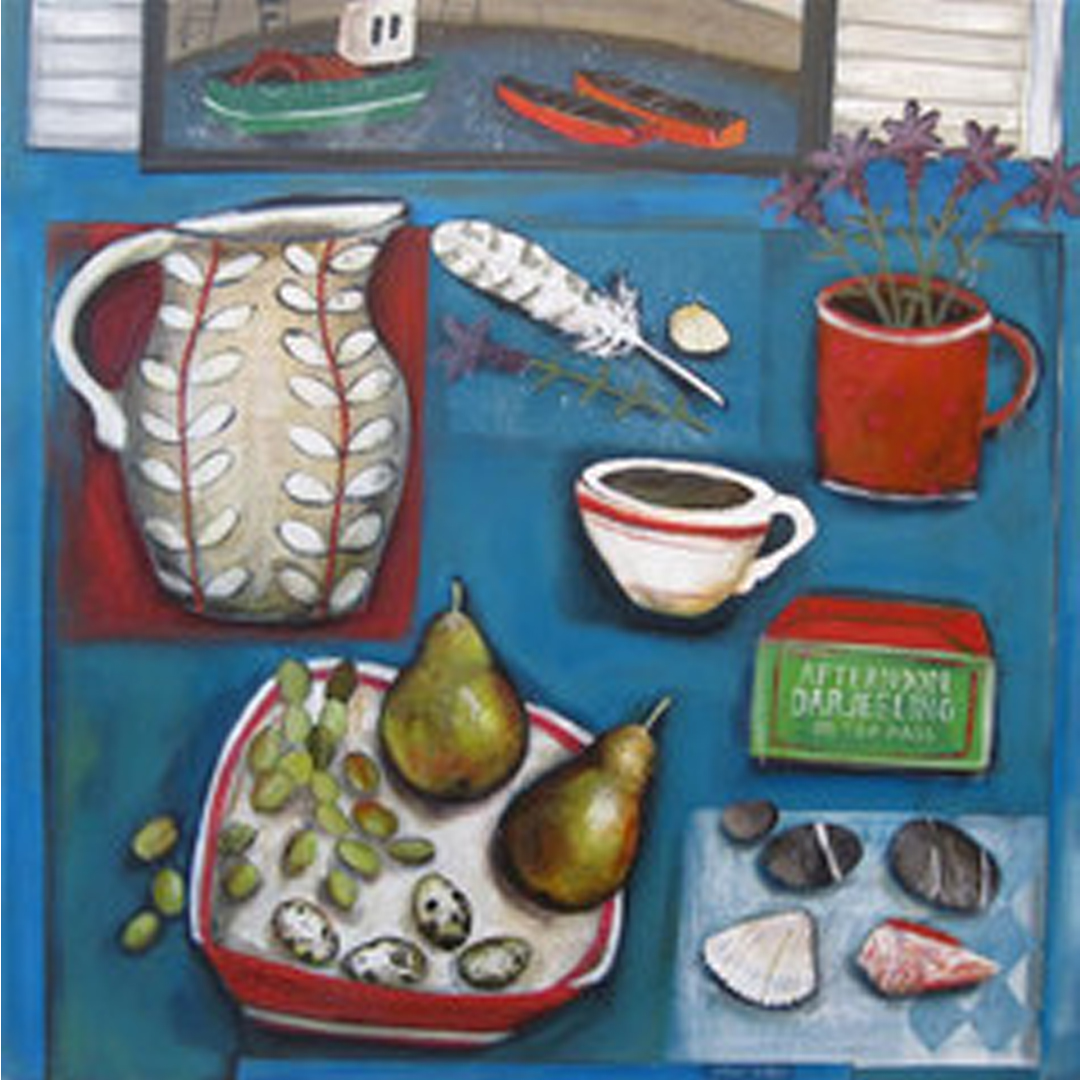
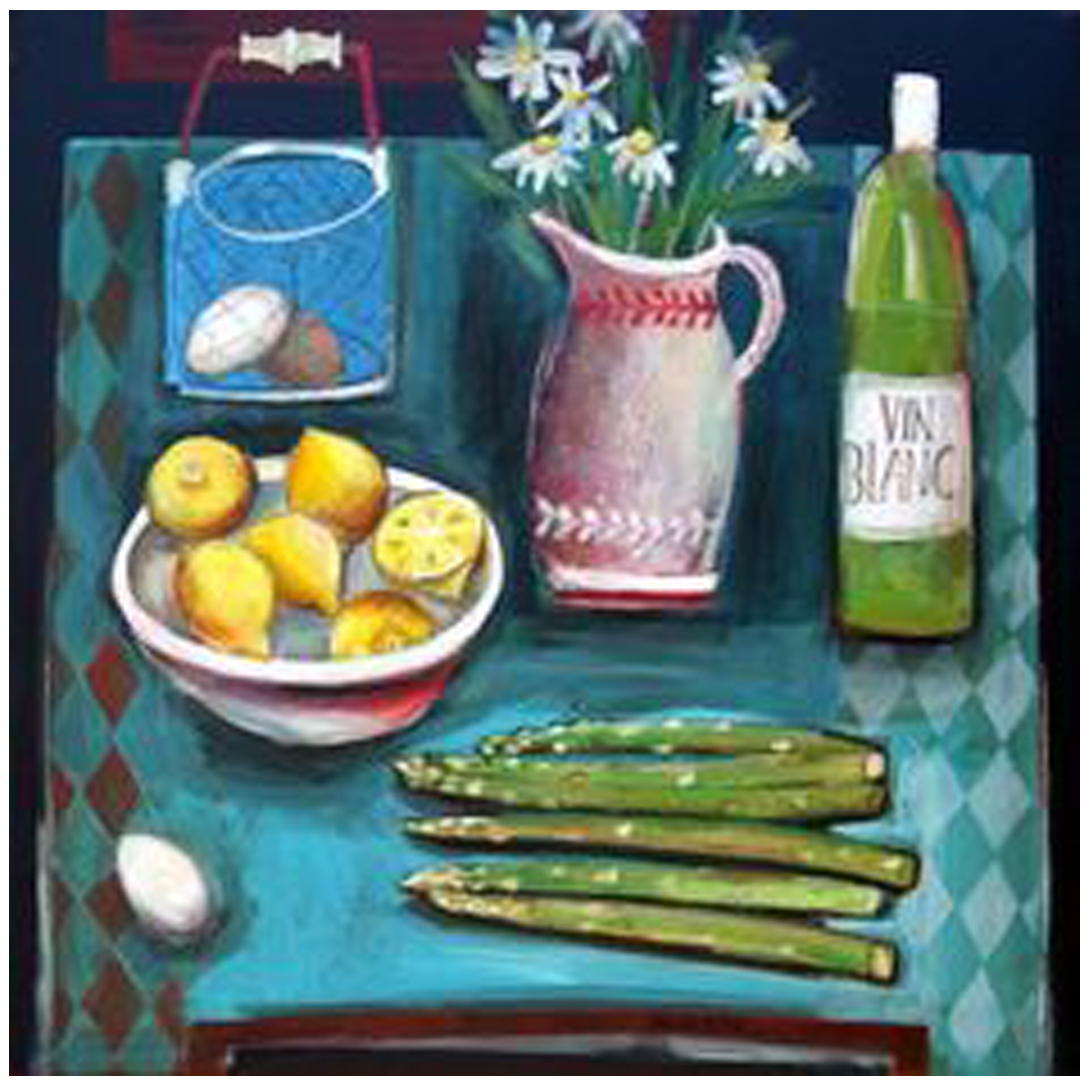
"This pouring kit comes with a warning – it’s completely addictive! Honestly, this is so much fun and what’s great is all the colour & pouring medium come premixed & ready to go. So, no complicated mixes or faffing around – it’s all going to work the first time.
Fluid art is mesmerising, it’s quite mindful, it's feel-good – everyone can do it & there’s no right or wrong - it’s perfect for beginners!
All the materials are in the kit for 3 different projects, using fluid colour, canvas boards, cups, string, & a palette knife. I promise you, you literally won’t want to stop, so simple but the results are stunning – I love it!" - Jenny Muncaster
How to dirty pour
Your step by step guide
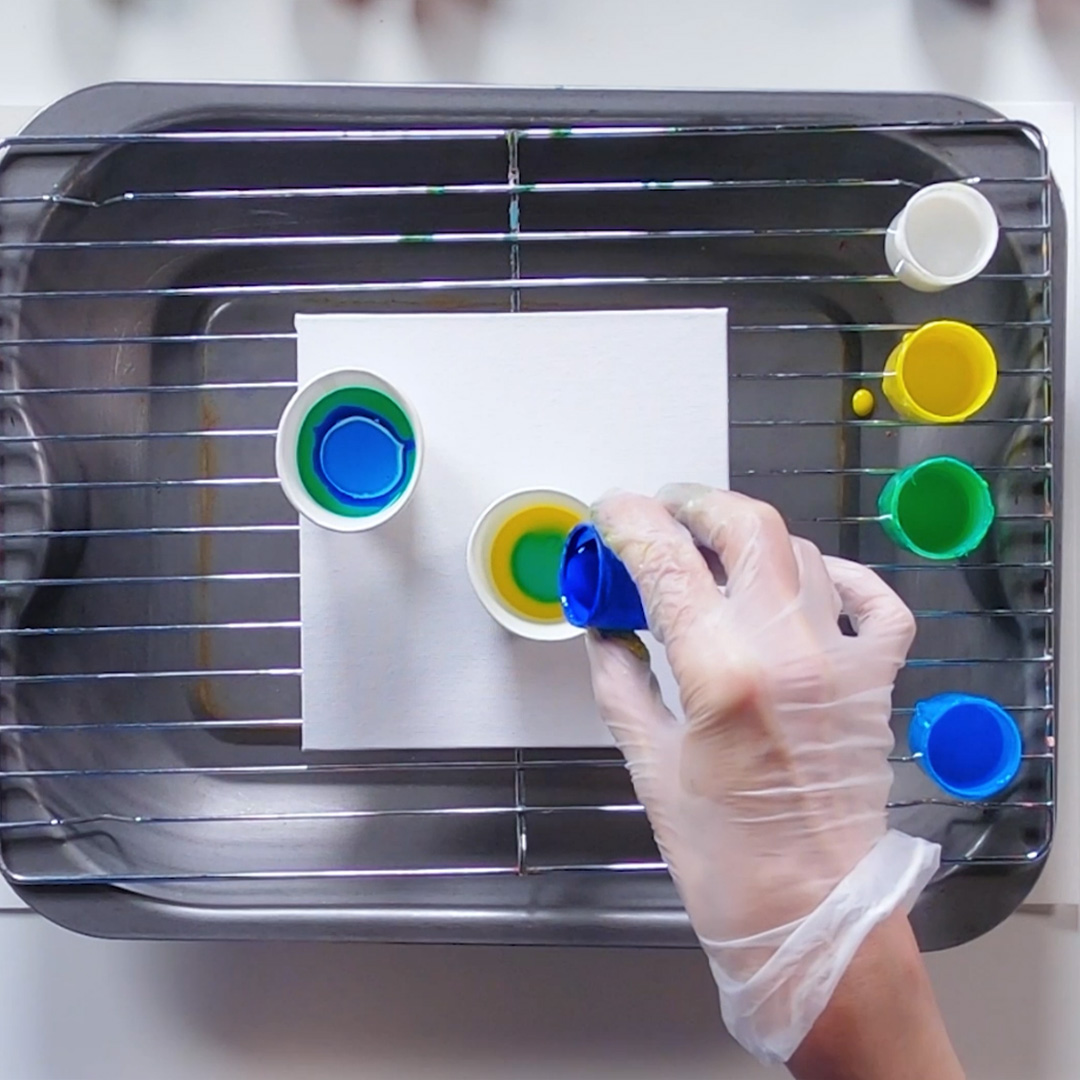
Decide which colours you would like to use and pour a little of each colour one by one until the cup is half full.
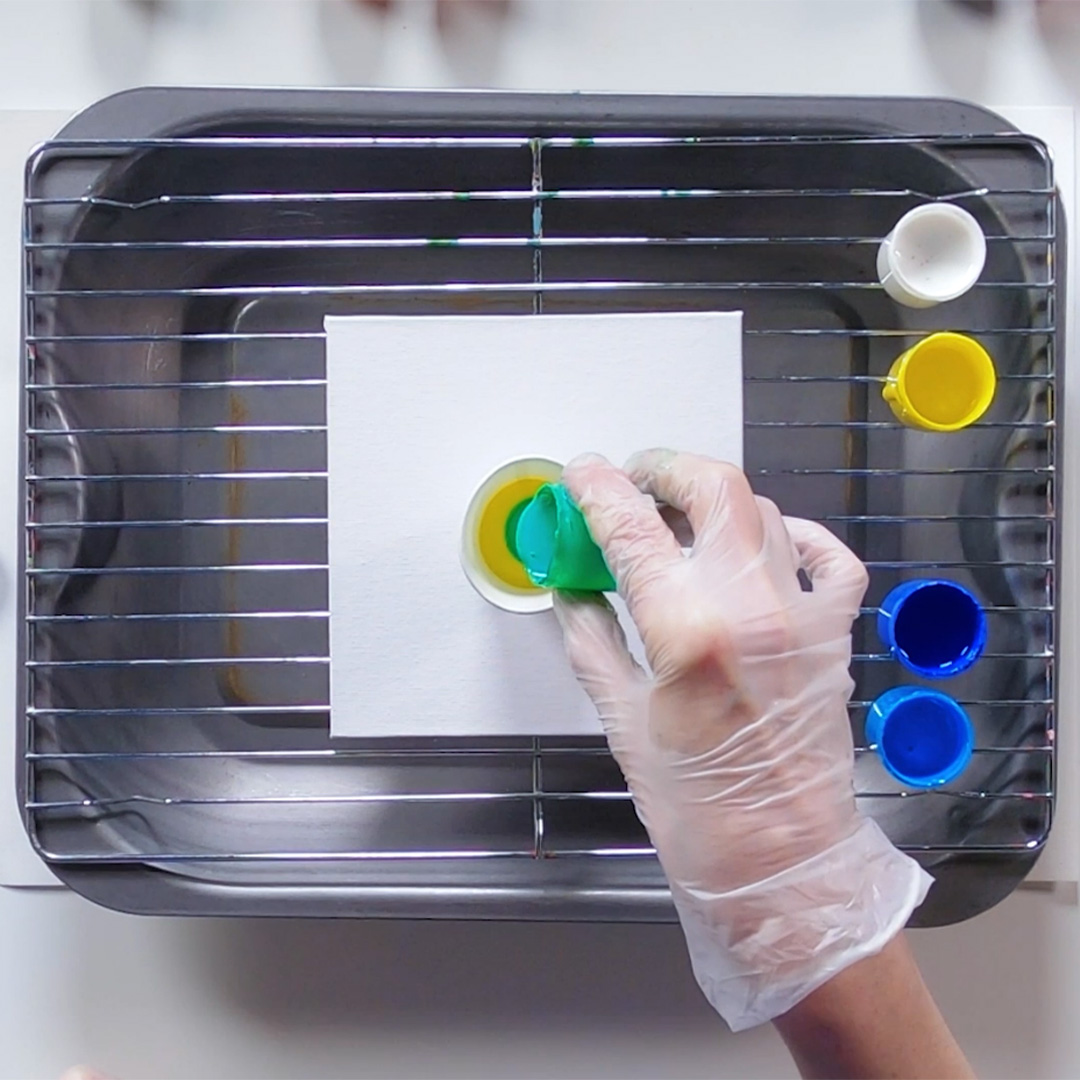
Repeat the process so you have 2 identical cups of colour.
Moving in a zig zag fashion up and down empty the first half cup on the canvas.
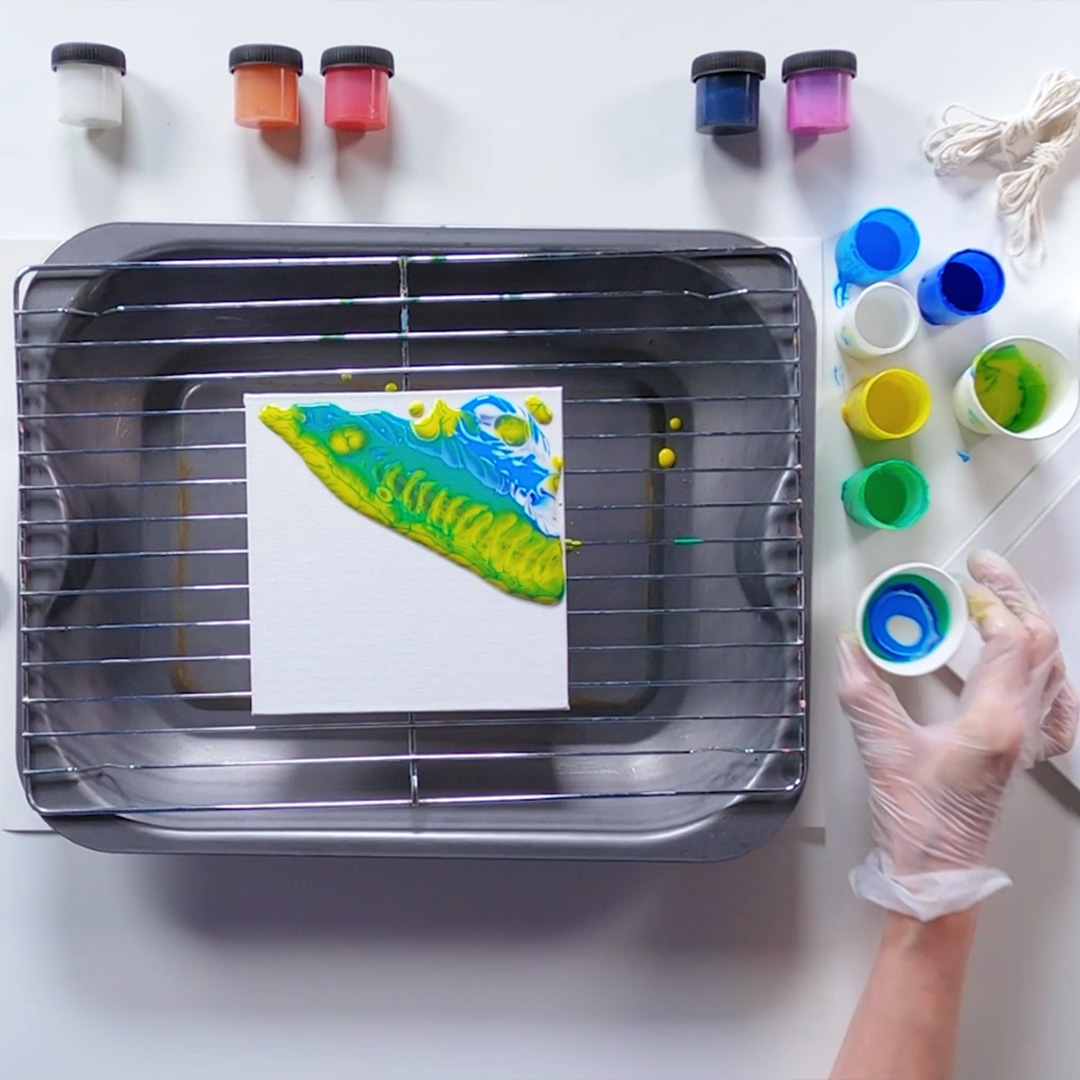
Repeat this across the other half of the canvas with the second cup of colour to fill the board with paint. If there are a few drips in the cup why not drop them over the artwork to create further effects?
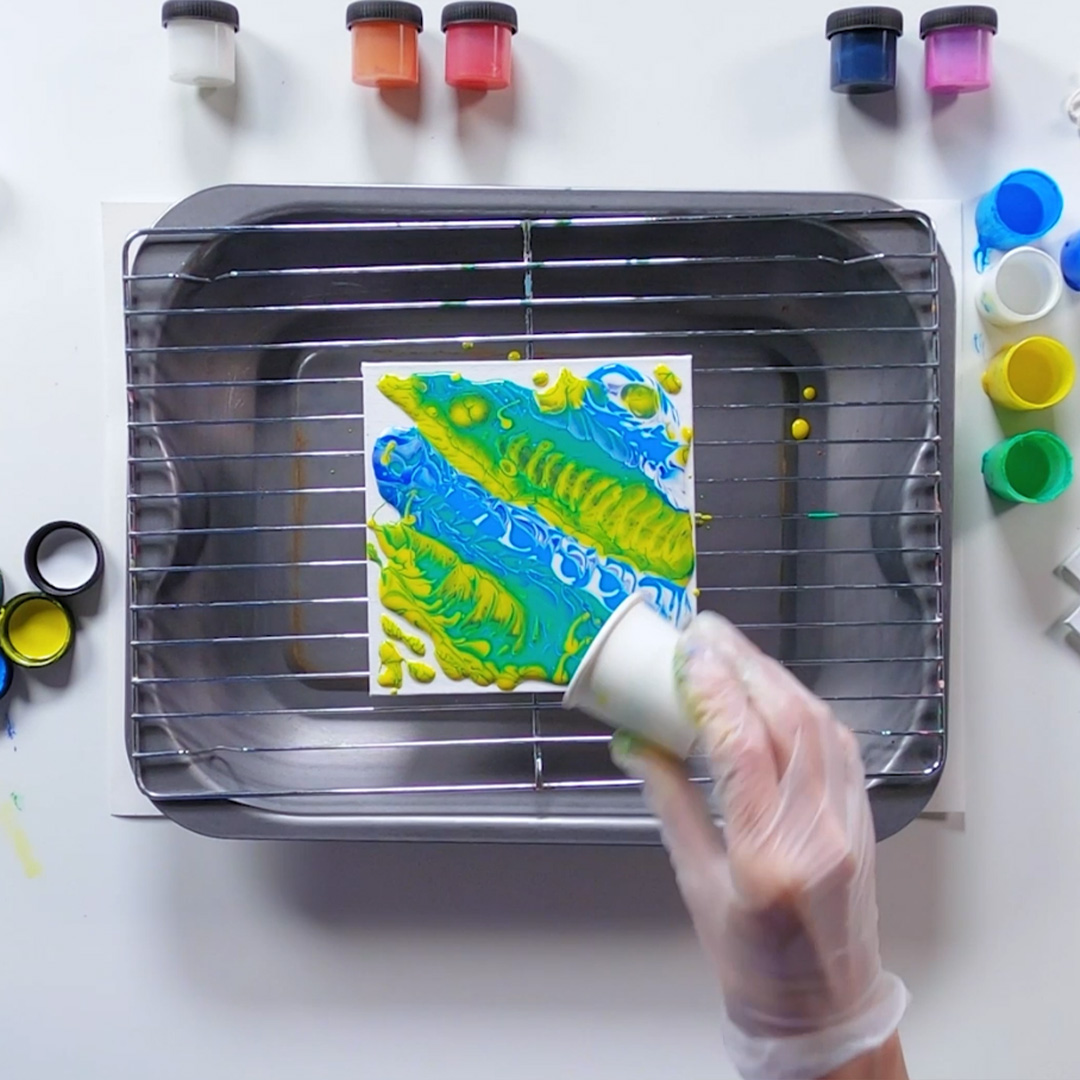
Tilt the canvas board to move the paint and watch it fill the board to create swirls of pattern and effect.
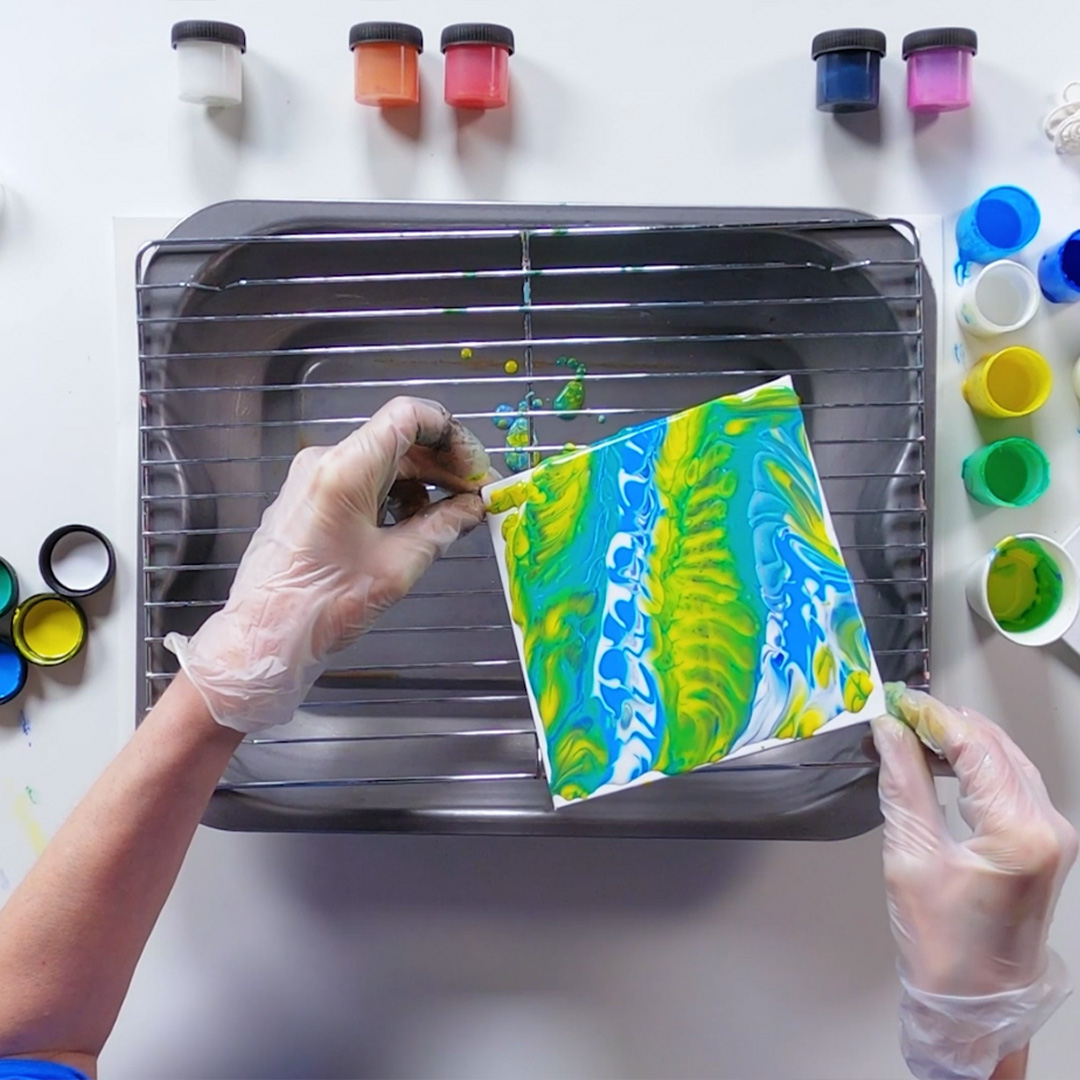
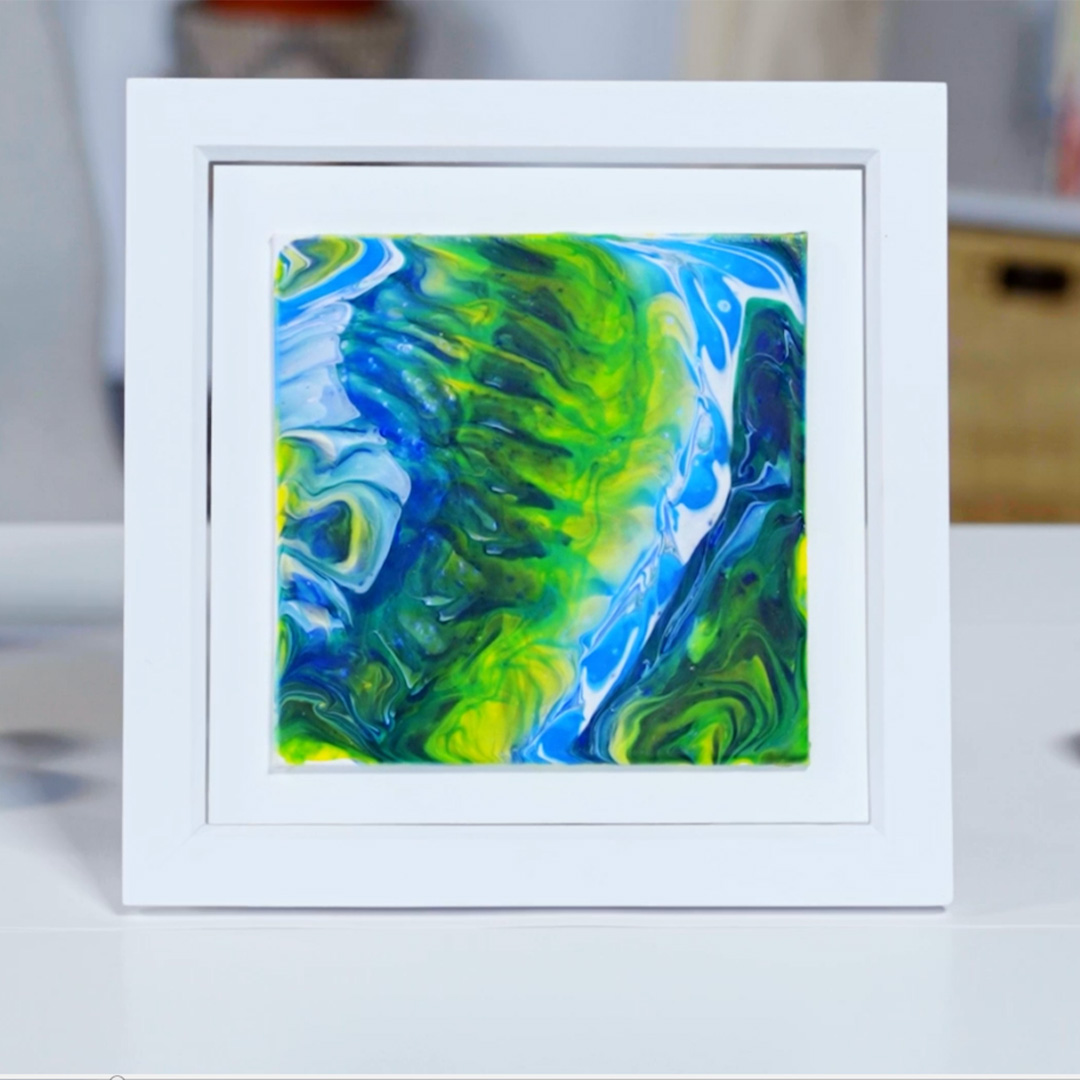
Place artwork on a flat surface and allow it to dry.
Your step by step guide
Decide which colours you would like to use and pour a little of each colour one by one until the cup is half full.
Repeat the process so you have 2 identical cups of colour.
Moving in a zig zag fashion up and down empty the first half cup on the canvas.
Repeat this across the other half of the canvas with the second cup of colour to fill the board with paint. If there are a few drips in the cup why not drop them over the artwork to create further effects?
Tilt the canvas board to move the paint and watch it fill the board to create swirls of pattern and effect.
Place artwork on a flat surface and allow it to dry.
What you'll need

Simply Creative Sets
Daler-Rowney Simply Creative Sets are a range of project-based sets that offer inspiration and creativity.
VIEWHow to create a feathers string pour
Your step by step guide
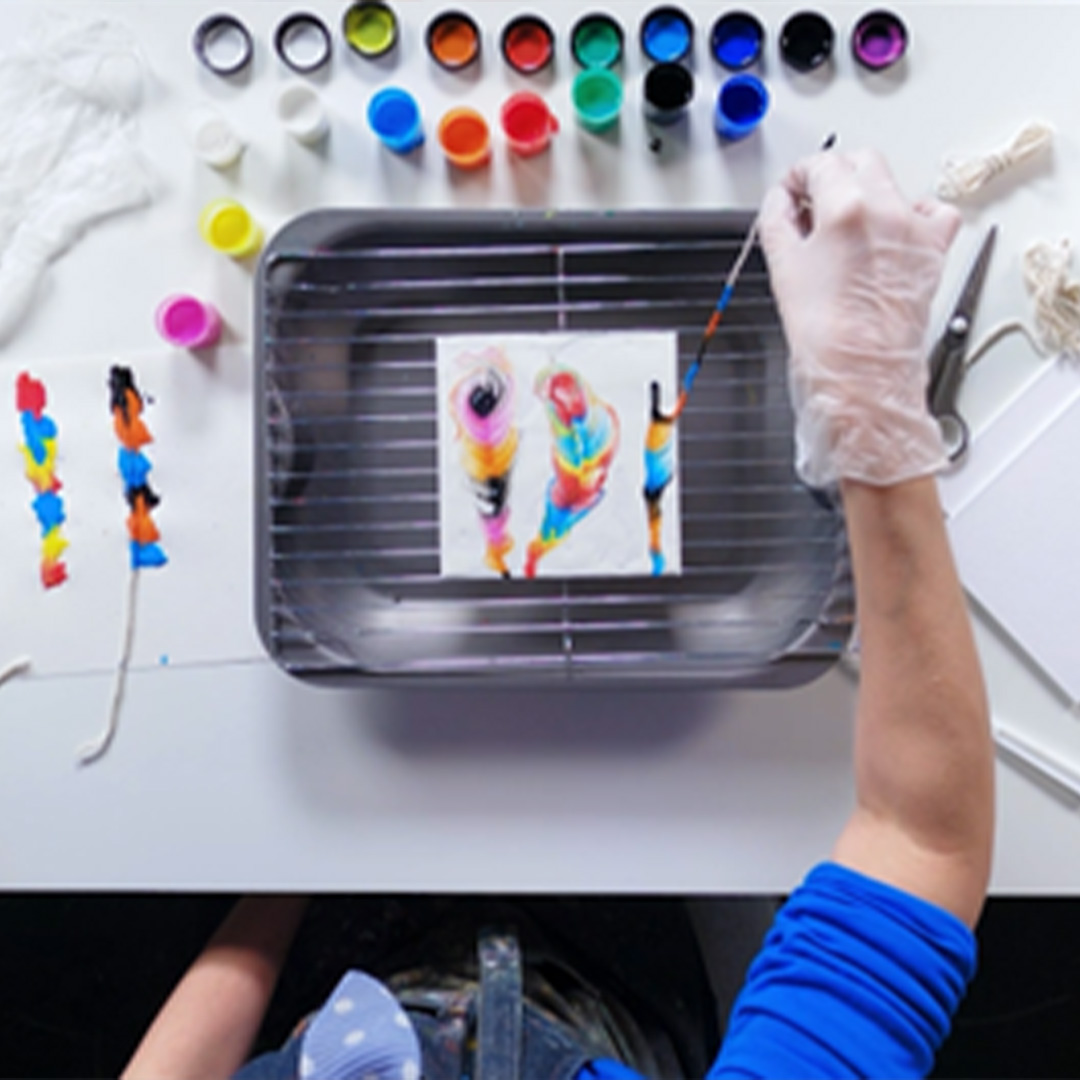
Take 6 lengths of string approx. 30cm in length each.
Group them in pairs lengthways on a piece of scrap paper or recyclable plastic sheet.
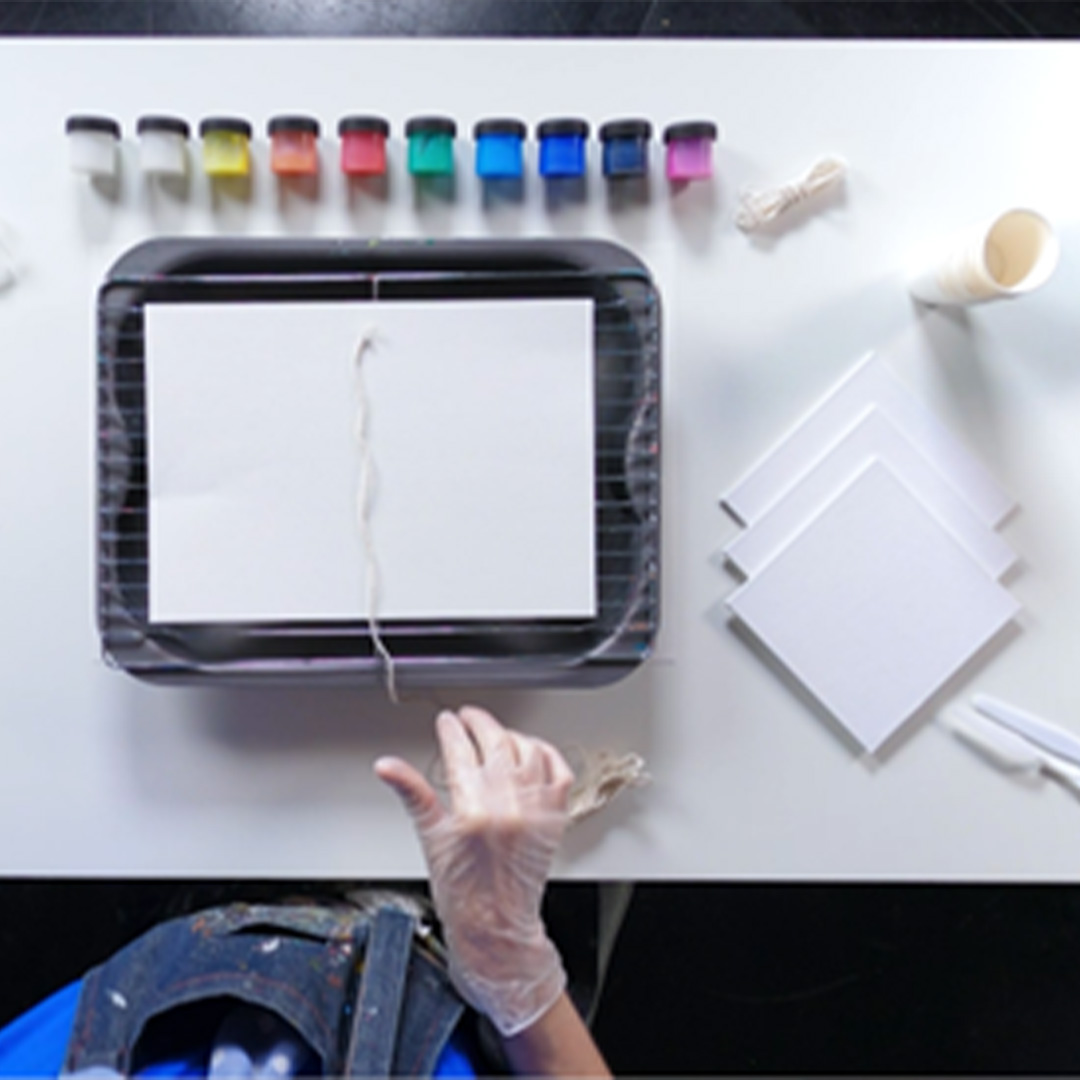
Using the palette knife coat the pairs of string (approx. halfway) with paint, leaving some string free at the end to grab hold of.
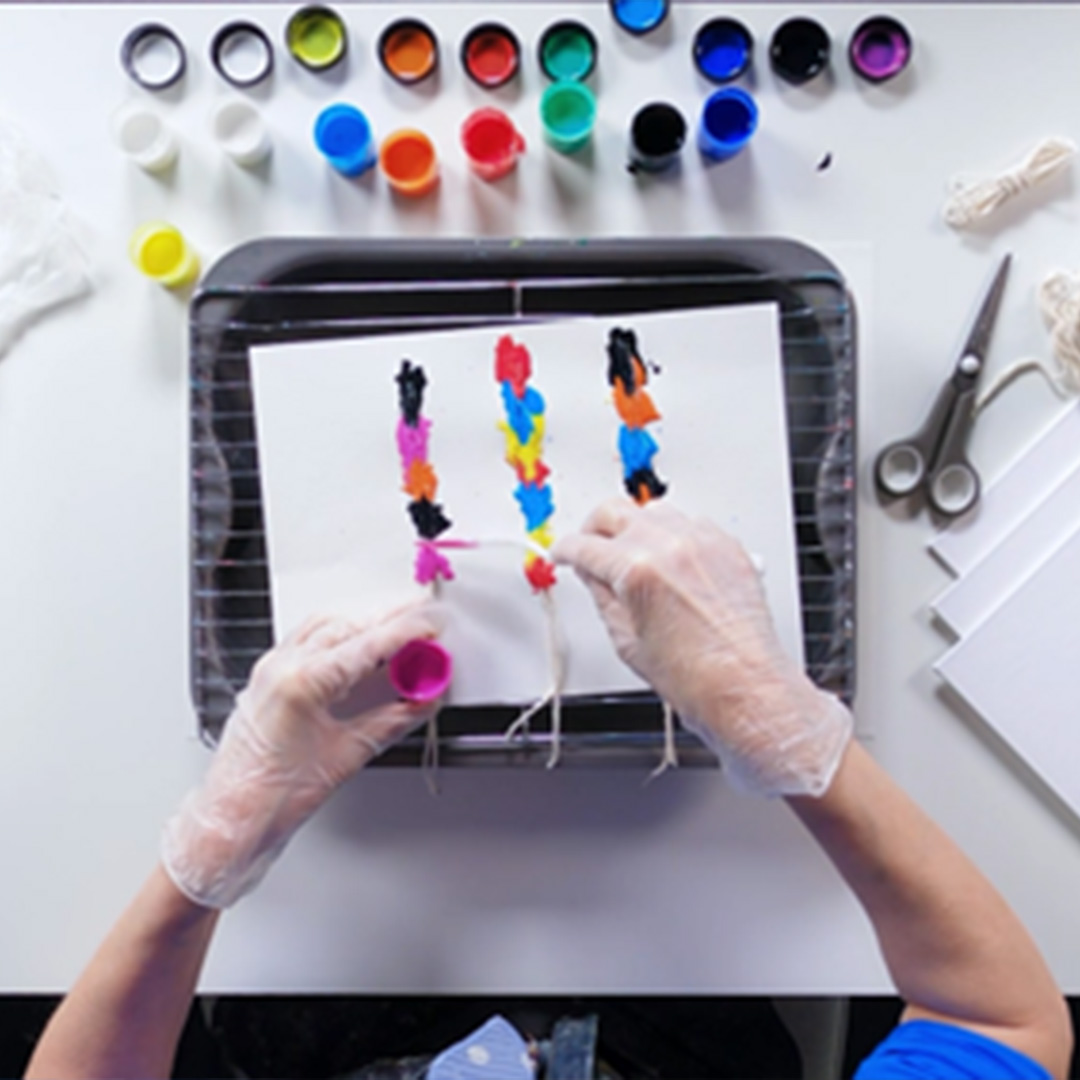
Spread an amount of white paint over your board using the palette knife, enough to cover it evenly. While your base paint is still wet, lay down the string in the centre of the board in a slight curve.
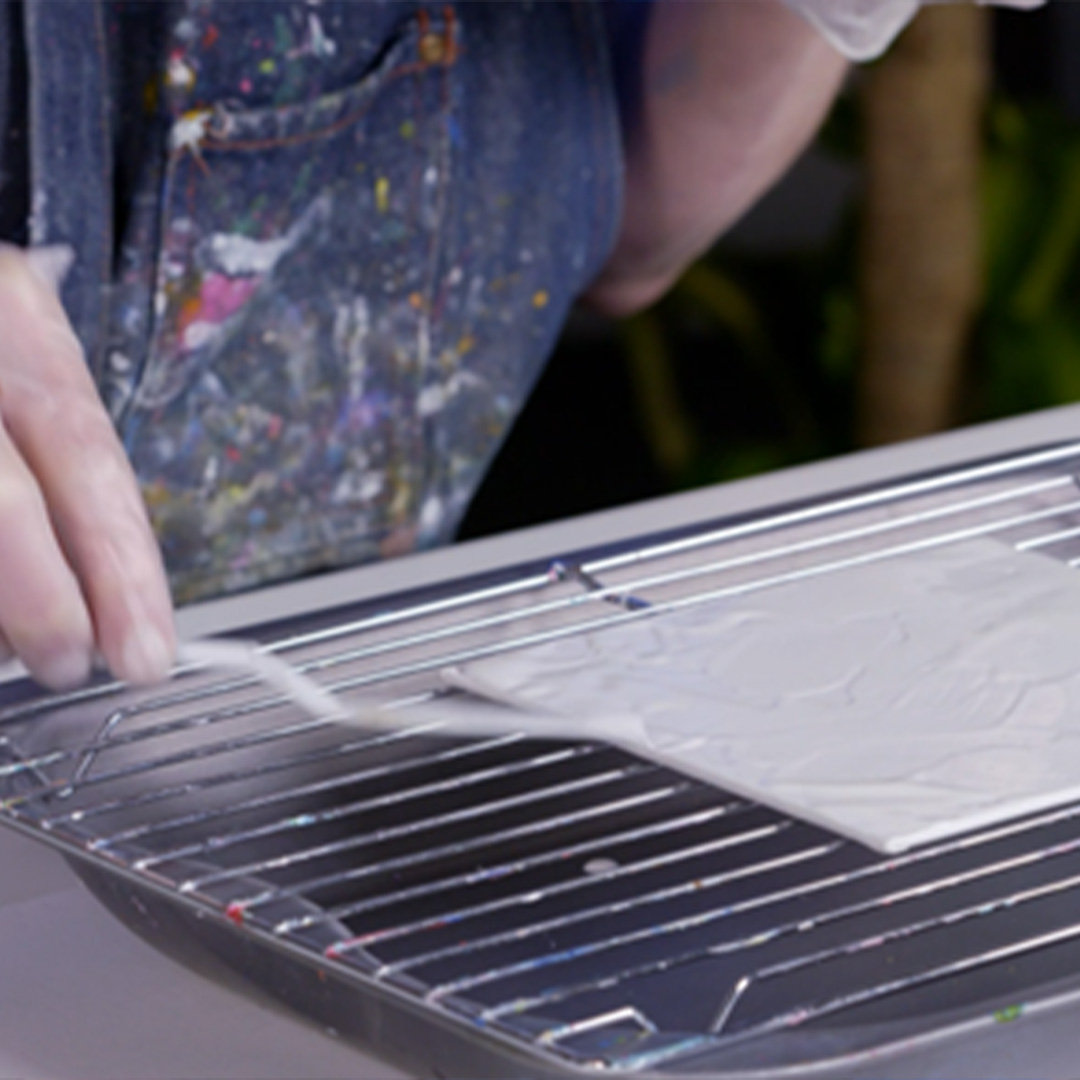
Gently and slowly pull the string across the board in an upwards direction and slightly to the side to form the first half of your feather shape. As you reach the top pull the string around in a little circle to form the rounded end of the feather.
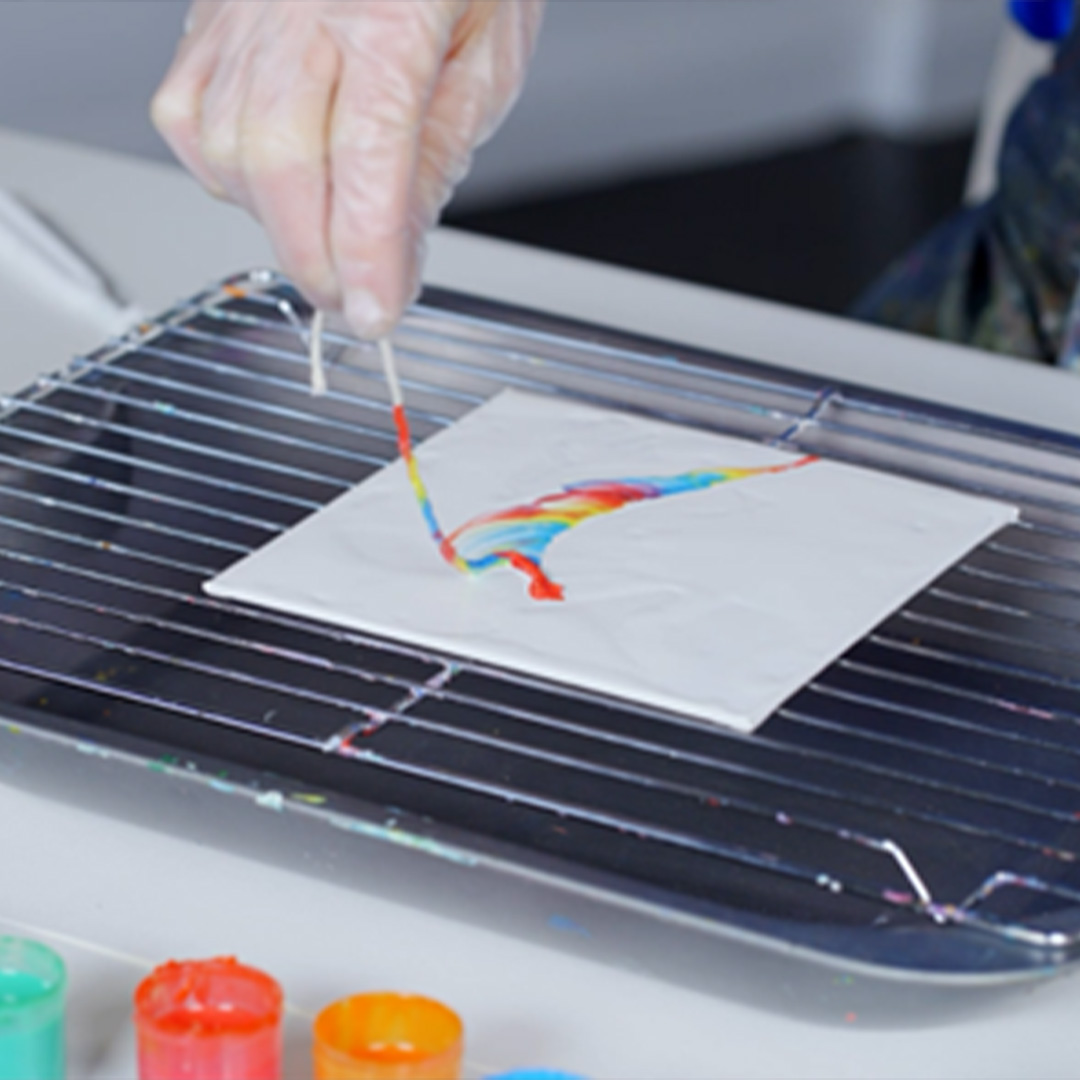
Place the second corresponding coloured string on the board adjacent to the first one just laid down and repeat the technique to finish off the feather.
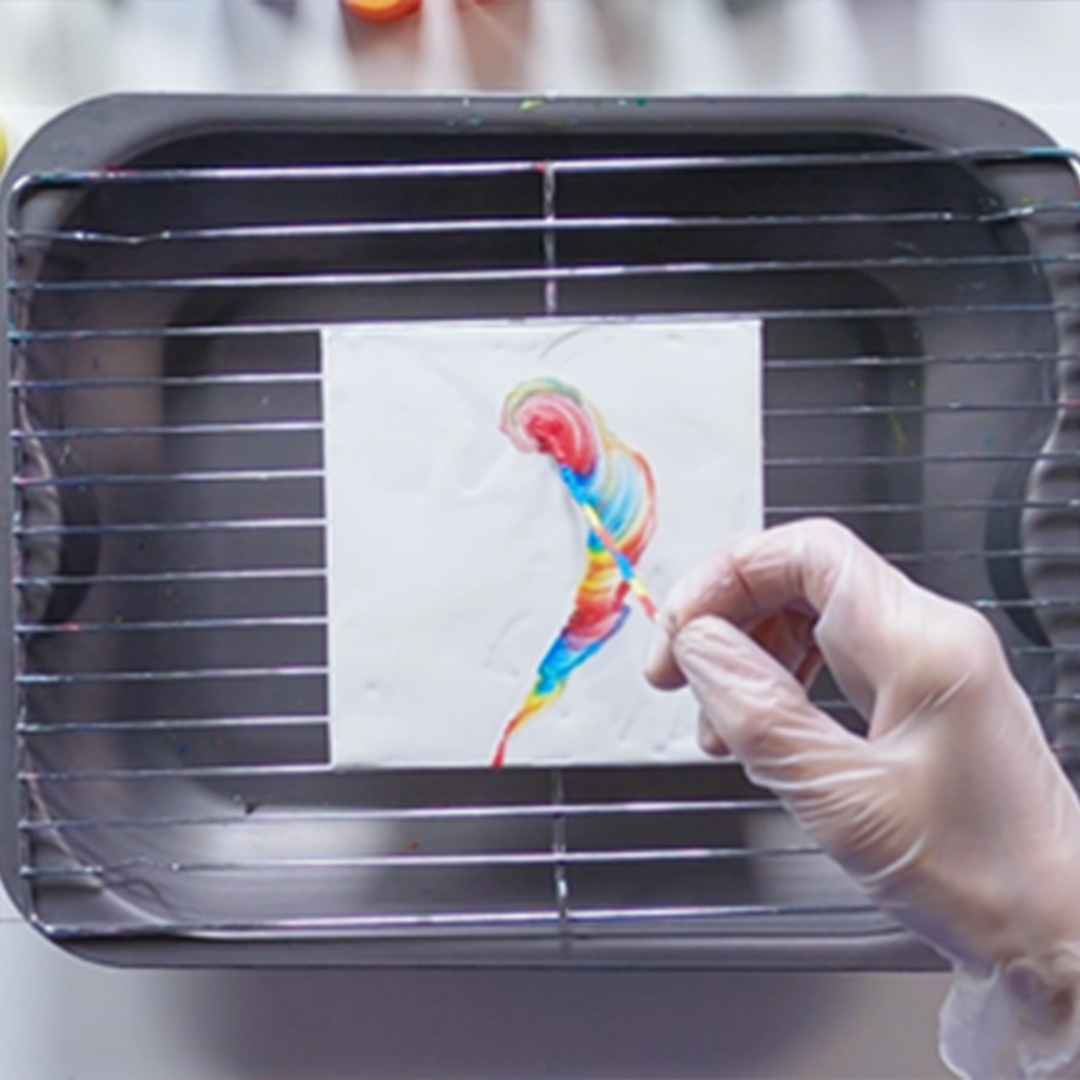
While the background paint is still wet, create as many feathers as you like.
Your step by step guide
Take 6 lengths of string approx. 30cm in length each.
Group them in pairs lengthways on a piece of scrap paper or recyclable plastic sheet.
Using the palette knife coat the pairs of string (approx. halfway) with paint, leaving some string free at the end to grab hold of.
Spread an amount of white paint over your board using the palette knife, enough to cover it evenly. While your base paint is still wet, lay down the string in the centre of the board in a slight curve.
Gently and slowly pull the string across the board in an upwards direction and slightly to the side to form the first half of your feather shape. As you reach the top pull the string around in a little circle to form the rounded end of the feather.
Place the second corresponding coloured string on the board adjacent to the first one just laid down and repeat the technique to finish off the feather.
While the background paint is still wet, create as many feathers as you like.
What you'll need
Simply Creative Sets
Daler-Rowney Simply Creative Sets are a range of project-based sets that offer inspiration and creativity.
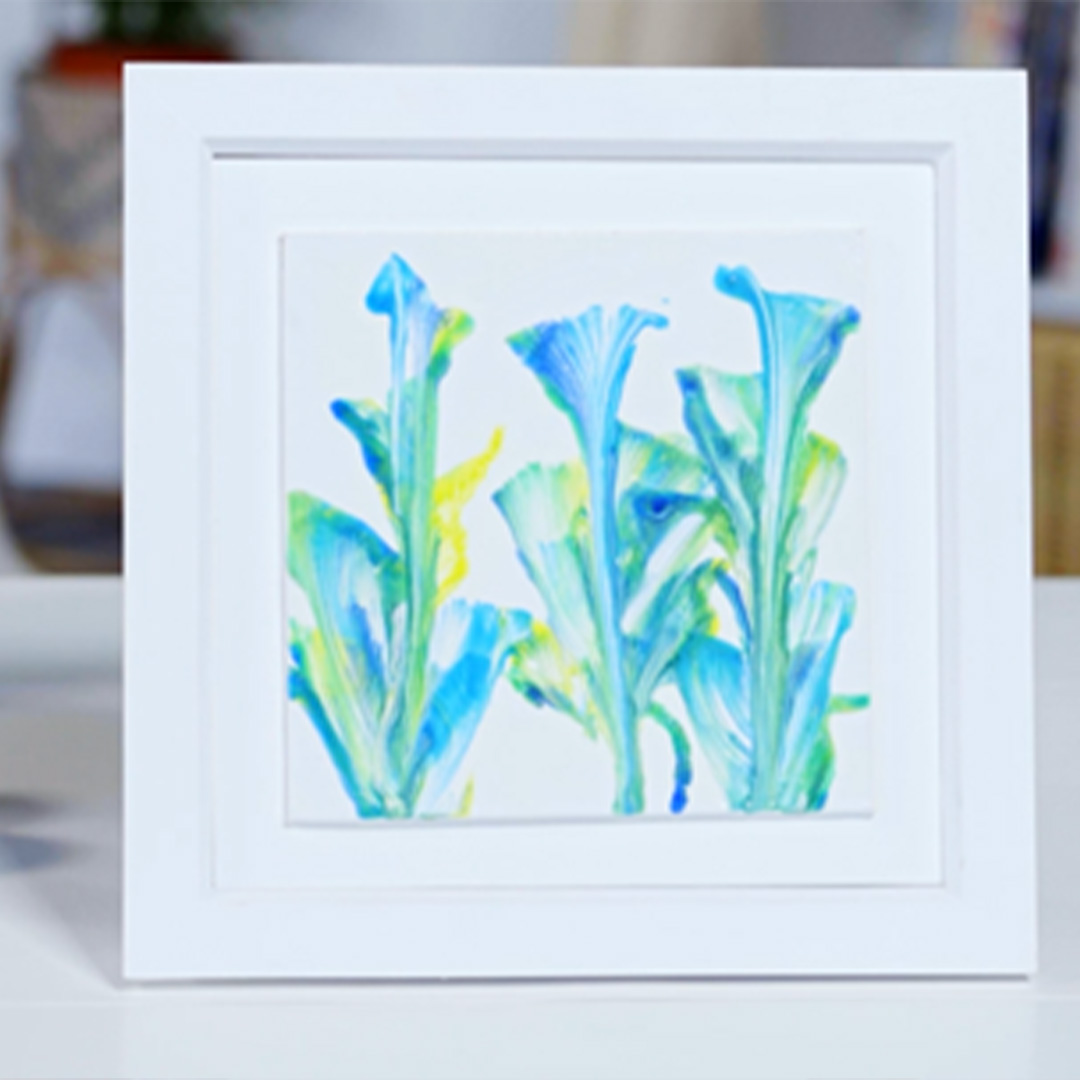
VIEWHow to create lillies using pouring
Your step by step guide
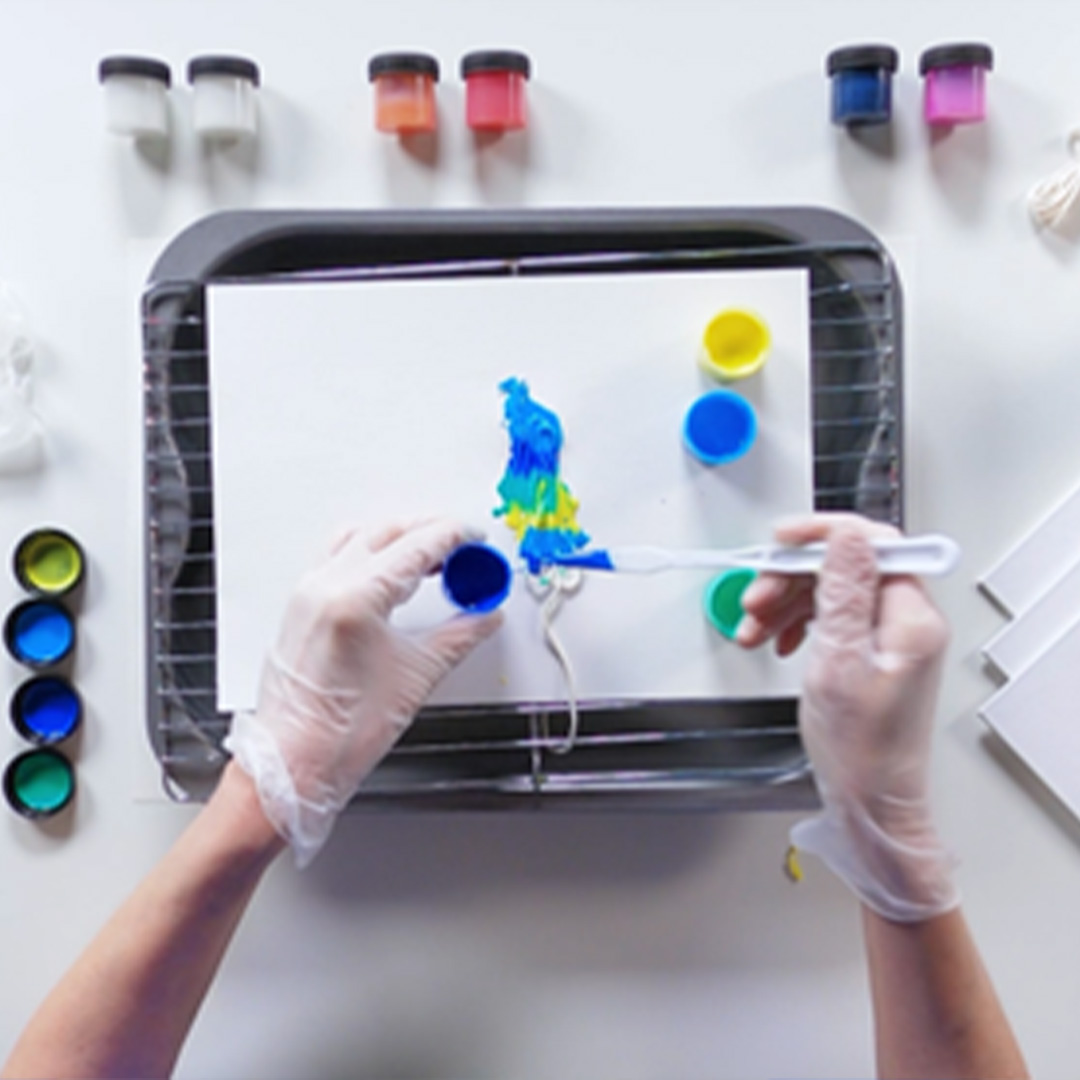
Take the string and wiggle it back and forth on a piece of scrap paper to create a few loops.
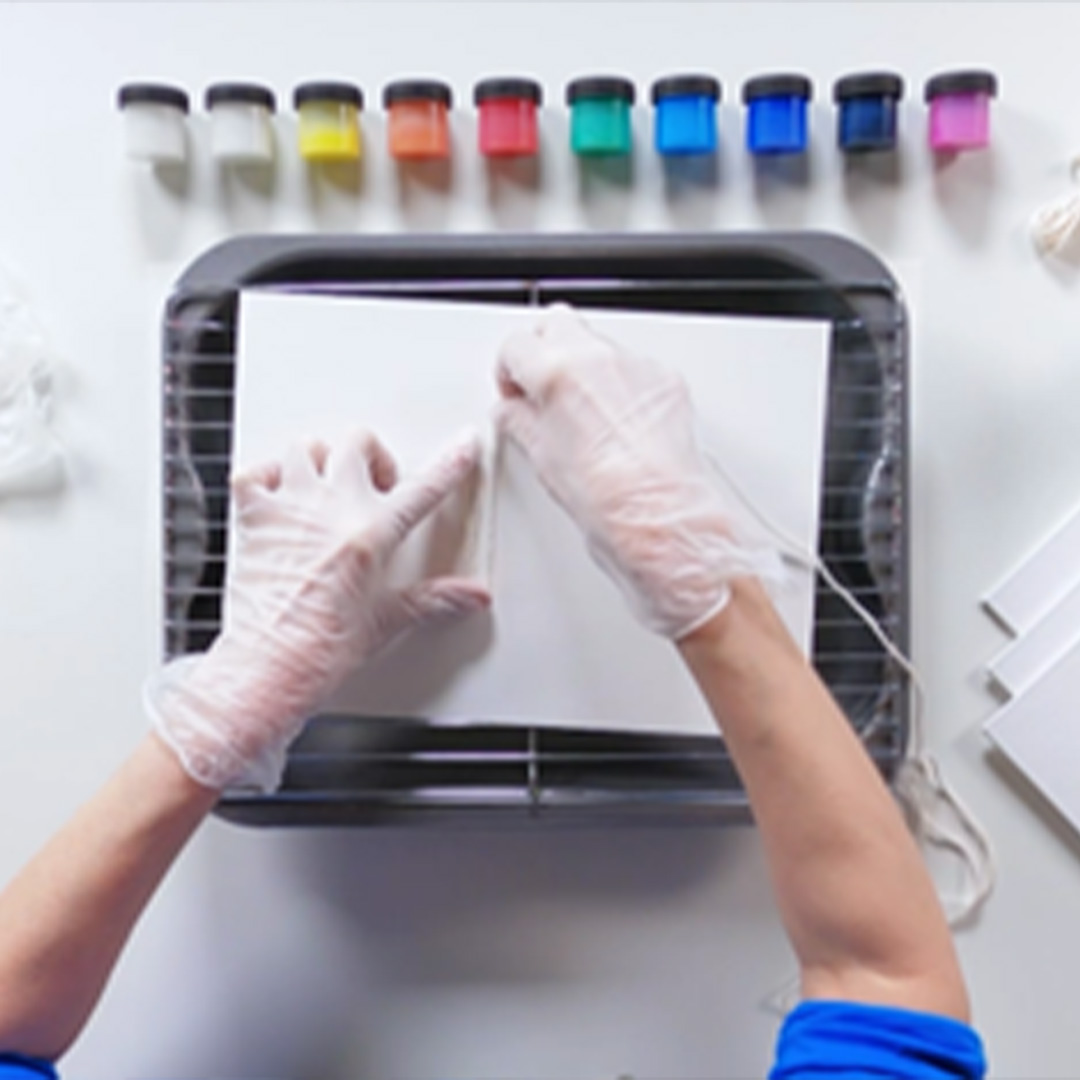
Load the string with different colours to your liking. Use the palette knife to ensure full coverage.
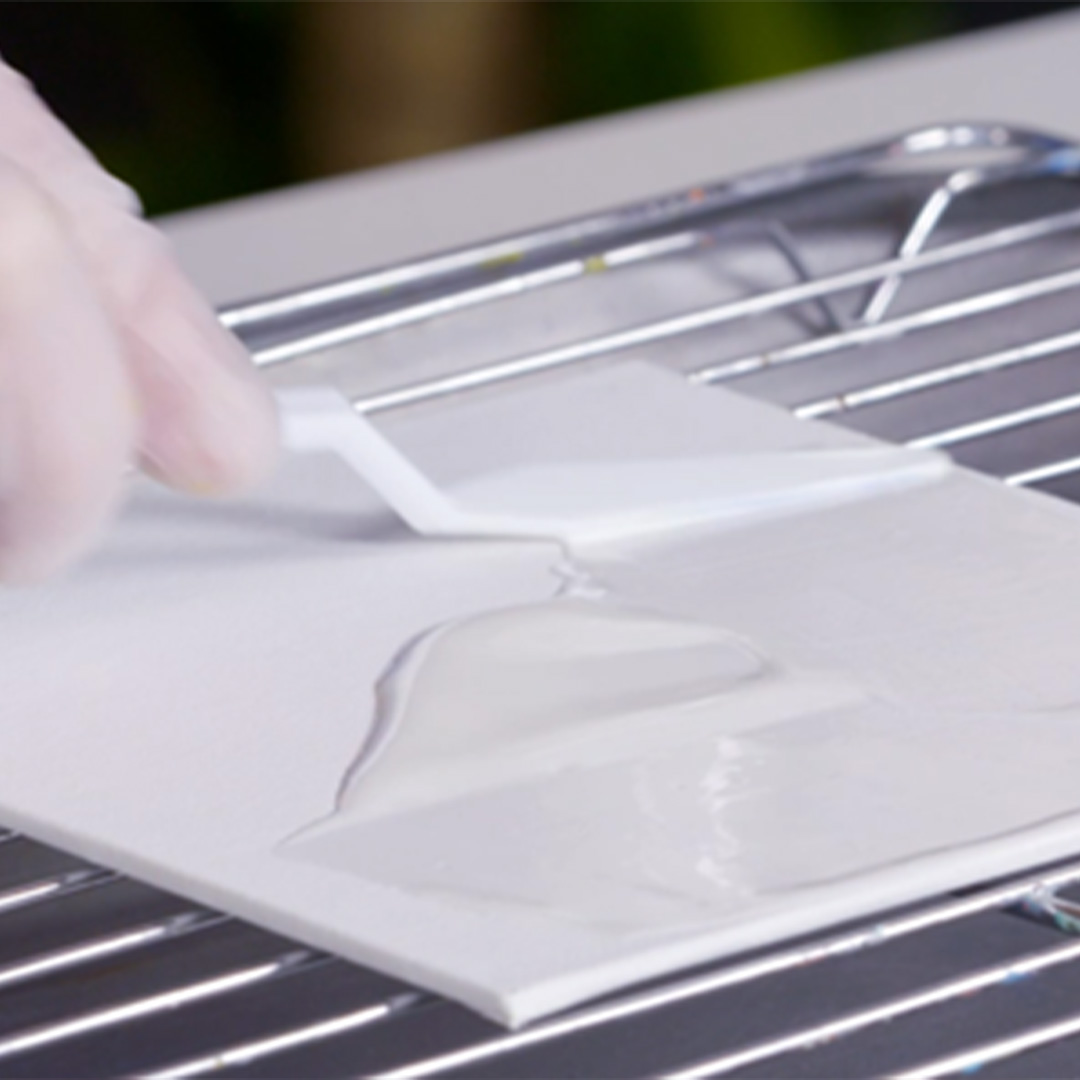
Spread an amount of white paint over your board using the palette knife, enough to cover it evenly.
While your base paint is still wet, lay down the string on the painted surface wiggling it across from top to bottom like a snake.

Gently pull the string towards you in one go, without lifting it.
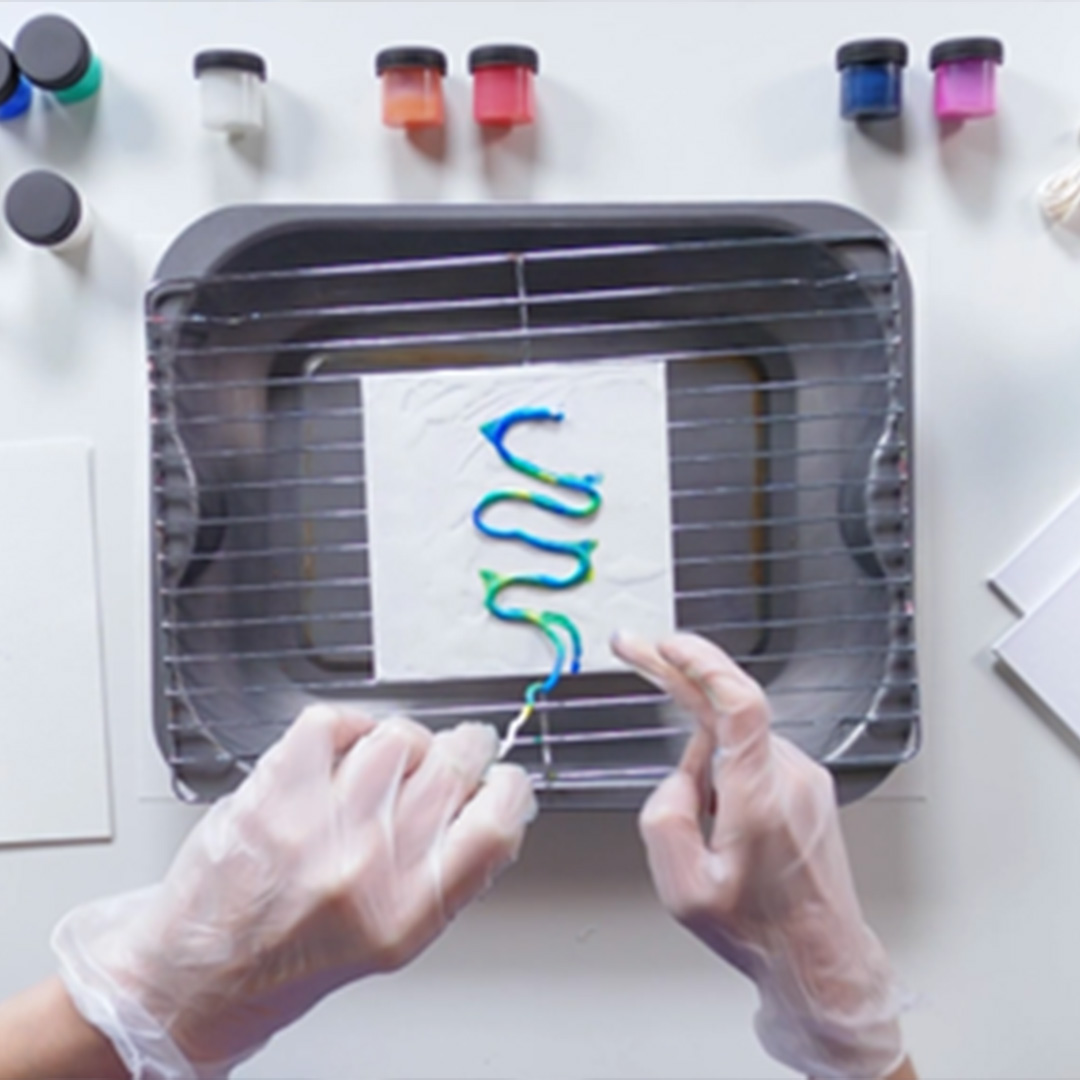
While the background paint is still wet, create as many Lillies as you like.
Your step by step guide
Take the string and wiggle it back and forth on a piece of scrap paper to create a few loops.
Load the string with different colours to your liking. Use the palette knife to ensure full coverage.
Spread an amount of white paint over your board using the palette knife, enough to cover it evenly.
While your base paint is still wet, lay down the string on the painted surface wiggling it across from top to bottom like a snake.
Gently pull the string towards you in one go, without lifting it.
While the background paint is still wet, create as many Lillies as you like.
What you'll need
Simply Creative Sets
Daler-Rowney Simply Creative Sets are a range of project-based sets that offer inspiration and creativity.
VIEWAbout the artist