Realistic Portrait Painting using an AirBrush with Dave Pinsker
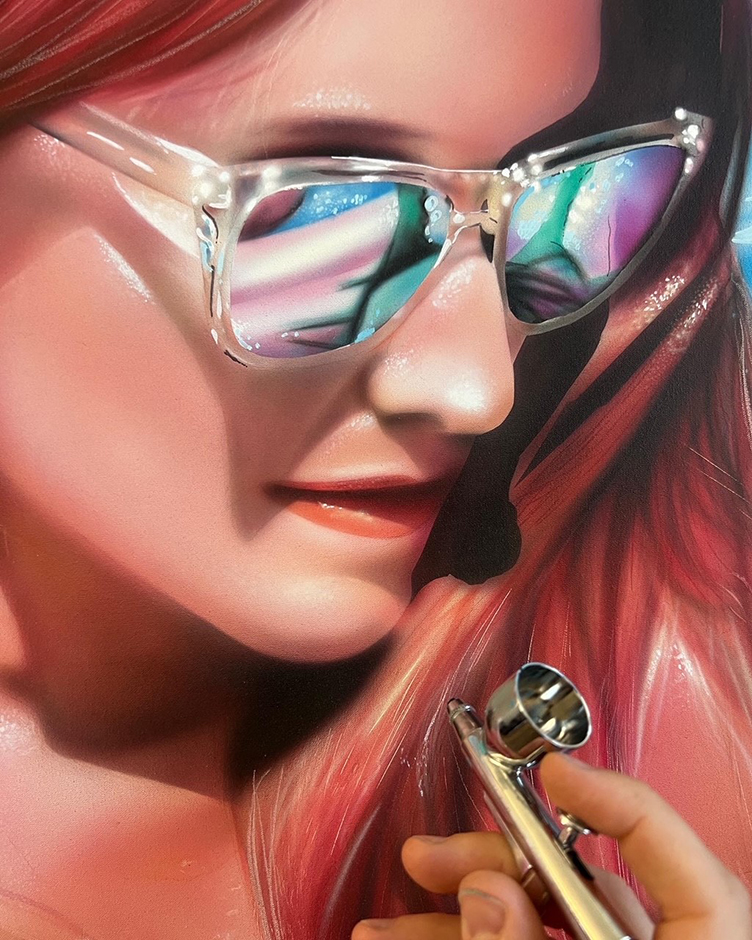
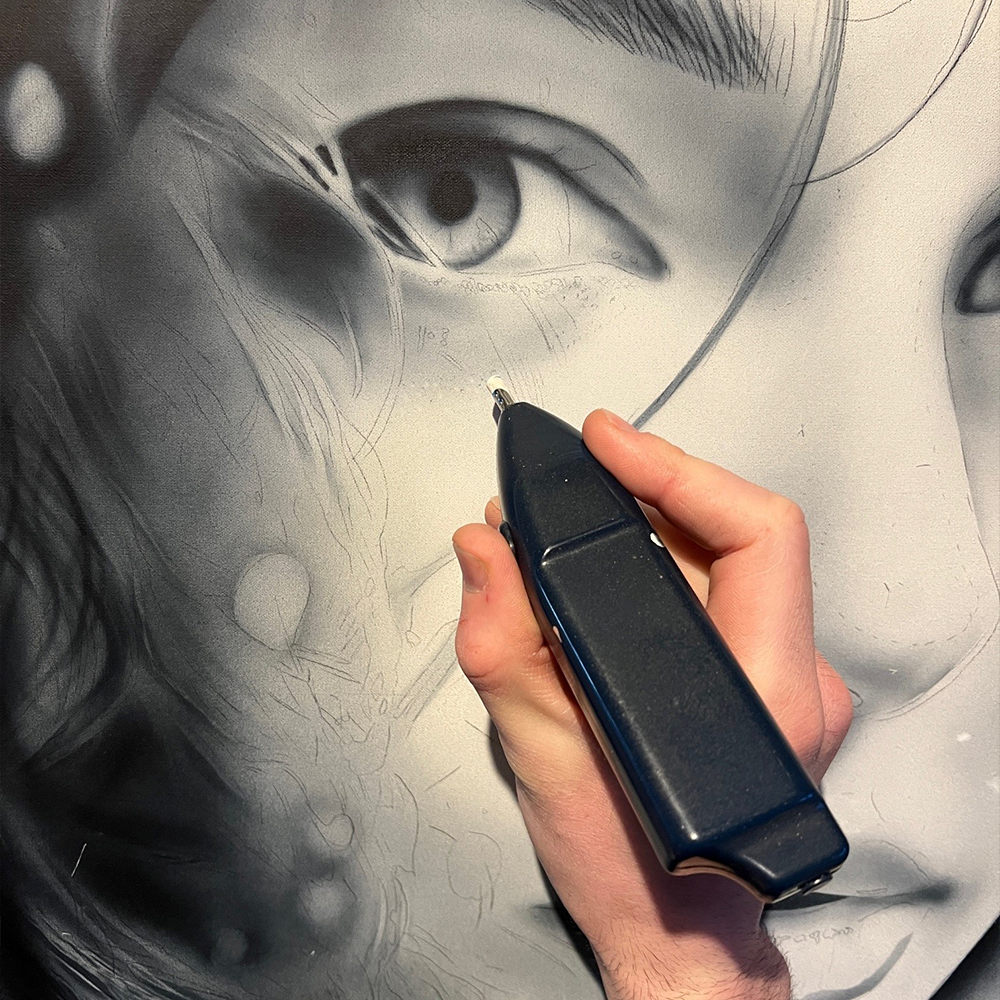
An airbrush is a small, handheld tool used for painting and detailing various surfaces such as paper, canvas, metal, or plastic. It operates by spraying a fine mist of paint or ink onto the desired surface, allowing for precise control over shading, gradients, and detail work. They are commonly used in art, illustration, automotive painting, makeup application, and other creative fields. They typically consist of a trigger mechanism for controlling air and paint flow, a nozzle for directing the spray, and a reservoir for holding the paint or ink. They have recently become one of my favourite ways of painting over the past two years. Here I am using Iwata airbrushes.
I’ve been getting many questions on the airbrush and my airbrush technique. I am in fact constantly evolving my use of the airbrush in my artwork, so I have put together a little demo explaining my process behind using this tool in my work. I have really been enjoying using the FW Ink range from Daler-Rowney, which sprays beautifully and result in very little clogging of the brush, as these inks have very finely ground pigments.
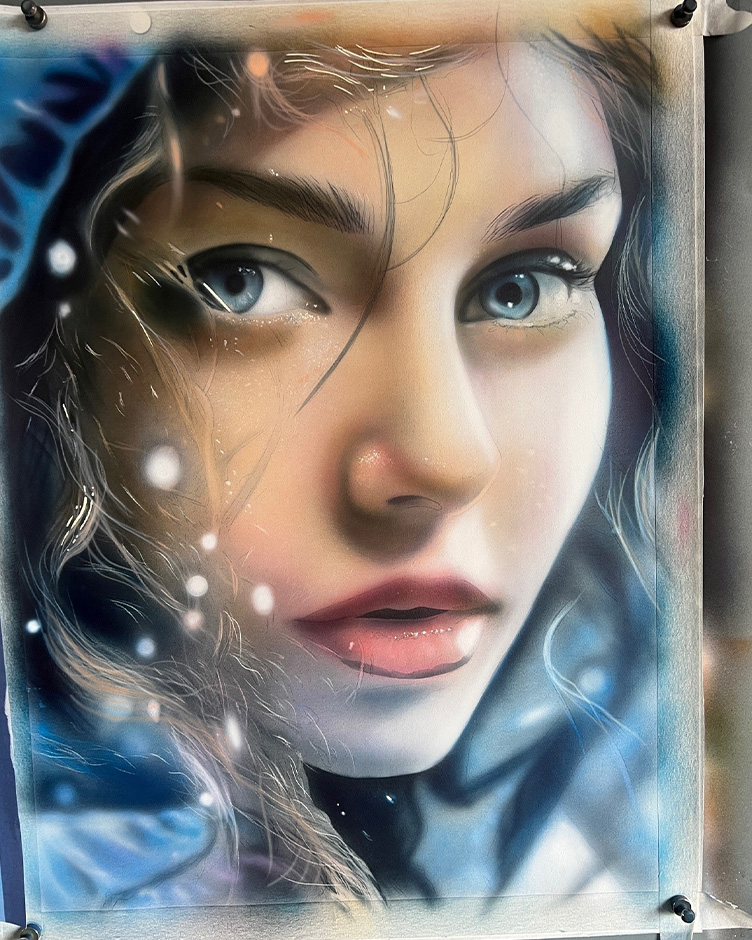
Below is a short guide on how I used an airbrush to paint my model Luna.
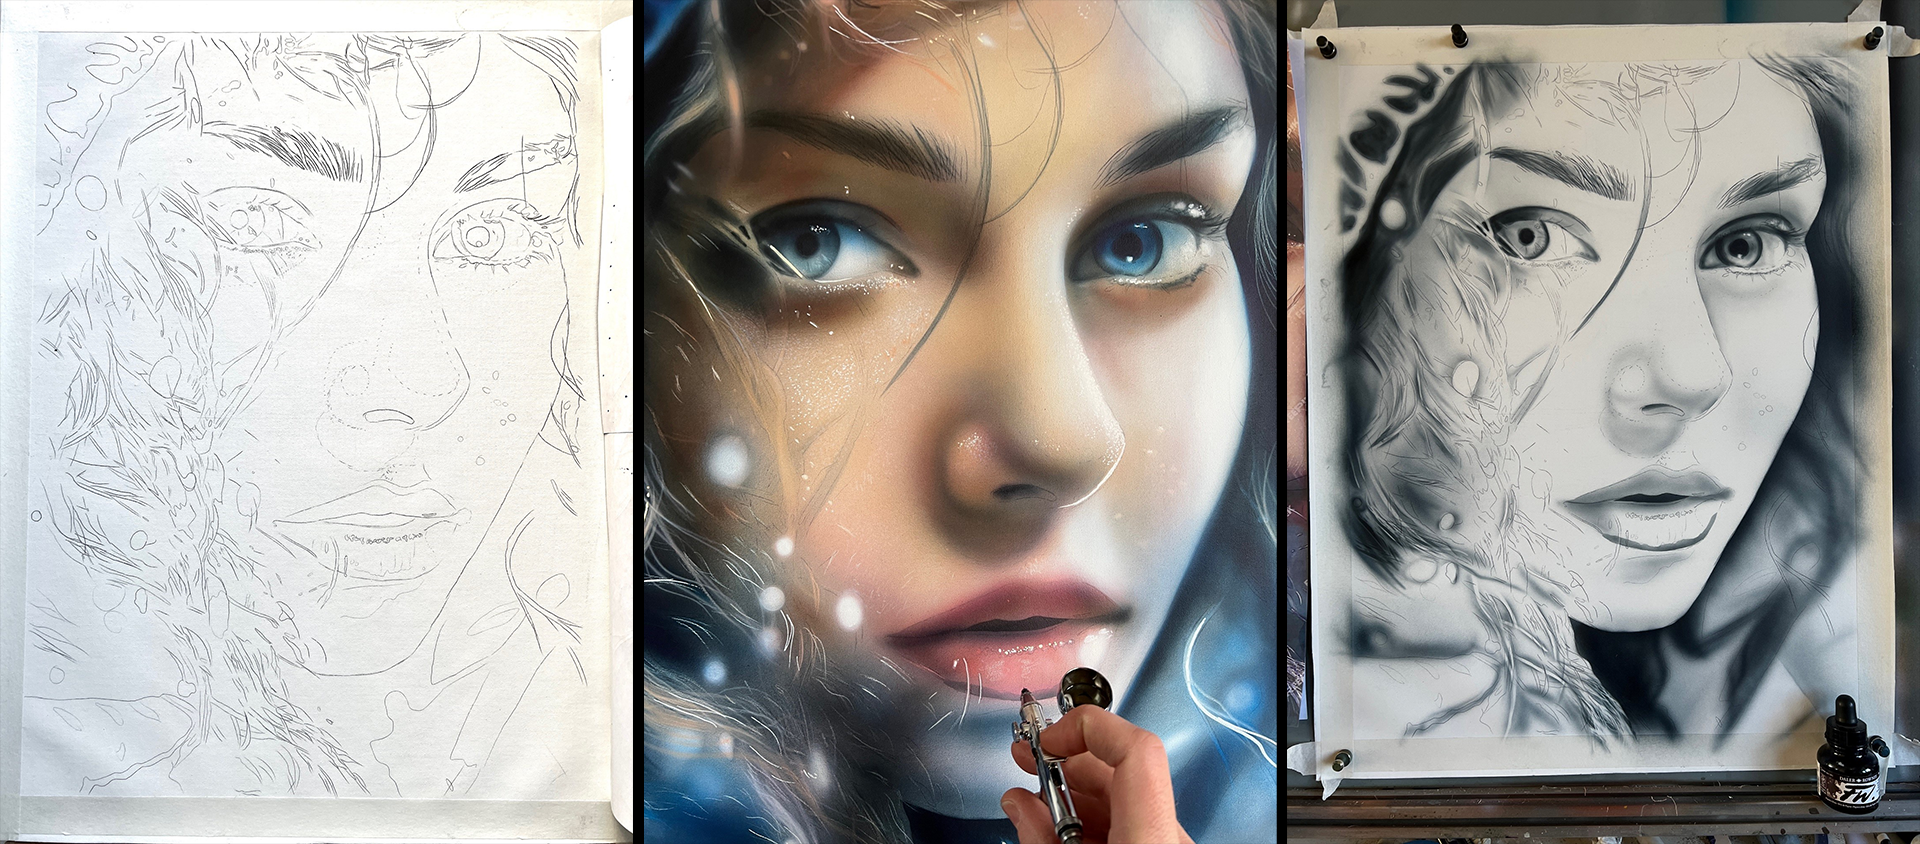
Your step by step guide
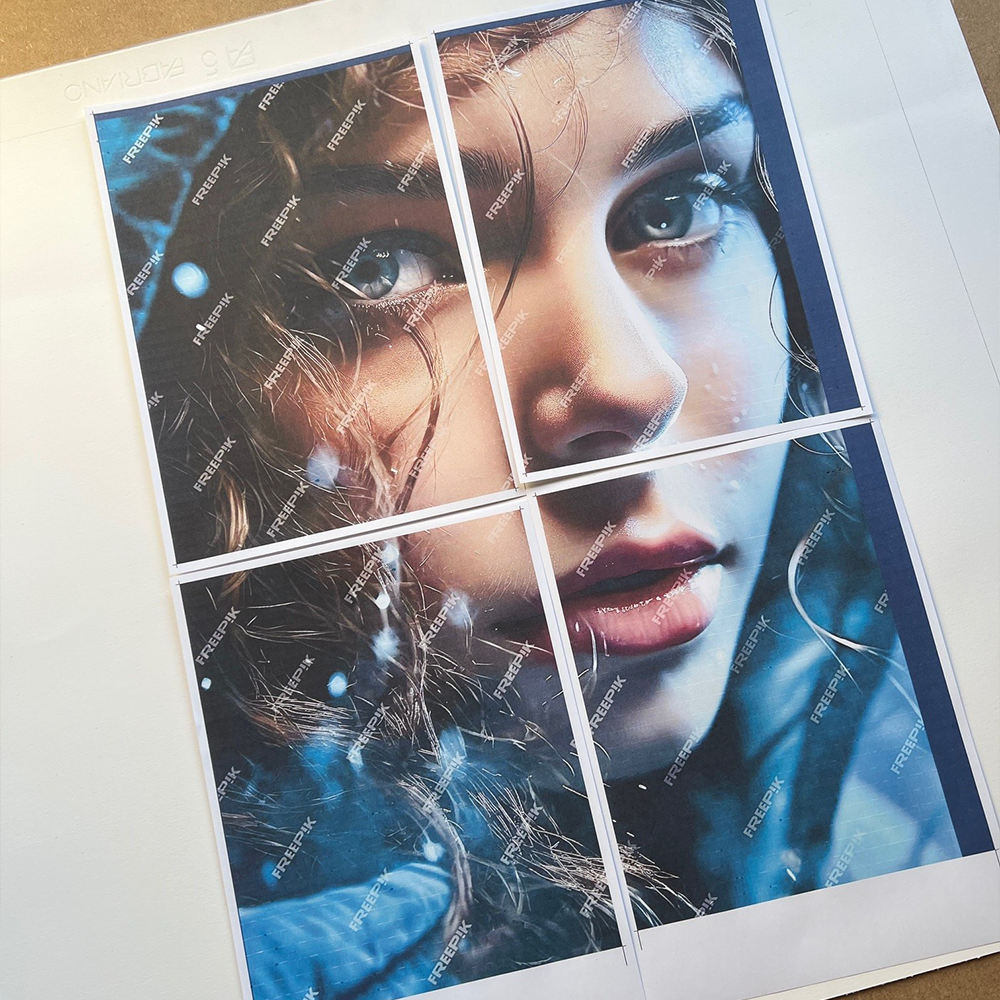
Using an A4 Printer, I have printed my reference image and cut it to size. With the application of graphite paper, I have transferred the image onto my canvas. Highlighting the key features and map of the image.
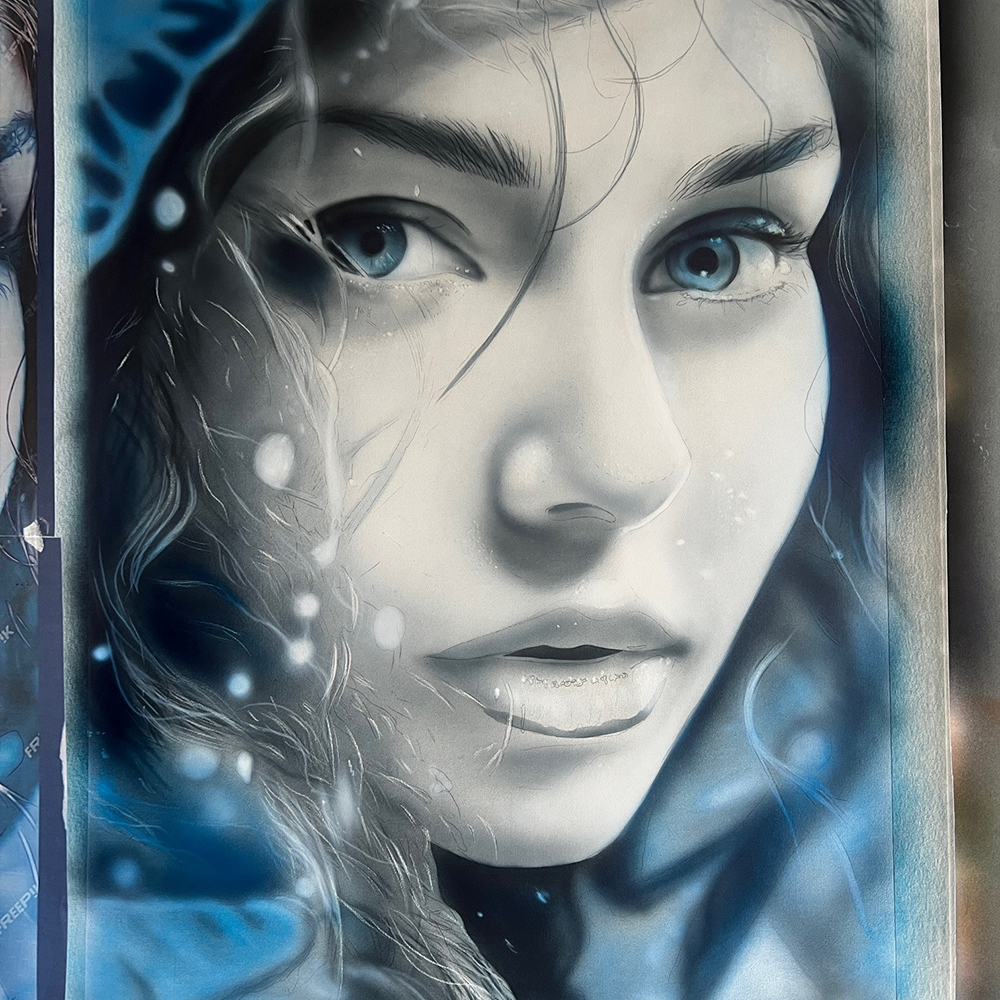
Using the colour Paynes Grey from FW Ink, I roughly begin adding structure to my painting. I use this same technique whether I am drawing with pencils or using paints.
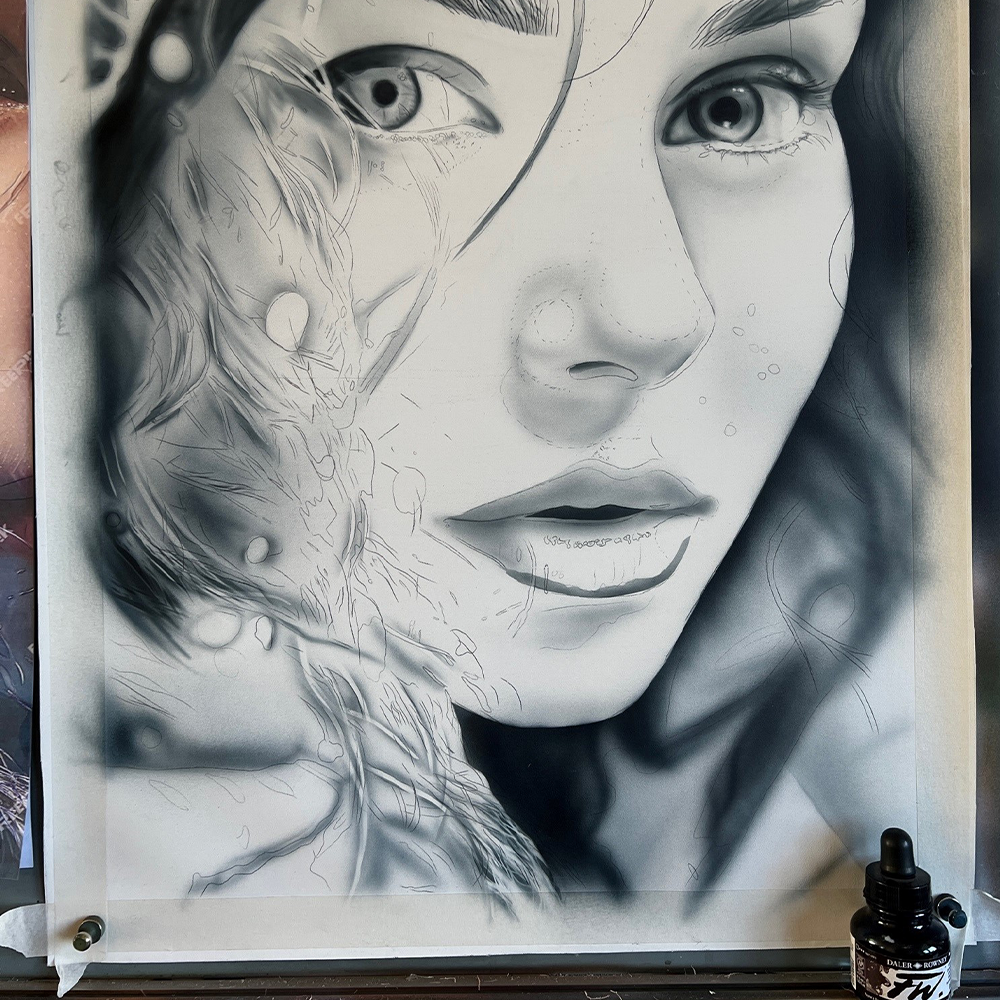
I continue developing the form with Paynes Grey alone and applying light textures with an eraser to break up the perfectly uniform spray pattern. This helps add realism to the piece as human skin is not perfectly smooth.
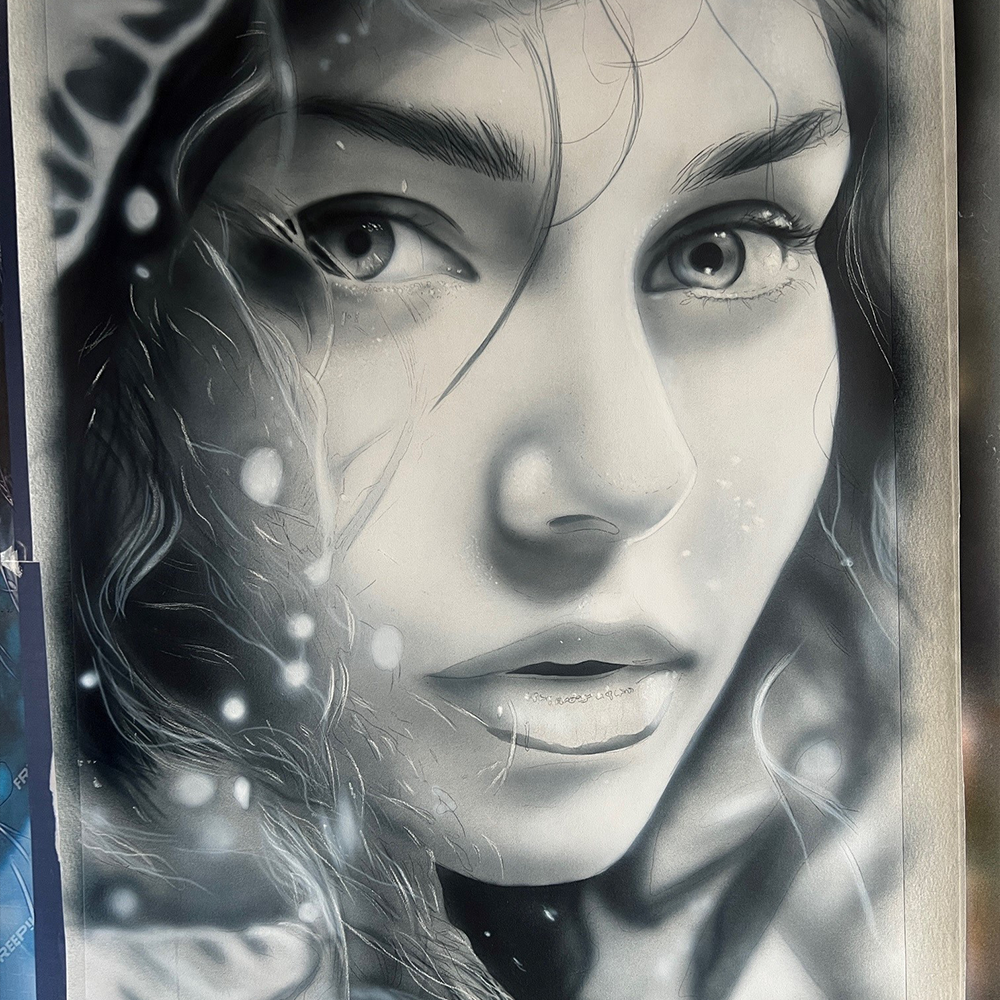
I use an Opaque White from FW Ink, to add volume and highlights. She is already beginning to look more real and voluminous.
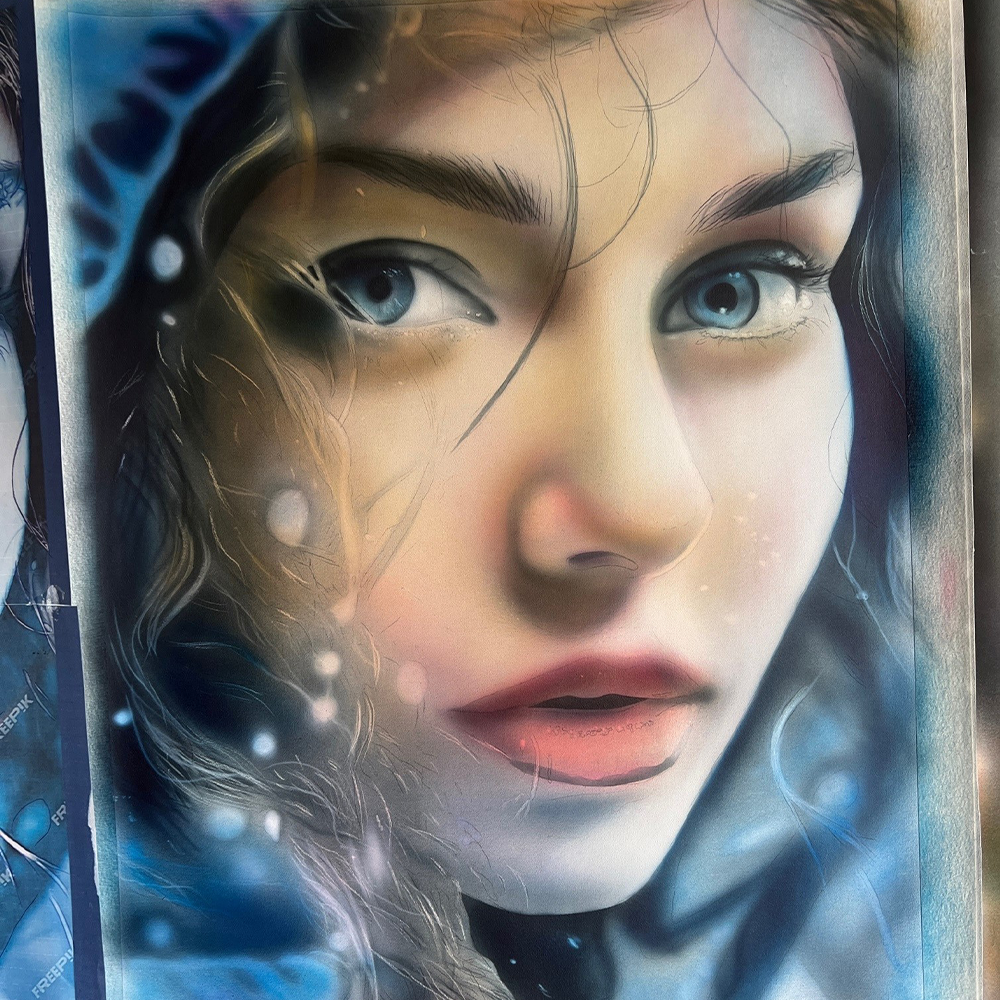
I begin Colour glazing, which simply means adding thin transparent paints over my opaque layer, beginning with the background. I generally work from back to front, however this can change depending on the painting I’m working on.
I begin with the first skin colours, utilising a balance of warm and cool tones to give depth and realism to the overall piece.
Here is much the same, adding darker darks and lighter lights to bring volume. I am approaching the final part and from here on it’s all about refining the smaller details with fine brushes.
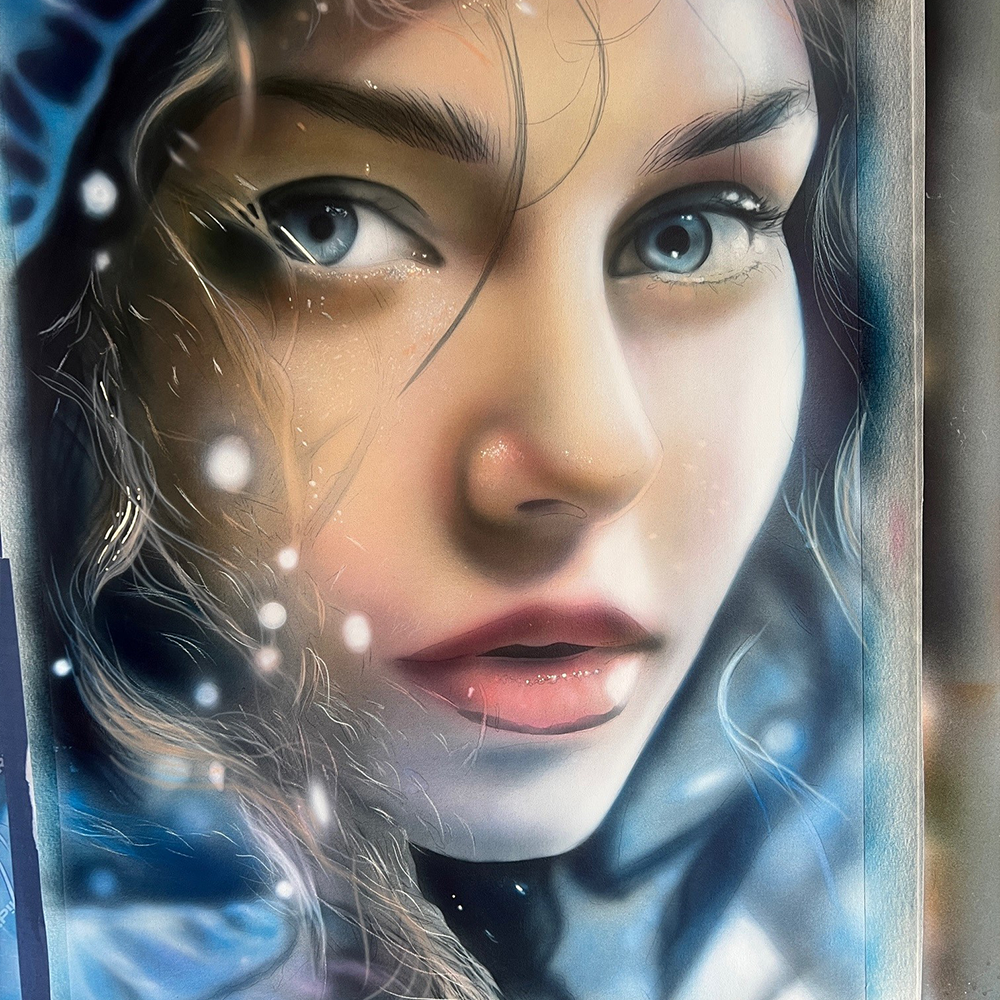

I am happy to call this painting finished. With a piece like this, I could continue to work for weeks tweaking areas and refining to an ultra-realistic state, however, I’m happy with the final result. I can highly recommend the FW range from Daler Rowney for airbrush painting to all amateur and professional artists.
I am happy to call this painting finished. With a piece like this, I could continue to work for weeks tweaking areas and refining to an ultra-realistic state, however, I’m happy with the final result. I can highly recommend the FW range from Daler Rowney for airbrush painting to all amateur and professional artists.
Your step by step guide
Using an A4 Printer, I have printed my reference image and cut it to size. With the application of graphite paper, I have transferred the image onto my canvas. Highlighting the key features and map of the image.
Using the colour Paynes Grey from FW Ink, I roughly begin adding structure to my painting. I use this same technique whether I am drawing with pencils or using paints.
I continue developing the form with Paynes Grey alone and applying light textures with an eraser to break up the perfectly uniform spray pattern. This helps add realism to the piece as human skin is not perfectly smooth.
I use an Opaque White from FW Ink, to add volume and highlights. She is already beginning to look more real and voluminous.
I begin Colour glazing, which simply means adding thin transparent paints over my opaque layer, beginning with the background. I generally work from back to front, however this can change depending on the painting I’m working on.
I begin with the first skin colours, utilising a balance of warm and cool tones to give depth and realism to the overall piece.
Here is much the same, adding darker darks and lighter lights to bring volume. I am approaching the final part and from here on it’s all about refining the smaller details with fine brushes.
I am happy to call this painting finished. With a piece like this, I could continue to work for weeks tweaking areas and refining to an ultra-realistic state, however, I’m happy with the final result. I can highly recommend the FW range from Daler Rowney for airbrush painting to all amateur and professional artists.
I am happy to call this painting finished. With a piece like this, I could continue to work for weeks tweaking areas and refining to an ultra-realistic state, however, I’m happy with the final result. I can highly recommend the FW range from Daler Rowney for airbrush painting to all amateur and professional artists.
Recommended Products
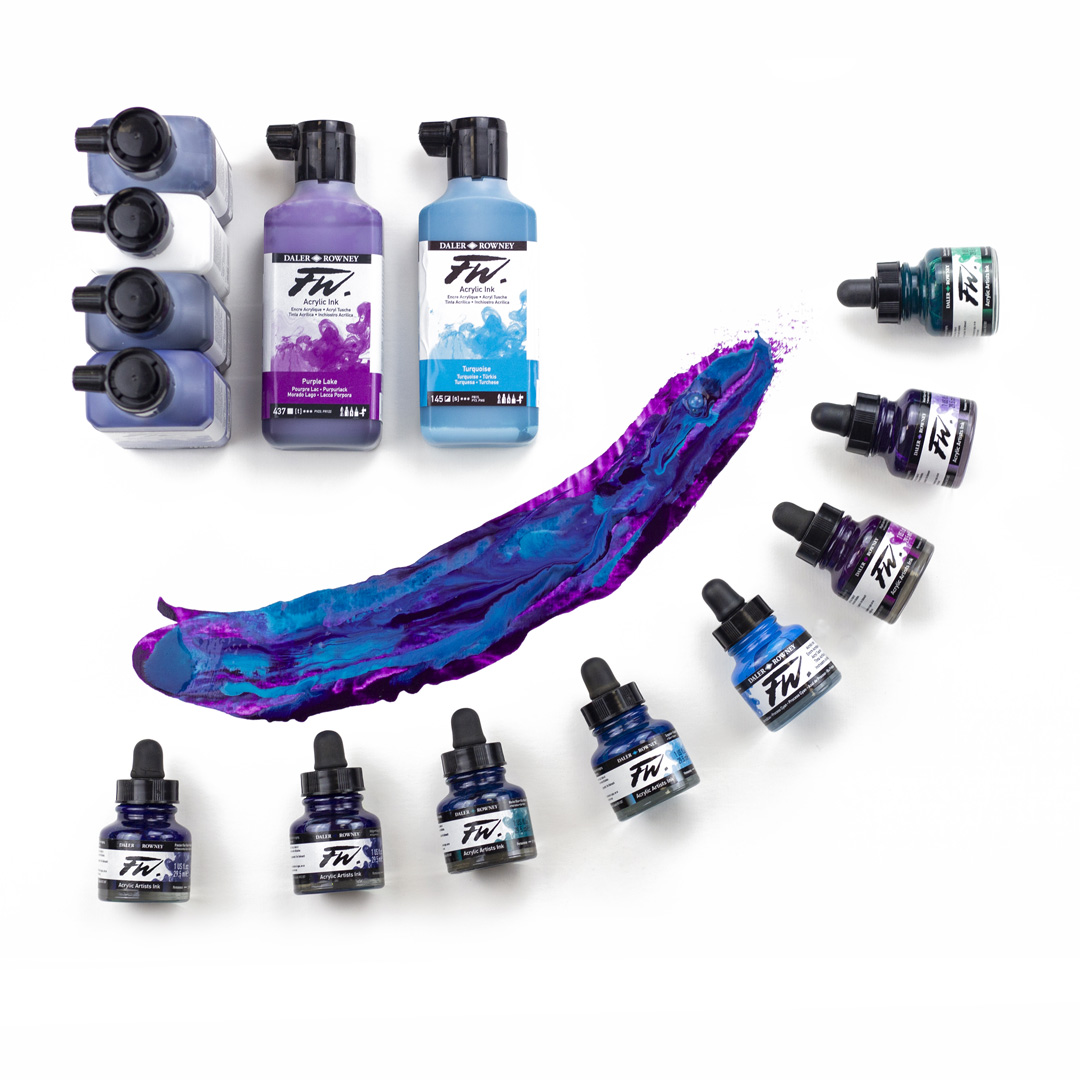
FW Acrylic Ink
Daler-Rowney FW Acrylic Inks are acrylic based, pigmented, water-resistant artists' inks with a high degree of lightfastness and intermixability. FW Acrylic Ink can be used straight out of the dropper, or diluted to achieve the most subtle of tones.
VIEW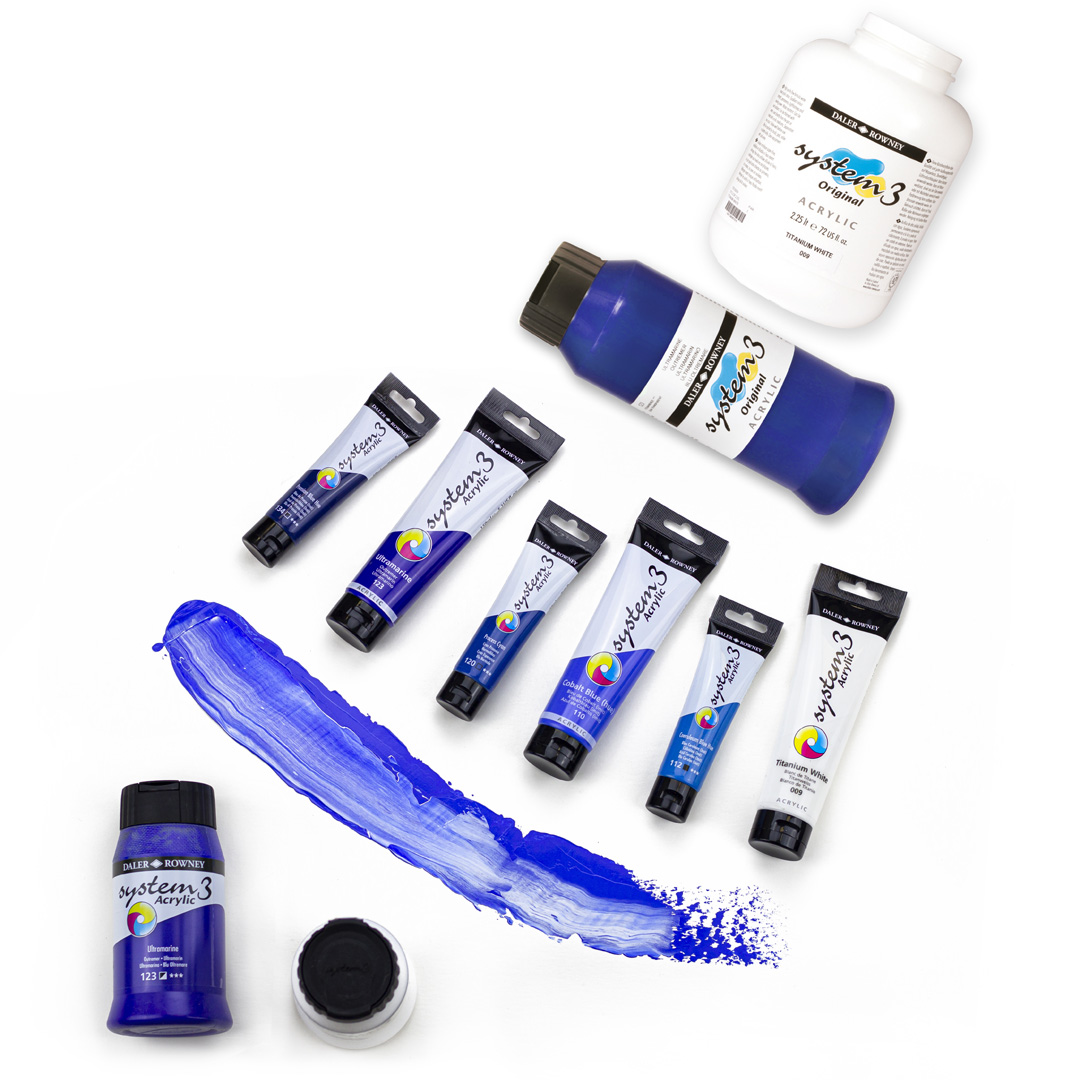
System3 Acrylic Paint
Daler-Rowney System3 Acrylics are versatile water-based colours made from high quality pigments. System3 Acrylic colours are lightfast, permanent, opaque, flexible and quick drying, making them suitable for applications on multiple surfaces both indoor and outdoor.
VIEWAbout the artist
Specialising in the intricate style of realistic and hyper-realistic art, Dave Pinsker's creations come to life through the delicate strokes of paint, pencil, and charcoal.