#simplycreate Creative Rock Painting Art Set
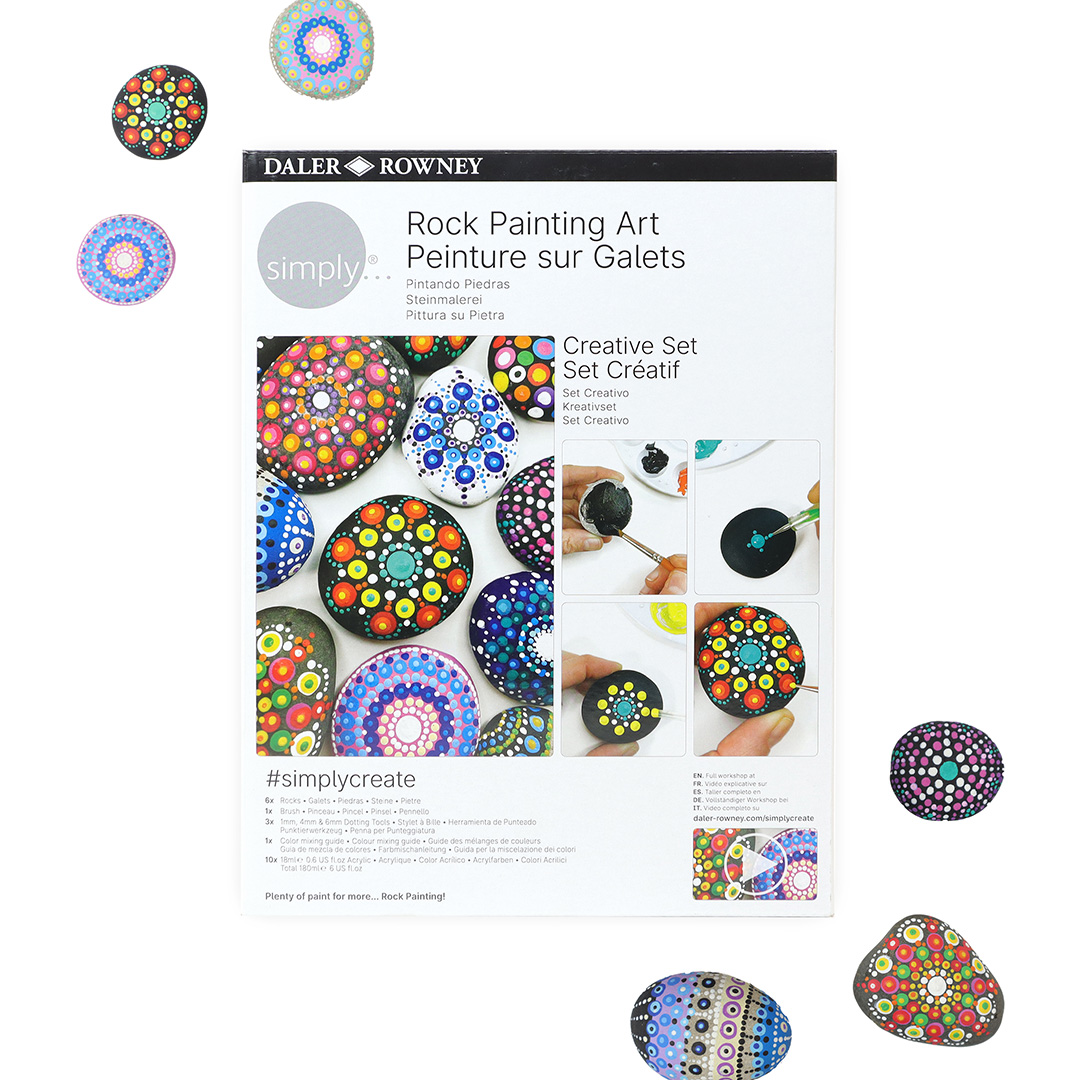
"Stone painting! It is so relaxing to do & the results are beautiful - I just think they just look stunning.
Now it looks complicated, but the step-by-step instructions & videos in the kit make it all completely doable!
It’s all about learning some techniques, and building confidence so you can go on to create even more intricate designs.
There are 10 acrylic colours in the kit, really good pigment, you’ve got a brush and all the dotting tools needed.
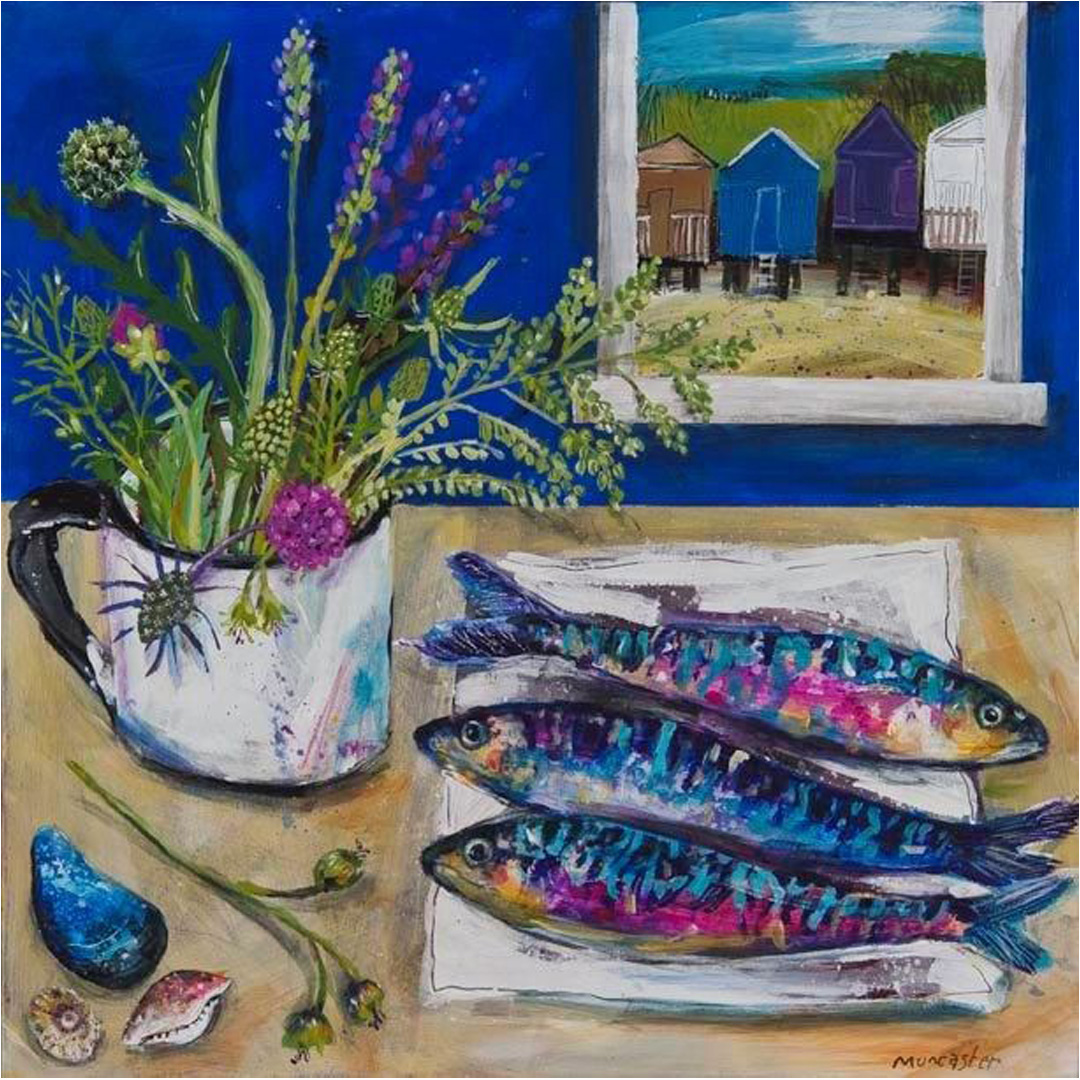
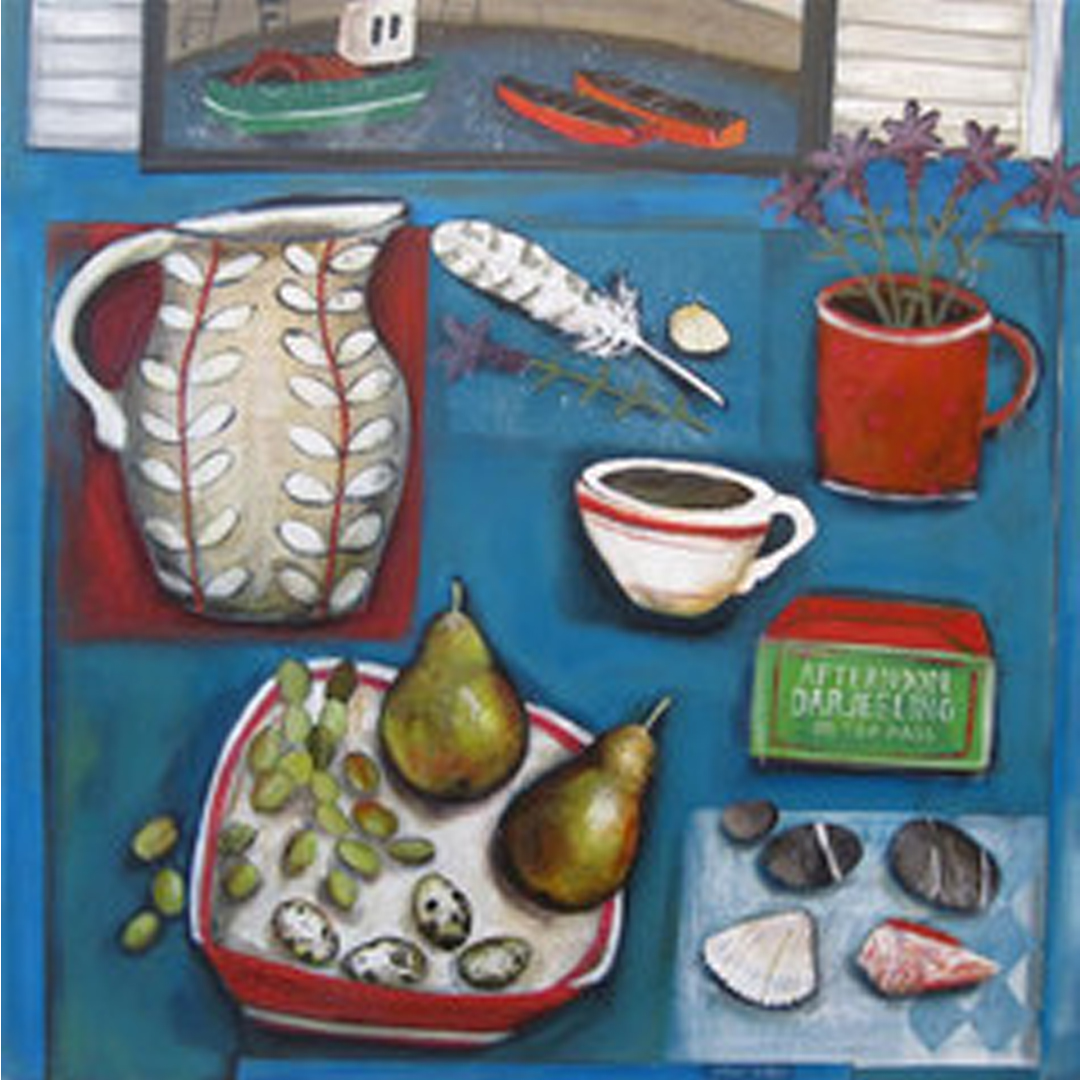
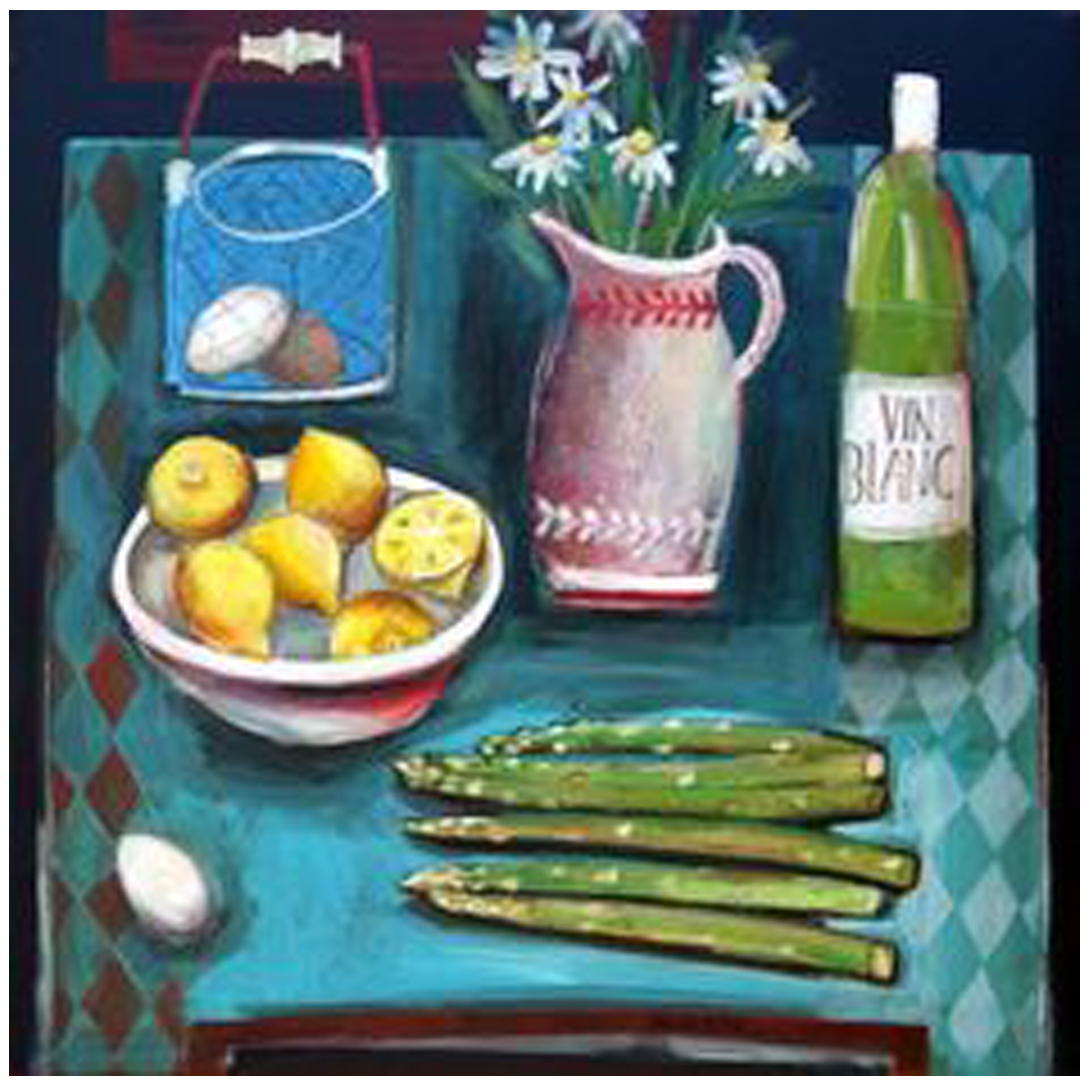
Honestly, these painted stones feel really lovely in my hand & they look beautiful. Great for home décor & I just think they would make a very special & unique gift for someone!" - Jenny Muncaster
How to paint on stones - design 1
Your step by step guide
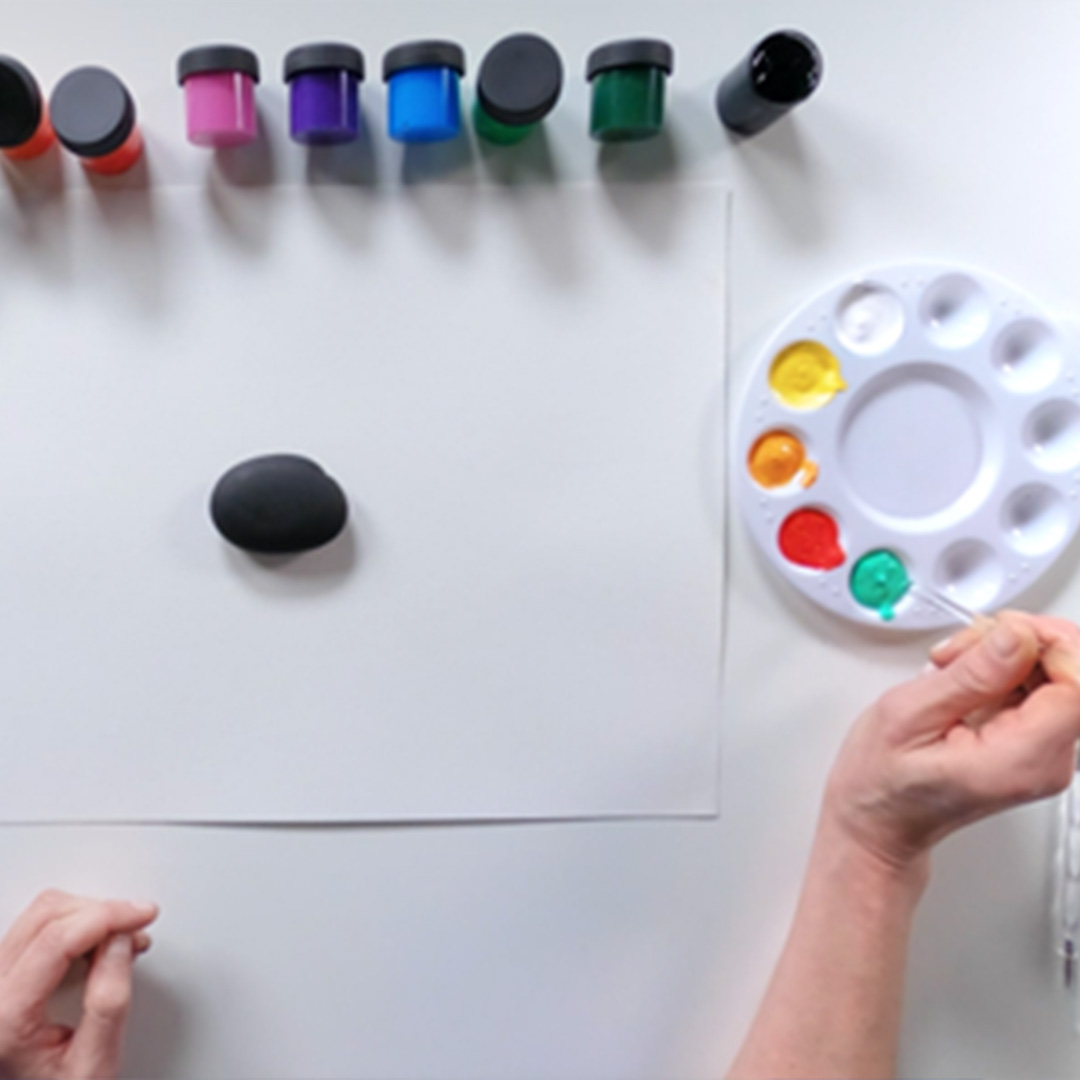
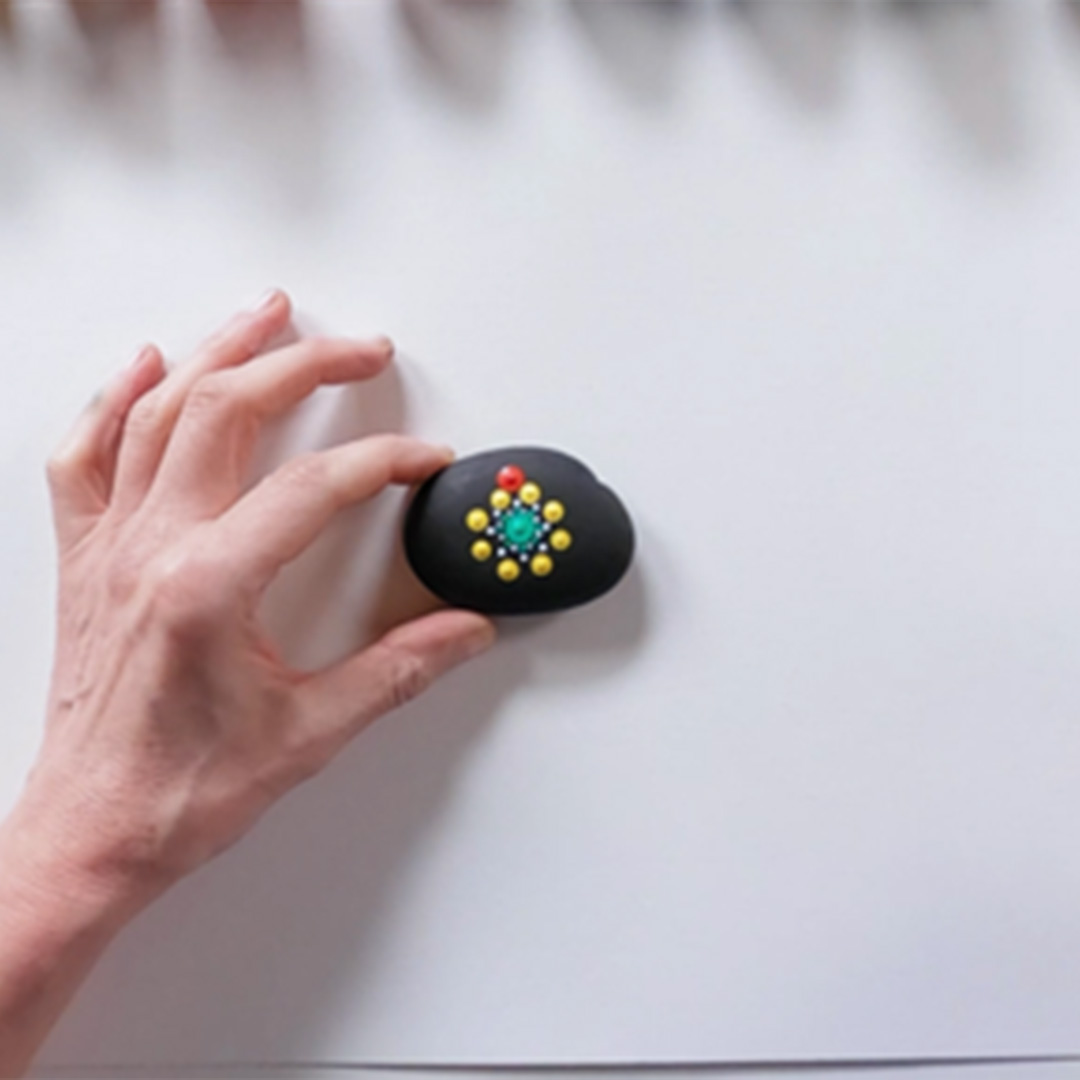
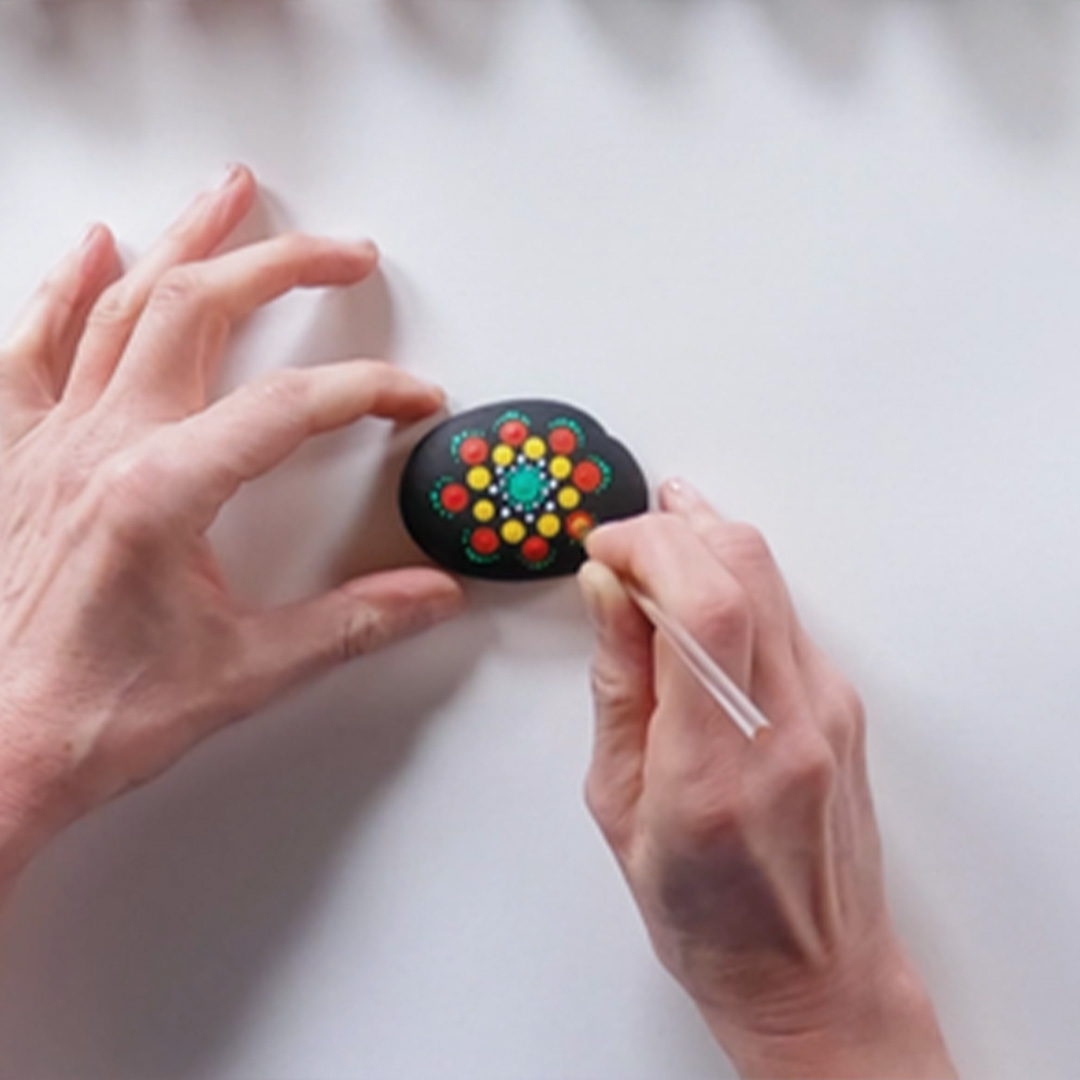
Begin by painting your stone with a base colour.
In this design, we have chosen black to provide maximum contrast and to enhance the other colours.
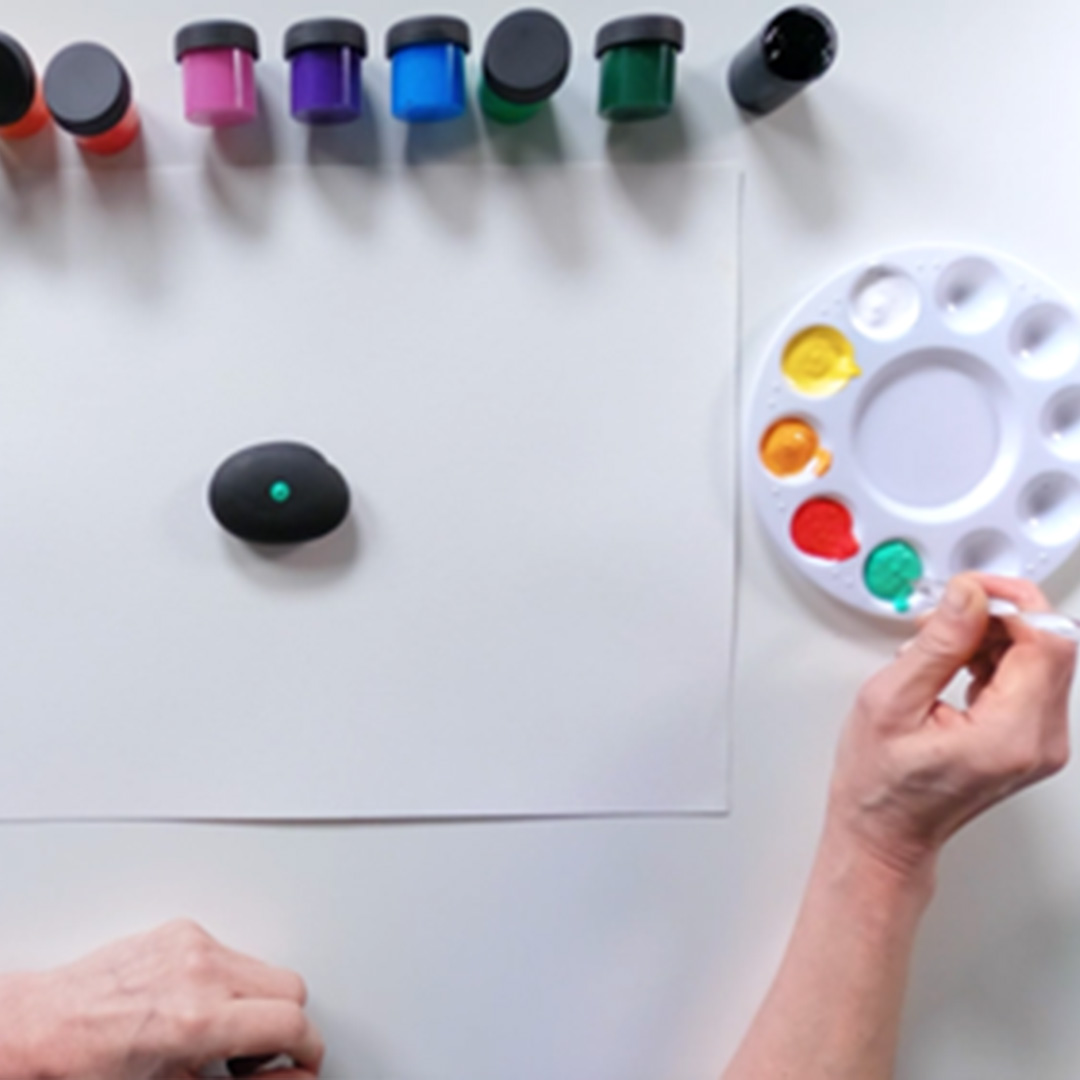
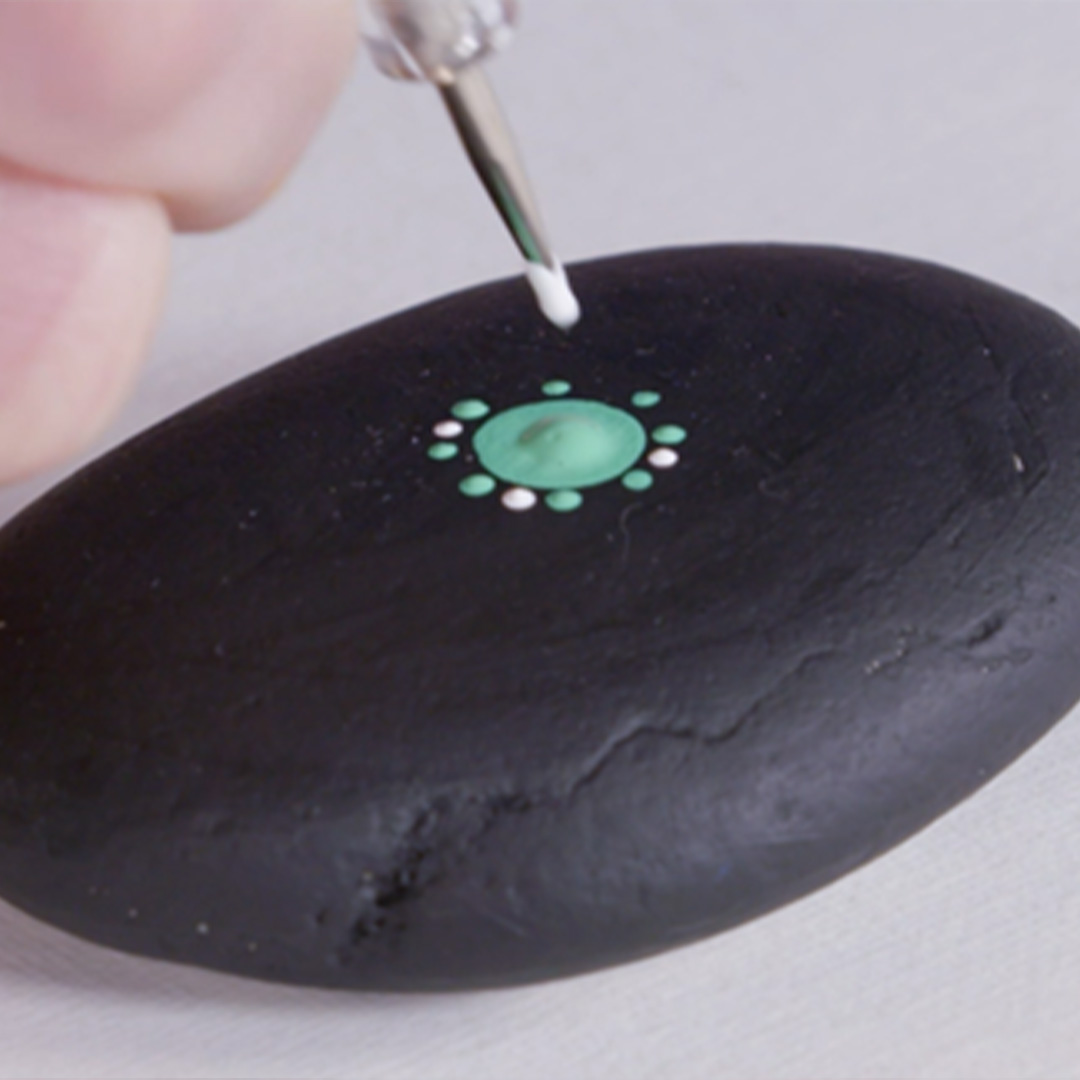
Use the largest dotting tool (6mm) to create the central green dot. Either eyeball it or measure it. Hold the tool upright and not at an angle, with a steady hand push lightly down to make a dot.
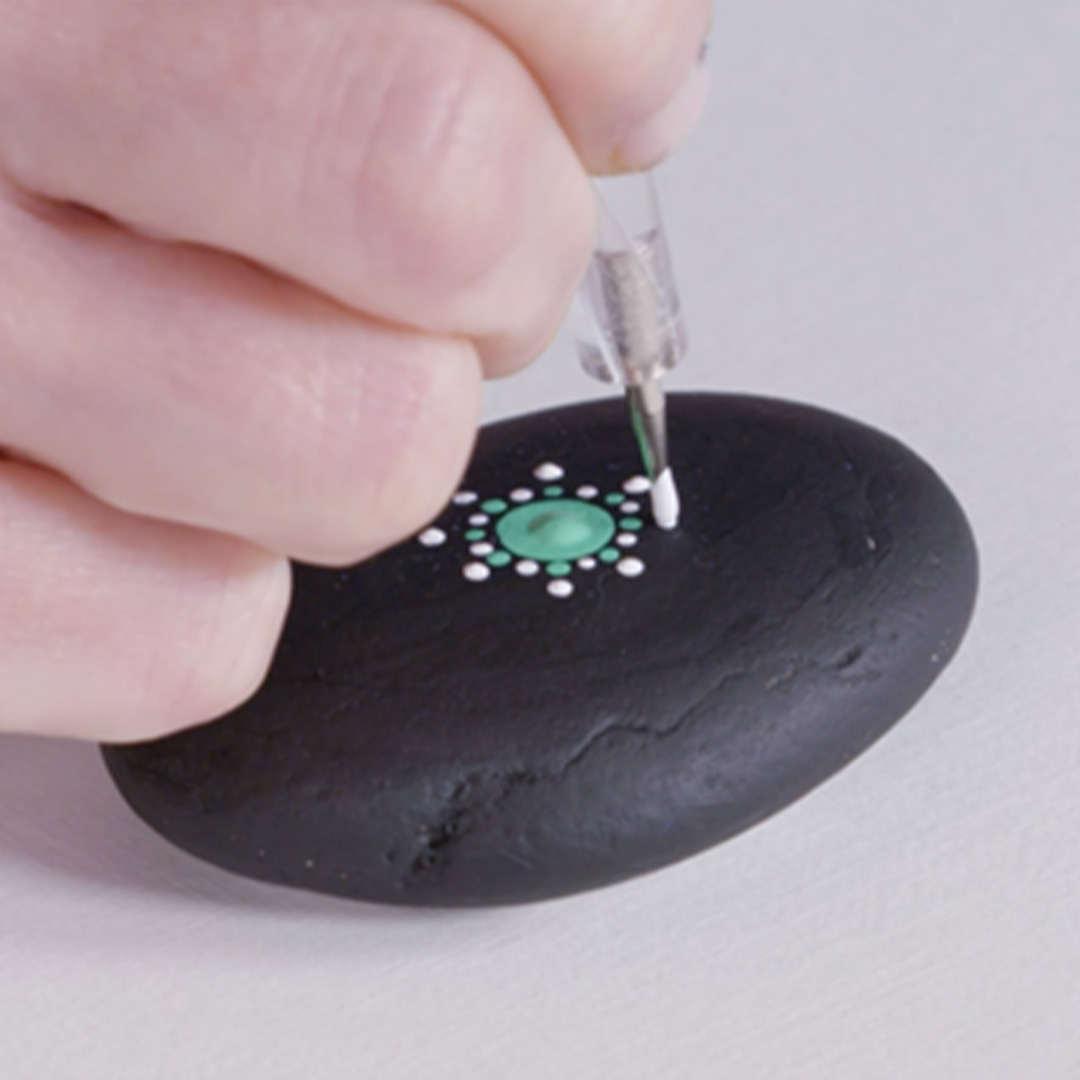
Start the ring by adding four small dots with the 1mm dotting tool. Finish the 8 dots ring by adding additional small green dots evenly spaced between the four dots you just created. Add white dots in-between.
Next use the 4mm dotting tool and offset the ring slightly by adding 8 dots in yellow in the gaps.
For the next ring use the 6mm dotting tool and paint 8 dots in red, in the gaps created by the yellow dots.
Next use the smallest dotting tool to create a cascade effect of dots around the large red dot. Enjoy the process and get creative by adding further dots.
Your step by step guide
Begin by painting your stone with a base colour.
In this design, we have chosen black to provide maximum contrast and to enhance the other colours.
Use the largest dotting tool (6mm) to create the central green dot. Either eyeball it or measure it. Hold the tool upright and not at an angle, with a steady hand push lightly down to make a dot.
Start the ring by adding four small dots with the 1mm dotting tool. Finish the 8 dots ring by adding additional small green dots evenly spaced between the four dots you just created. Add white dots in-between.
Next use the 4mm dotting tool and offset the ring slightly by adding 8 dots in yellow in the gaps.
For the next ring use the 6mm dotting tool and paint 8 dots in red, in the gaps created by the yellow dots.
Next use the smallest dotting tool to create a cascade effect of dots around the large red dot. Enjoy the process and get creative by adding further dots.
What you'll need

Simply Creative Sets
Daler-Rowney Simply Creative Sets are a range of project-based sets that offer inspiration and creativity.
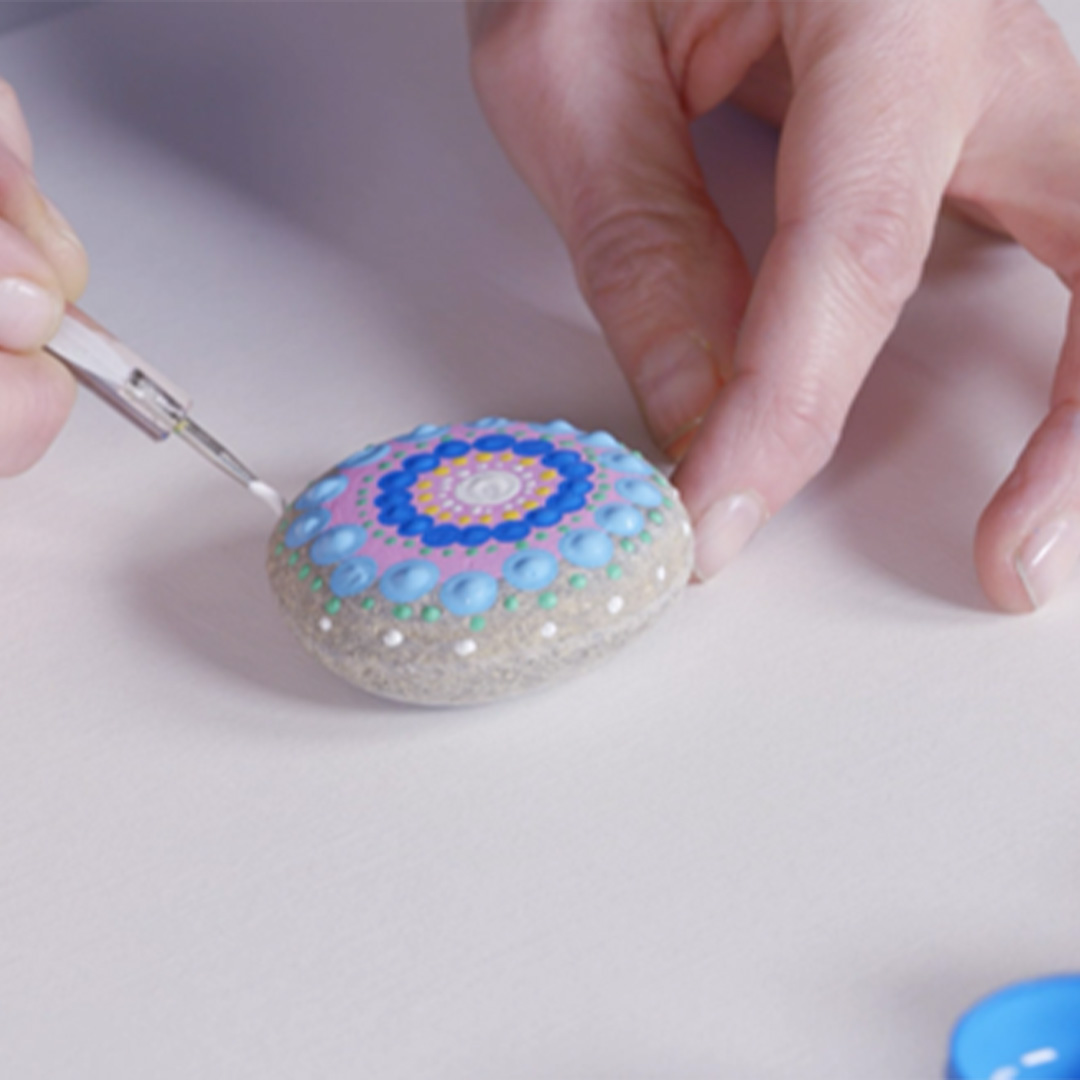
VIEWHow to paint on stones - design 2
Your step by step guide
Begin by painting your stone with a base colour.
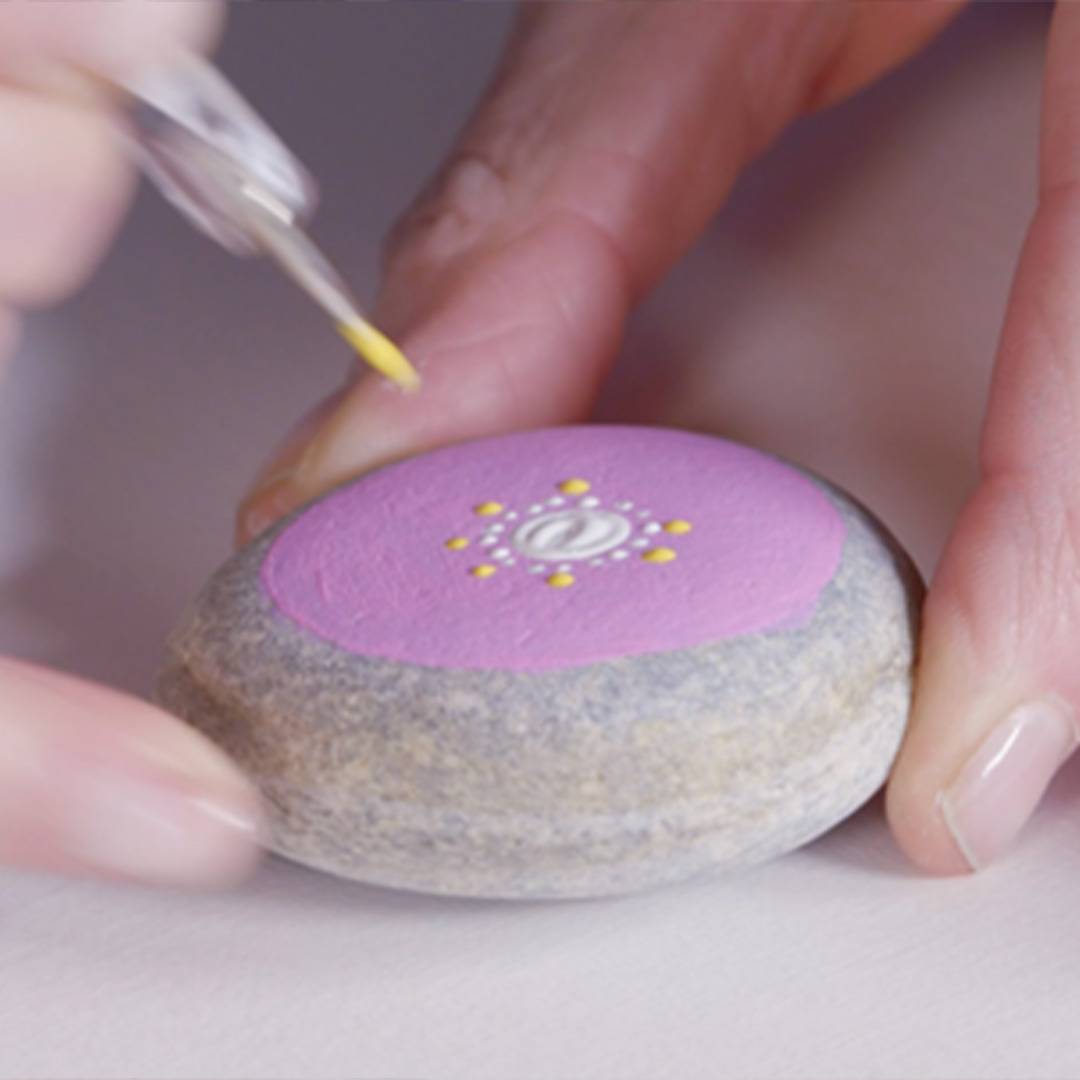
Use the largest dotting tool (6mm) to create the central white dot. Start the ring by adding four small dots. Using the same technique finish the 16 white dot ring and start the next ring by repeating in yellow
Create the next circle of dots in dark blue using the 4mm dotting tool and add another circle of 16 dots.
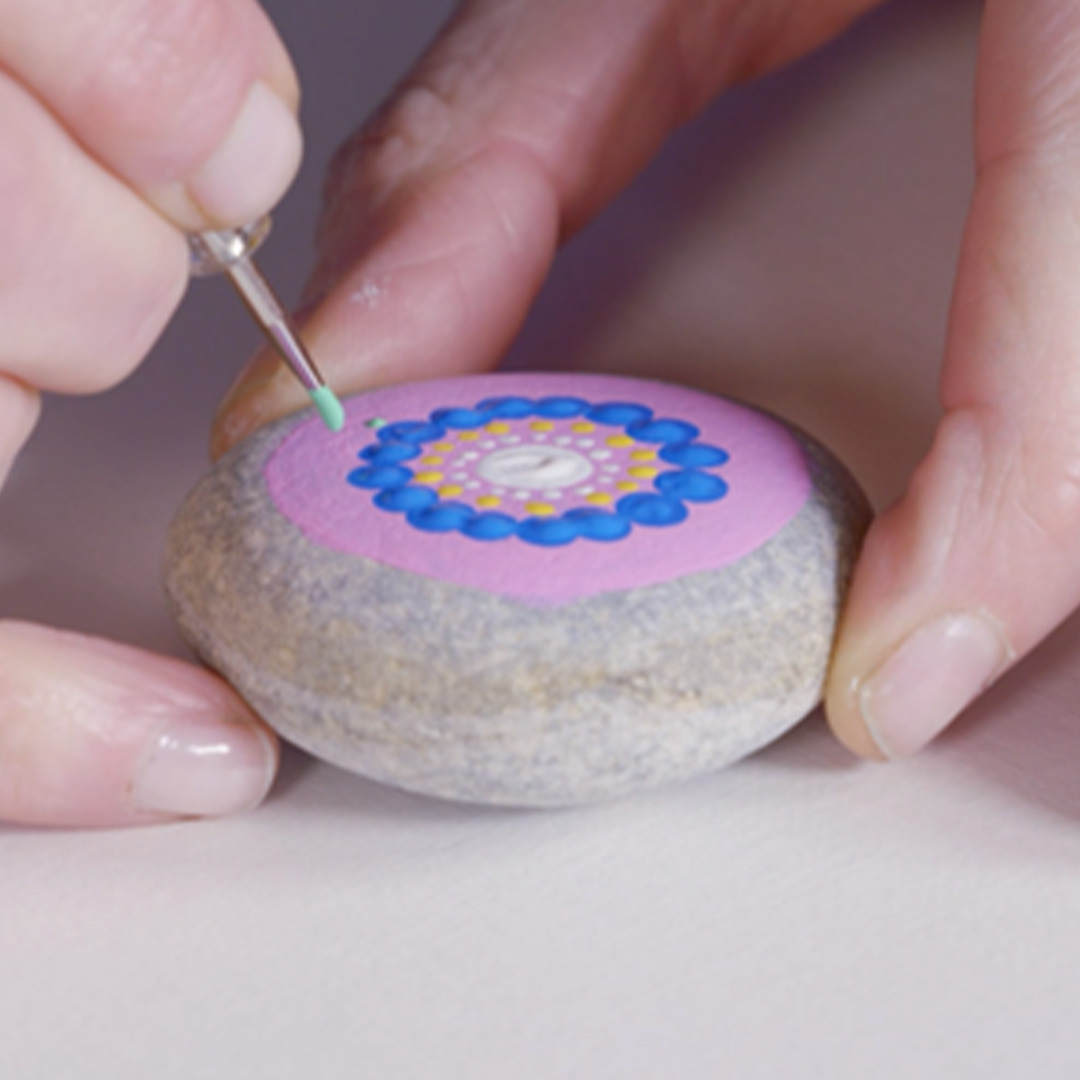
Offset the blue ring with smaller green dots using the 1mm tool, dotting directly under the blue dots and also in-between them.
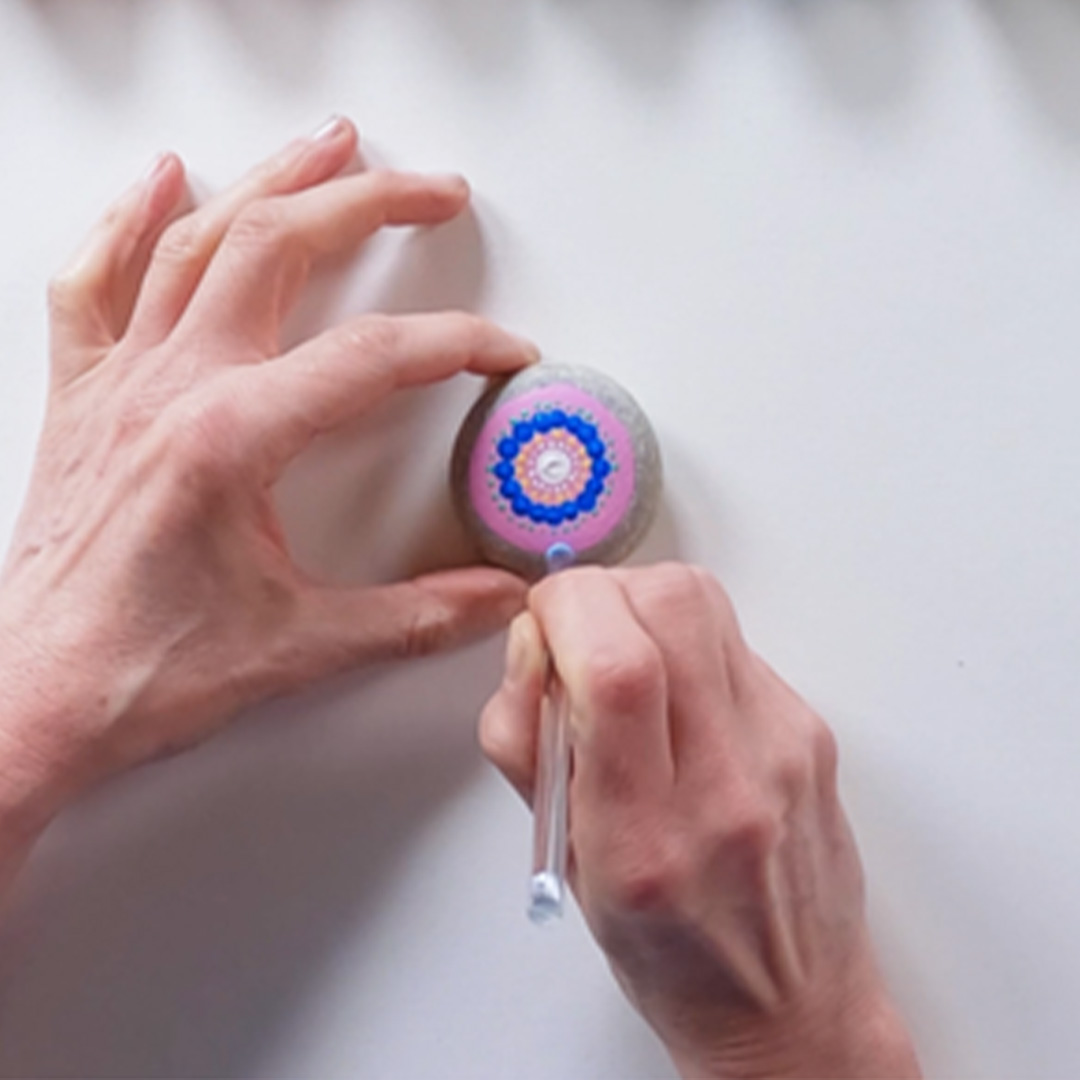
For the next ring use the 6mm dotting tool and paint a ring of 16 dots in light blue.
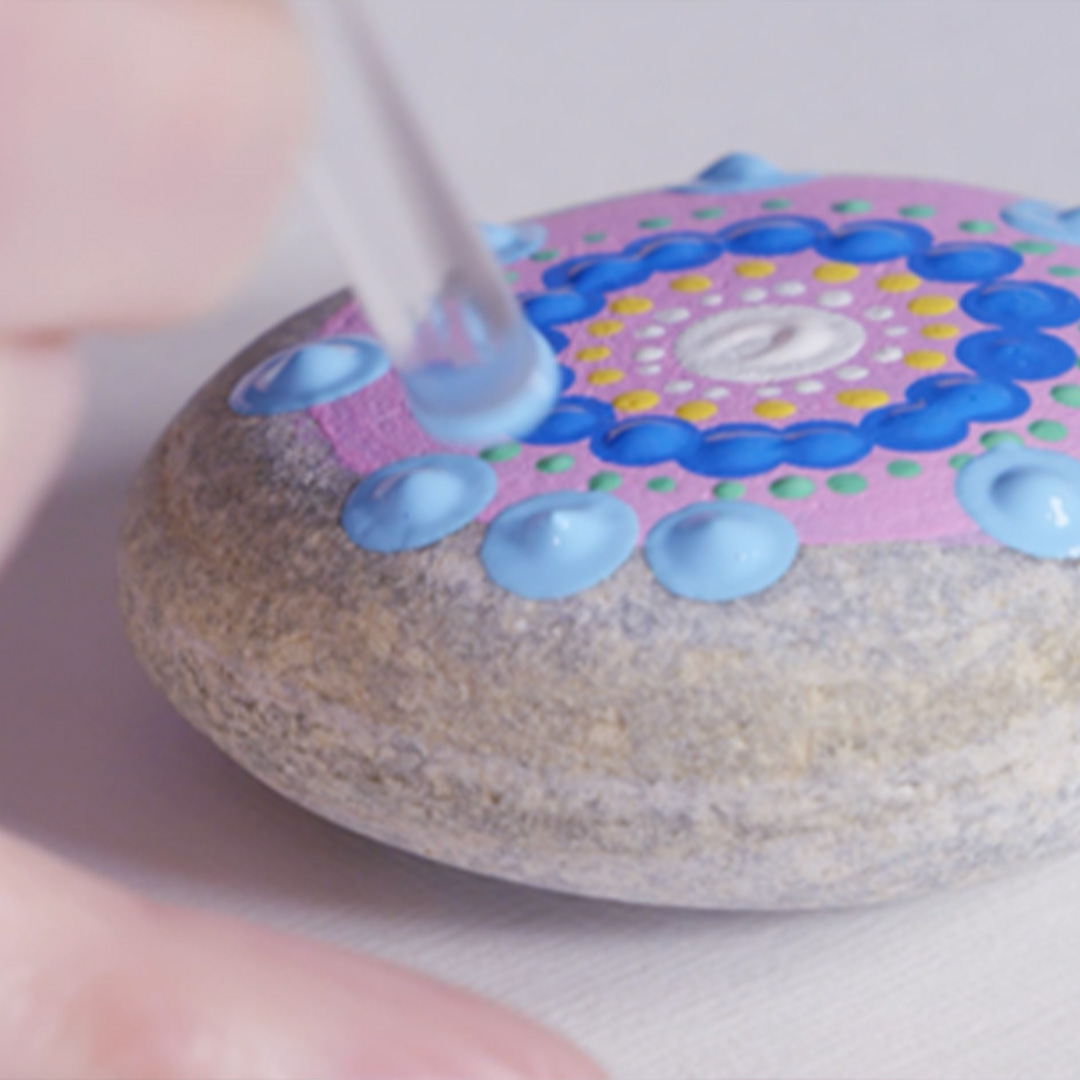
Now offset the light blue ring with green dots using the 1mm tool dotting in-between.
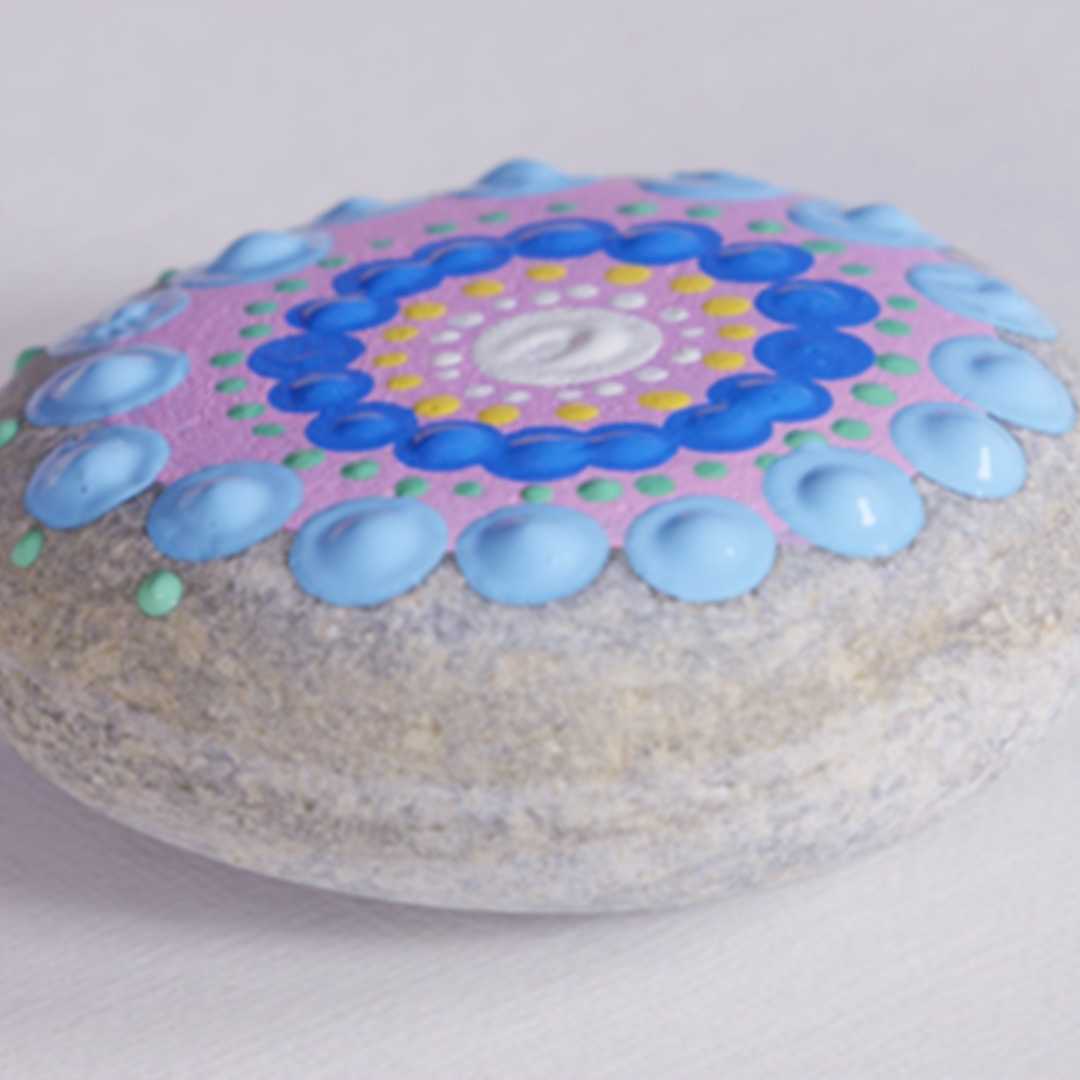
Next use the smallest dotting tool to create a border of dots around the design. Enjoy the process and get creative by adding further dots.
Your step by step guide
Begin by painting your stone with a base colour.
Use the largest dotting tool (6mm) to create the central white dot. Start the ring by adding four small dots. Using the same technique finish the 16 white dot ring and start the next ring by repeating in yellow
Create the next circle of dots in dark blue using the 4mm dotting tool and add another circle of 16 dots.
Offset the blue ring with smaller green dots using the 1mm tool, dotting directly under the blue dots and also in-between them.
For the next ring use the 6mm dotting tool and paint a ring of 16 dots in light blue.
Now offset the light blue ring with green dots using the 1mm tool dotting in-between.
Next use the smallest dotting tool to create a border of dots around the design. Enjoy the process and get creative by adding further dots.
What you'll need
Simply Creative Sets
Daler-Rowney Simply Creative Sets are a range of project-based sets that offer inspiration and creativity.
VIEWHow to paint on stones - design 3
Your step by step guide
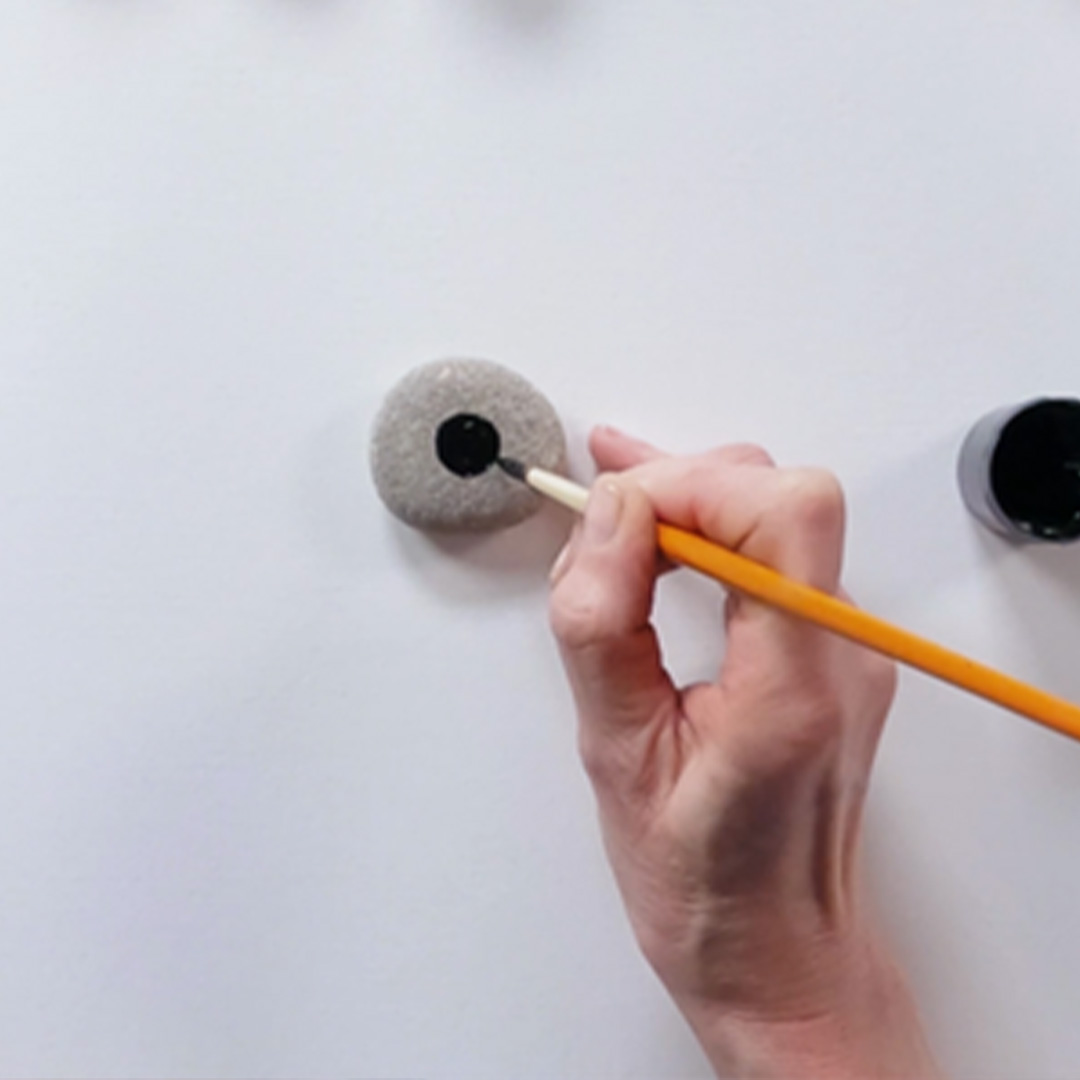
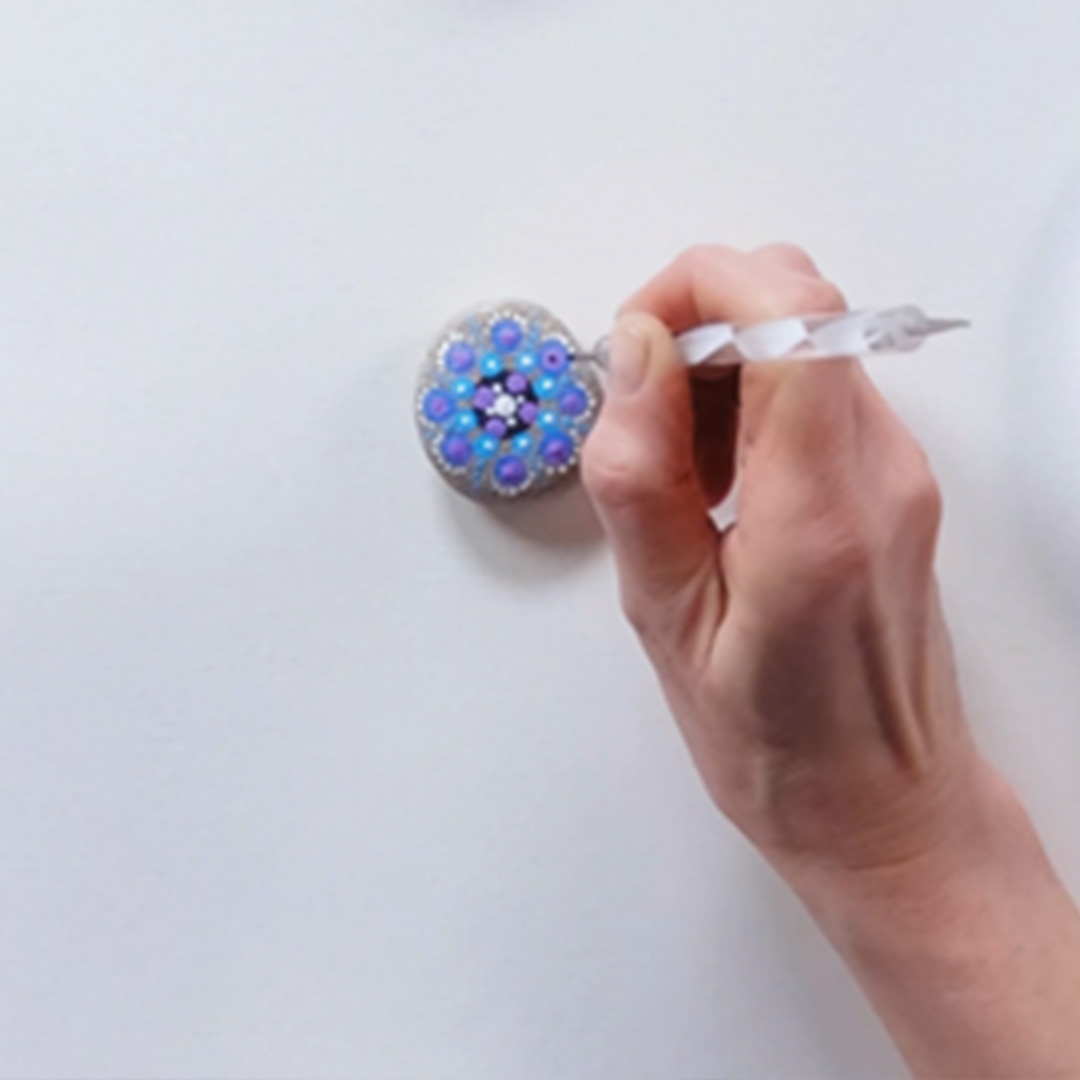
Begin by painting a black circle in the middle of your stone’ about the size of a 5 pence piece.
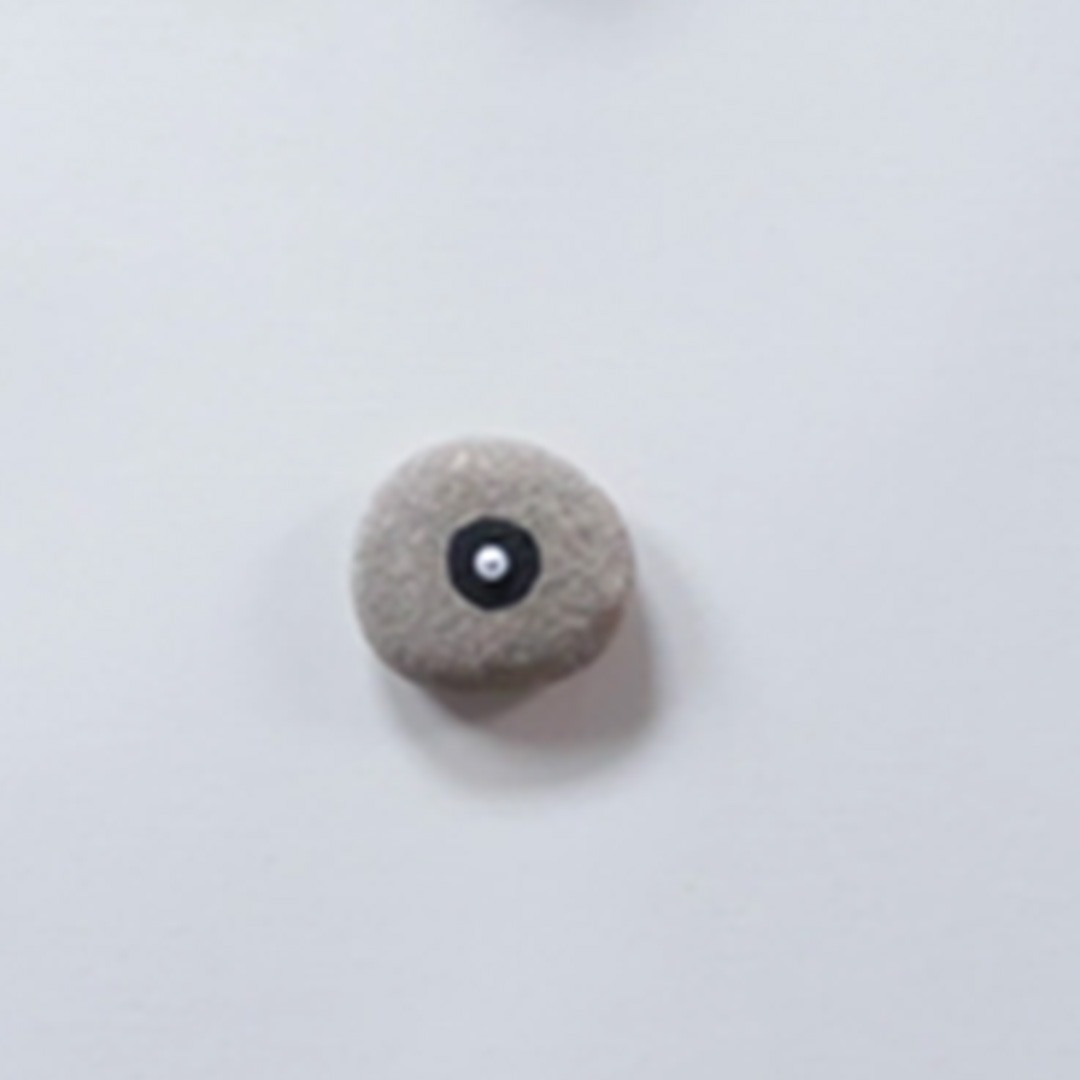
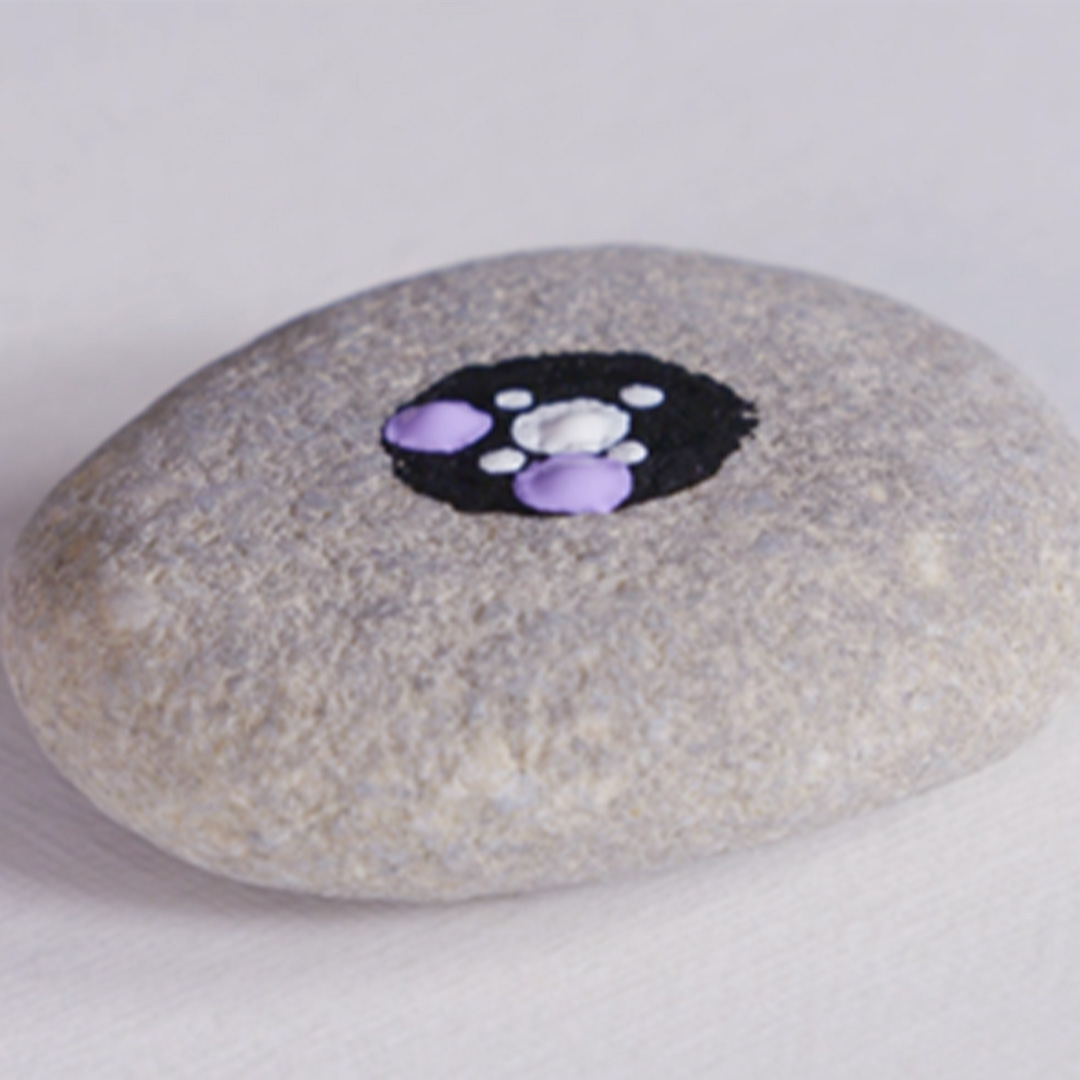
Use the 4mm dotting tool to create a white dot in the centre. Use the 1mm doting tool to create 4 further dots around this one.
Now take the 4mm dotting tool and make 4 dots with the lilac paint in between the smaller white ones.
Start the next ring in light blue with the 4mm doting tool. Use the 4 axis points to start, and then fill the gaps in between to make 8 dots in total.
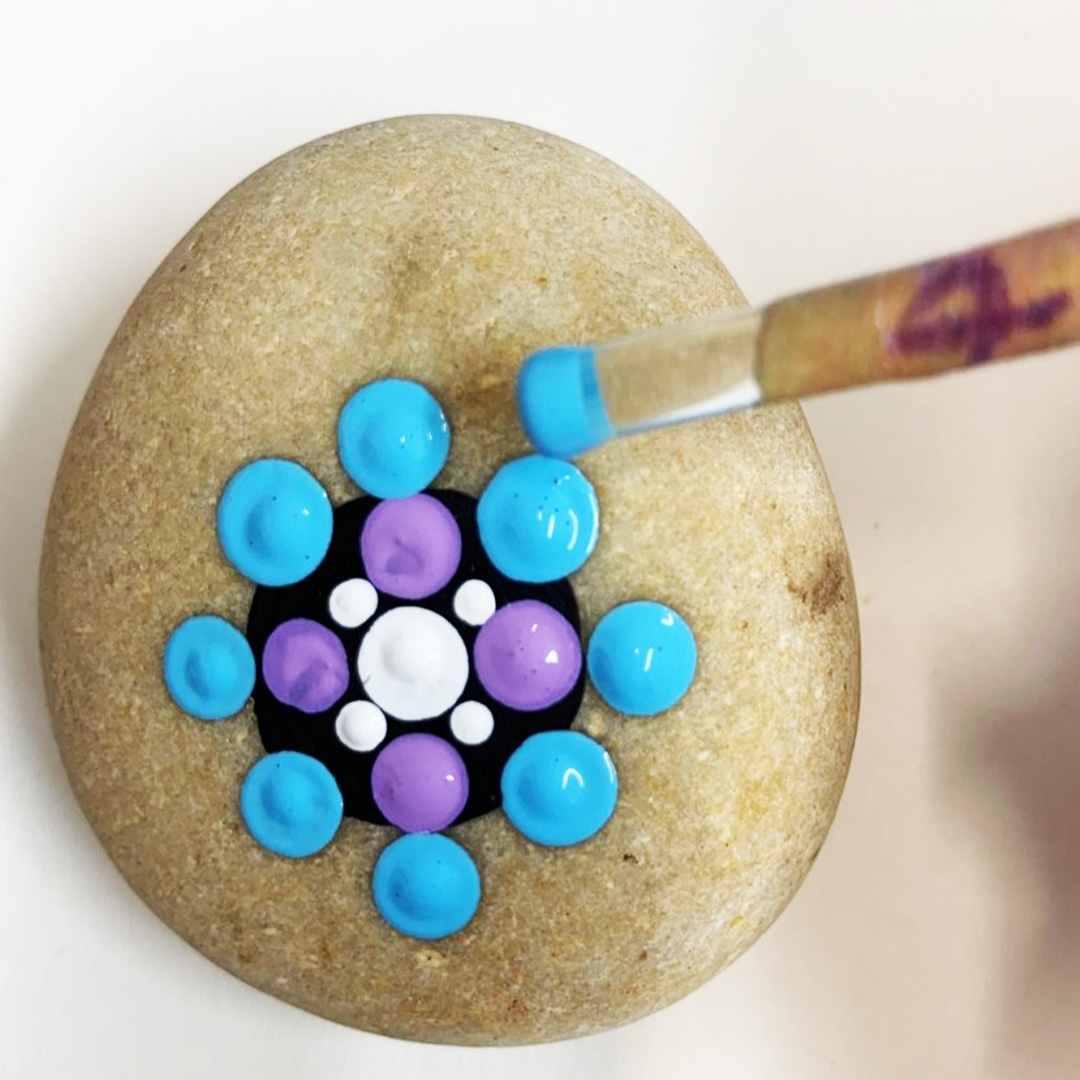
Now take the 6mm dotting tool and offset the next ring slightly by adding 8 dots in mid blue in the gaps created by the smaller dots.
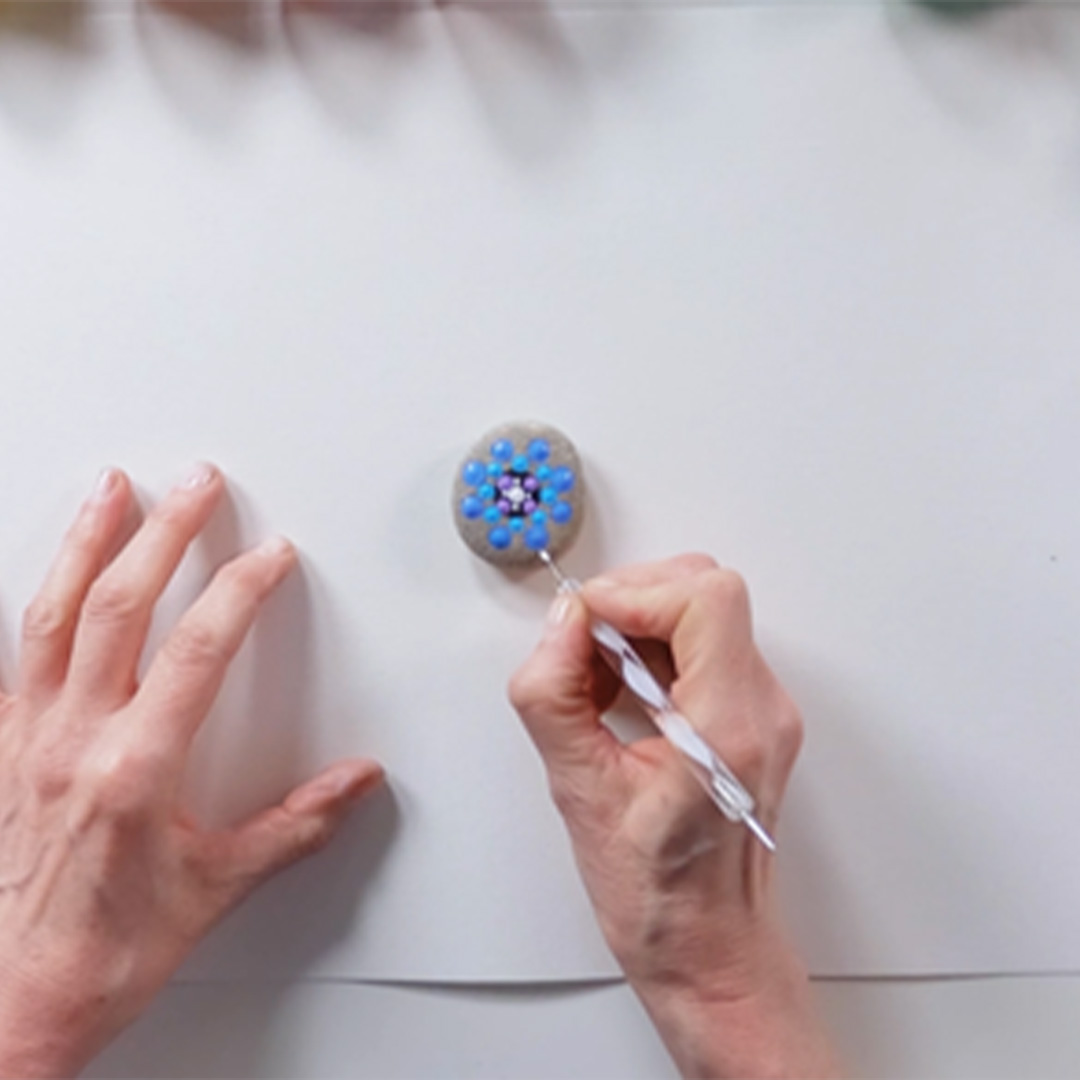
Next use the smallest dotting tool to create a cascade effect of dots around the large blue ones and add a vertical cascade in light blue. Enjoy the process and get creative by adding further dots.
Your step by step guide
Begin by painting a black circle in the middle of your stone’ about the size of a 5 pence piece.
Use the 4mm dotting tool to create a white dot in the centre. Use the 1mm doting tool to create 4 further dots around this one.
Now take the 4mm dotting tool and make 4 dots with the lilac paint in between the smaller white ones.
Start the next ring in light blue with the 4mm doting tool. Use the 4 axis points to start, and then fill the gaps in between to make 8 dots in total.
Now take the 6mm dotting tool and offset the next ring slightly by adding 8 dots in mid blue in the gaps created by the smaller dots.
Next use the smallest dotting tool to create a cascade effect of dots around the large blue ones and add a vertical cascade in light blue. Enjoy the process and get creative by adding further dots.
What you'll need
Simply Creative Sets
Daler-Rowney Simply Creative Sets are a range of project-based sets that offer inspiration and creativity.
VIEWAbout the artist